• Email
  • Instagram
  • Skip to primary navigation
  • Skip to main content
  • Skip to primary sidebar
  • Skip to footer
  • Home
  • About
  • Contact
  • Beauty
  • Lifestyle
  • Faith
  • Wellness
  • Holiday

Anna Mae Groves

A vessel sharing positivity through beauty, wellness, and personal style.

  • About
  • Contact
  • Beauty
  • Lifestyle
  • Faith
  • Wellness
  • Holiday
    • Email
    • Instagram

DIY BATHROOM AND SHOWER

January 21, 2021 By Anna Groves No Comments

When we moved into our house I knew I wanted to change the bathrooms right away. There was nothing wrong with them, but I really wanted something that reflected our personality more than the simple grays and silvers.

Don’t mind me- I also needed a glow up that day lol

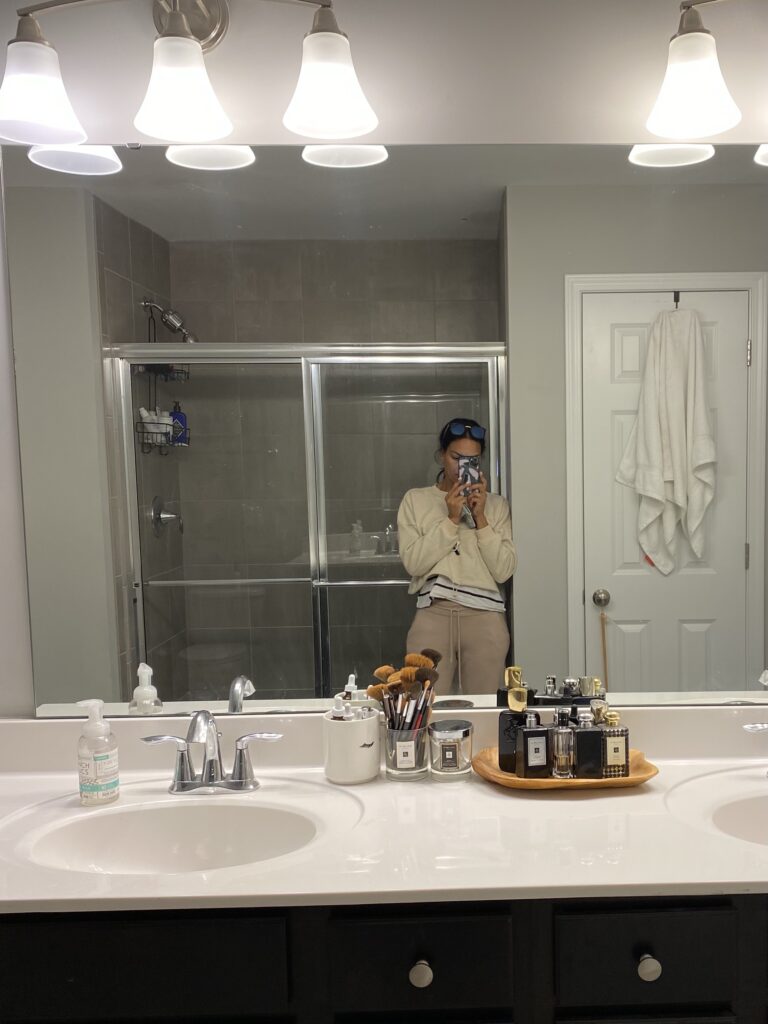
The first bath I updated was our powder room (see the post HERE) and I couldn’t wait top give the Master bath a little facelift. My dream plan is to replace the tile on the floor and bath, and also replace the doors, but since I would need to wait awhile for a total redo, I decided to make a few cosmetic changes for the time being.

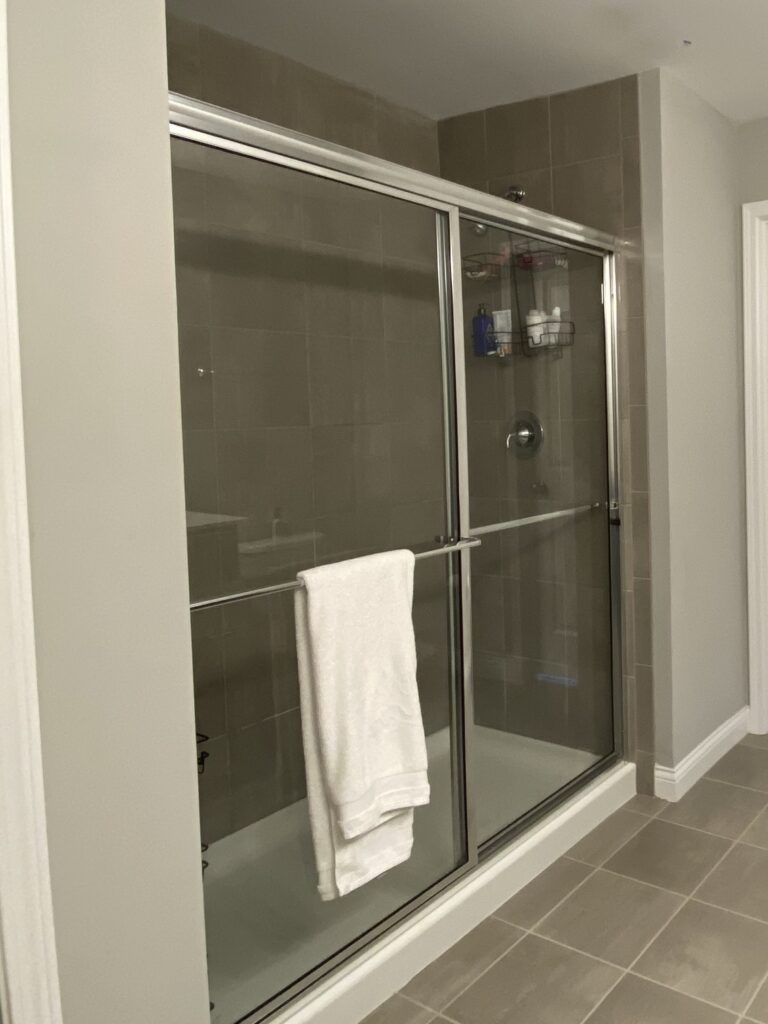
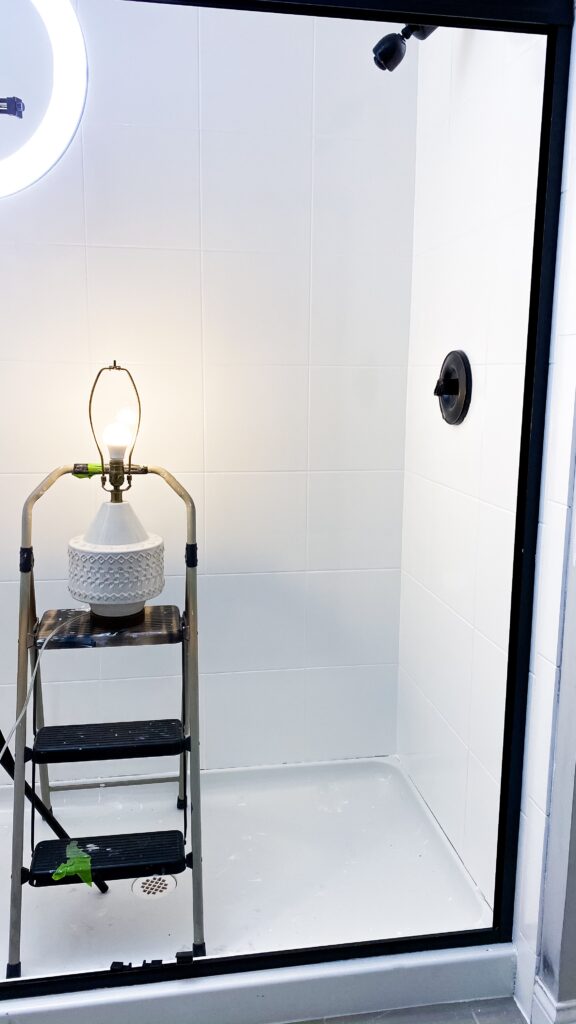
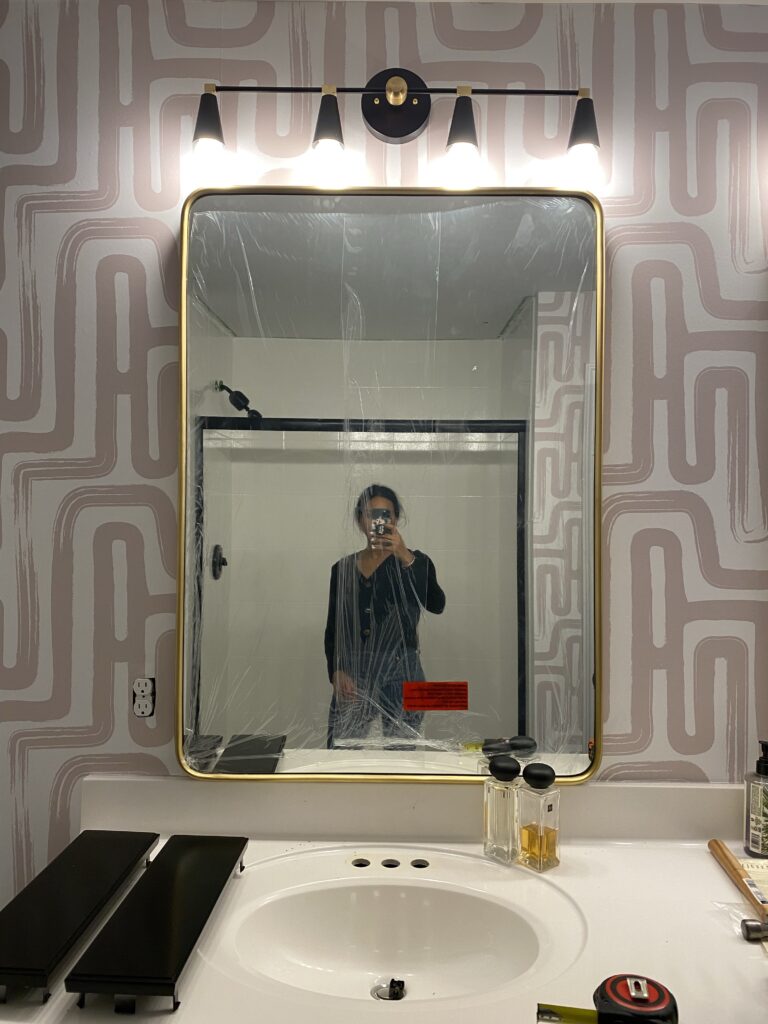
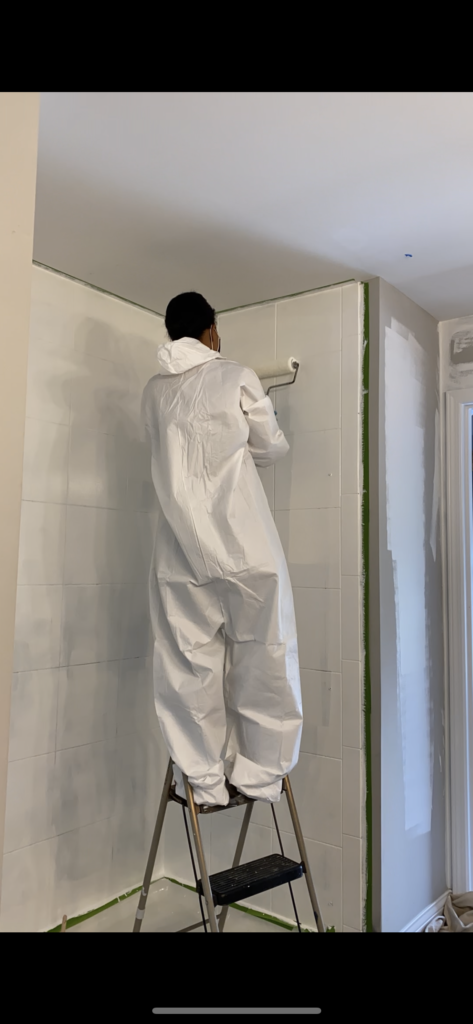
Since I would not be replacing the tile or shower door just yet, I opted to paint the tile white to brighten everything up. And the shower frame, I painted black for contrast. (SEE BELOW for instructions and for products I used for these two projects)

see below for instructions
LIVETTE’S WALLPAPER

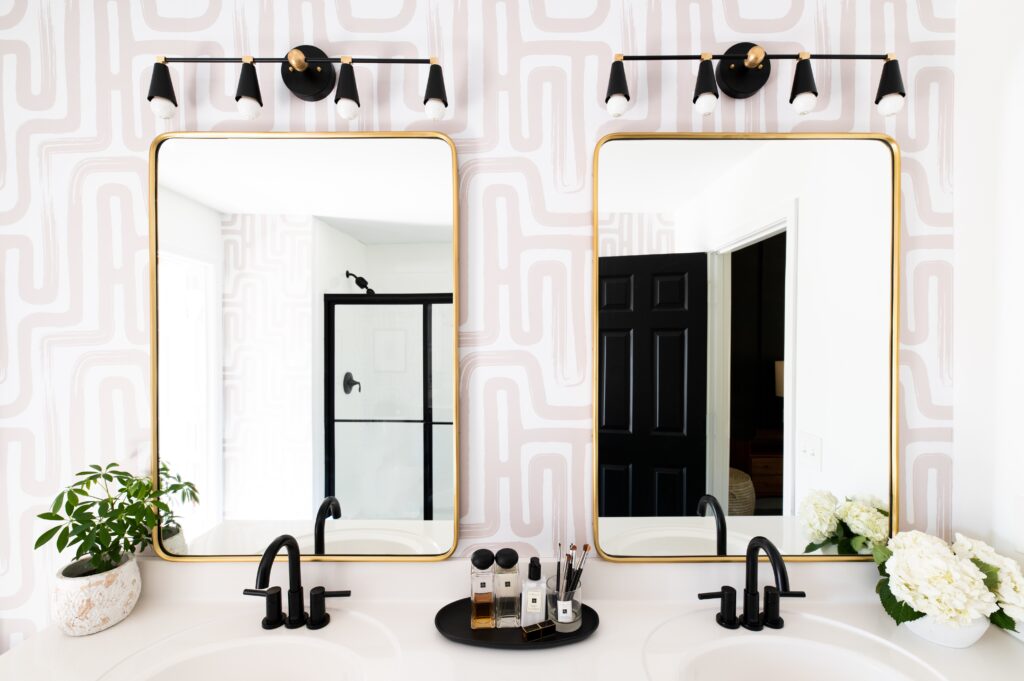
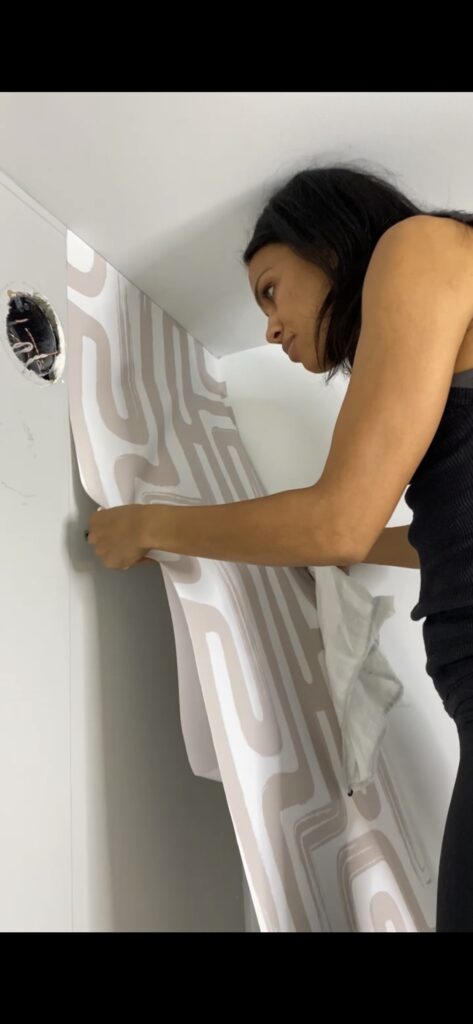
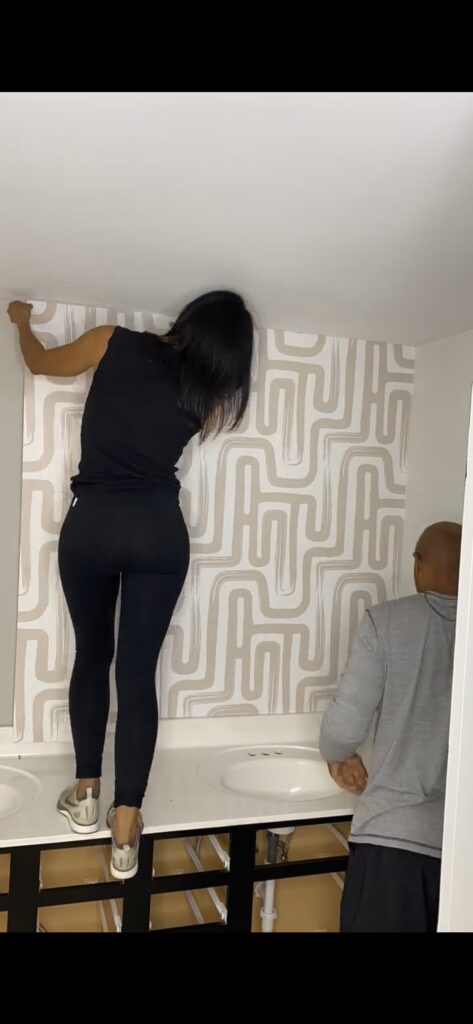
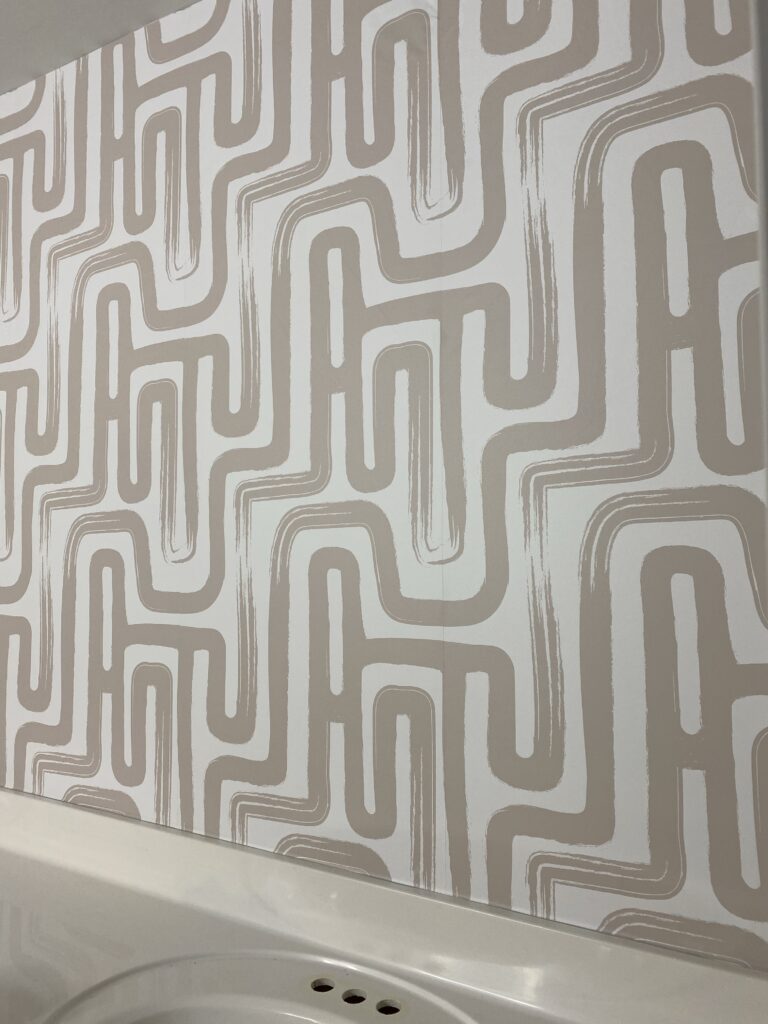
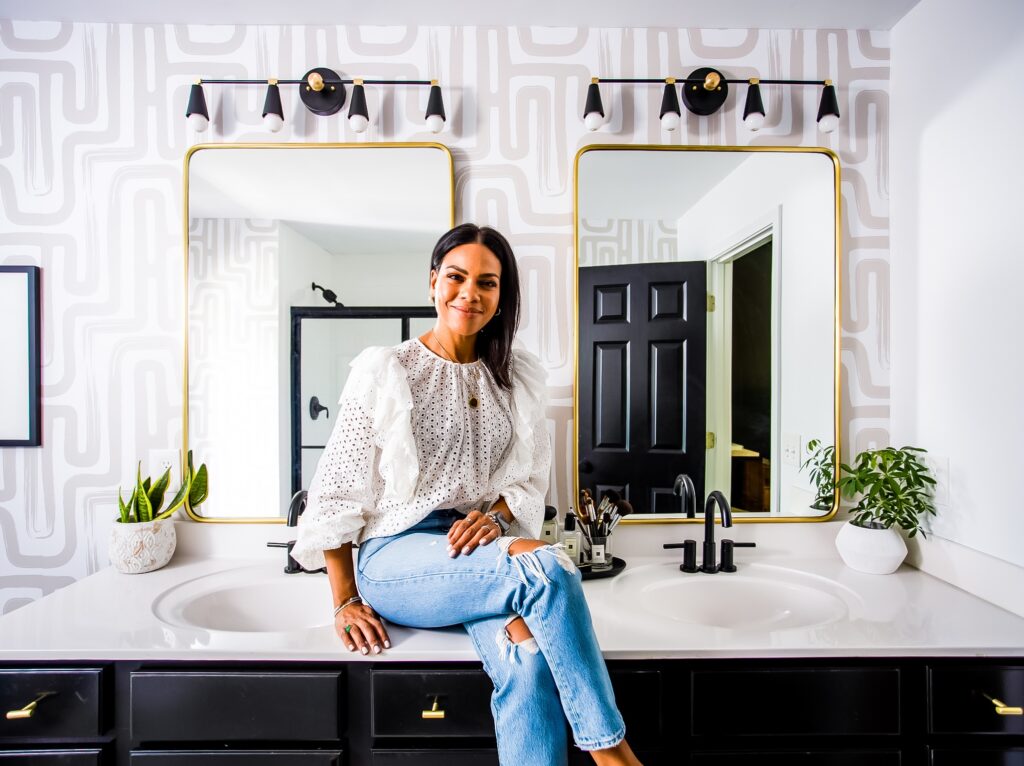
I really wanted something fun for the walls, so I chose a geometric print in a soft neutral by Livette’s Wallpaper. It reads more pink in photos, but leans more toward a soft beige with subtle pink undertones. I loved the fact that this was a peel and stick paper, which seemed like it would be easier to install. For tips, you can take a look at their website, and to see how I installed it, visit my DIY Bath instagram stories.

I always say go fun with wallpaper! This is by Livette’s!

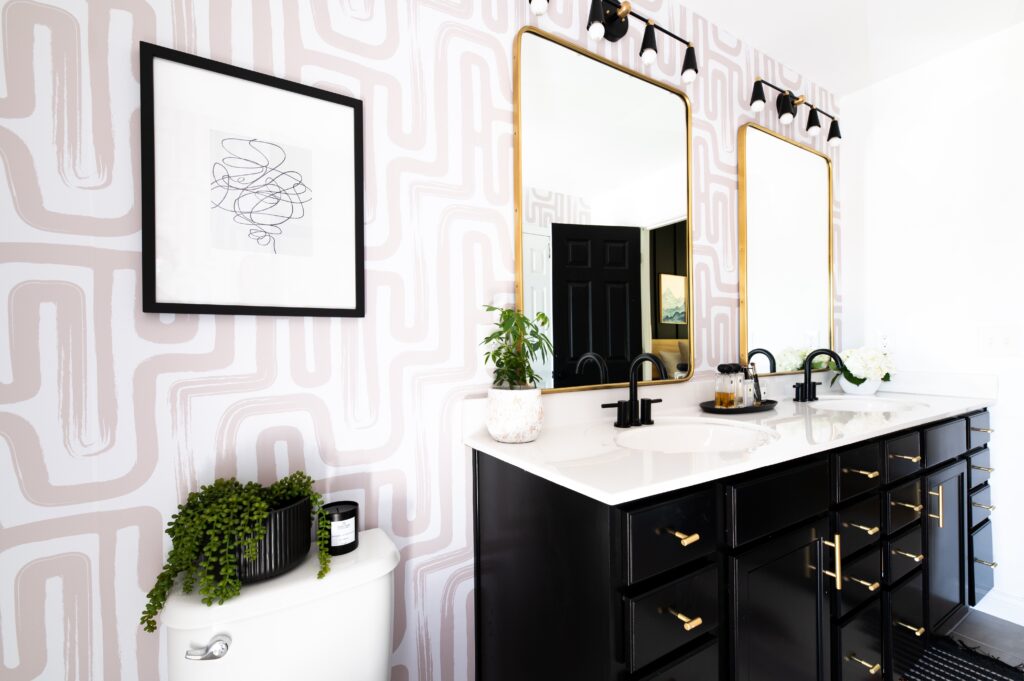
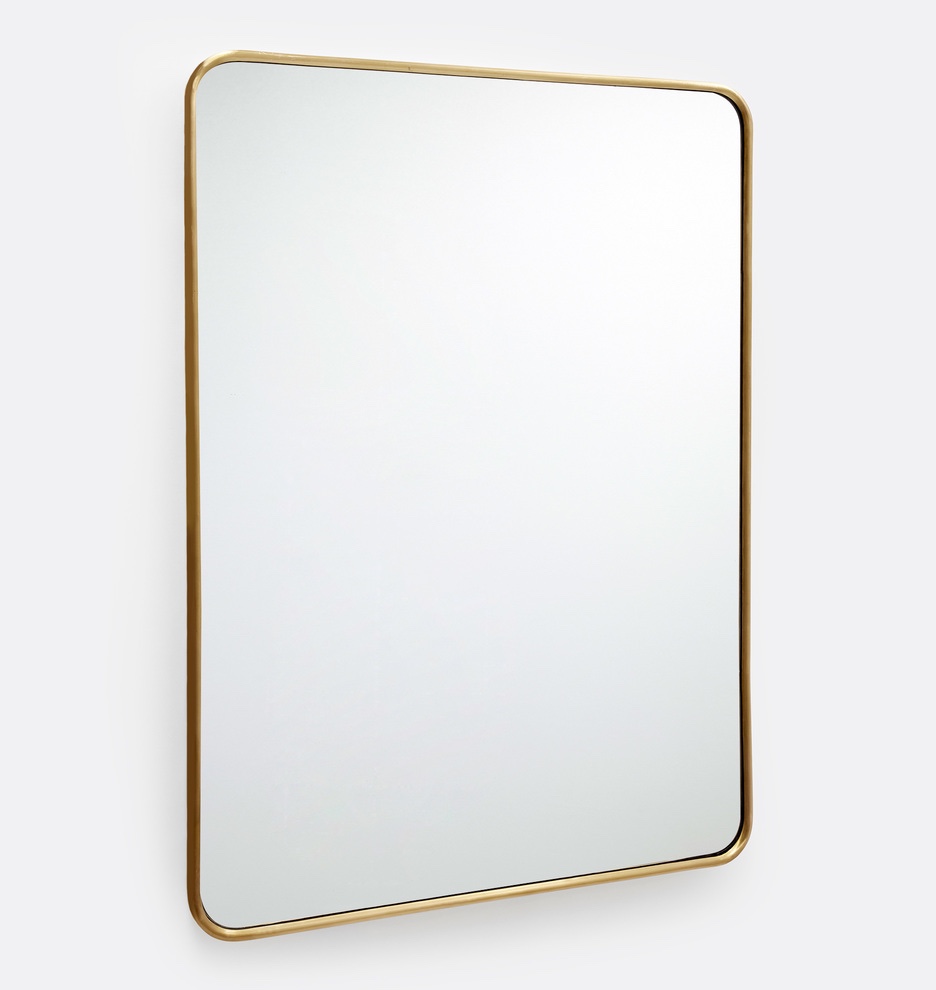
I fell in LOVE with these gorgeous oversized rectangular mirrors with a brass finish from Rejuvenation. They really anchored the entire room!

Rejuvenation Mirror

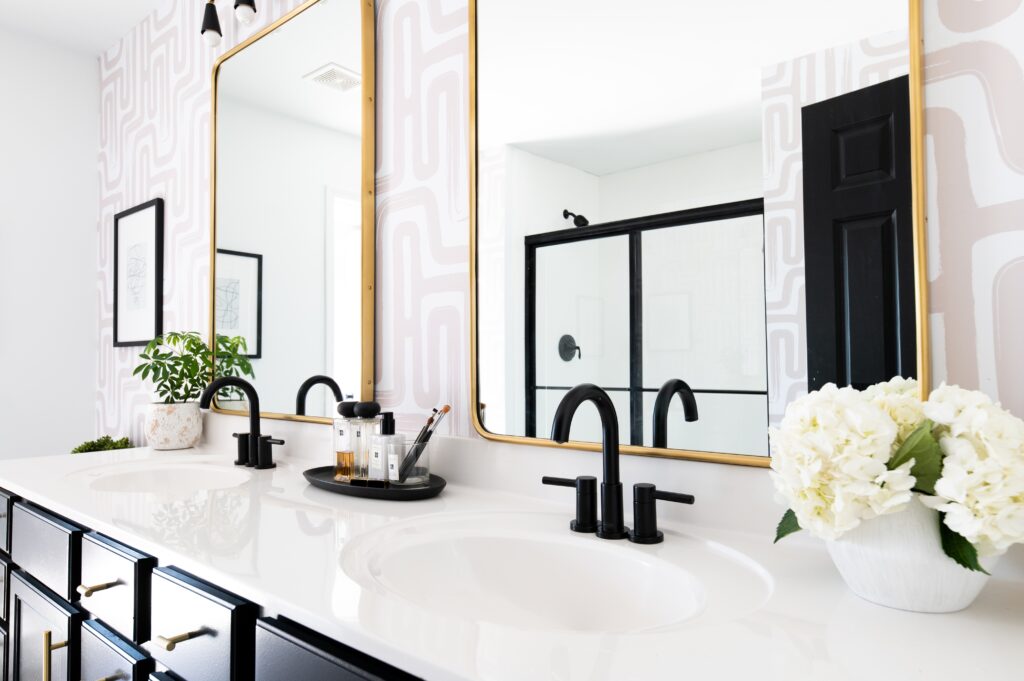
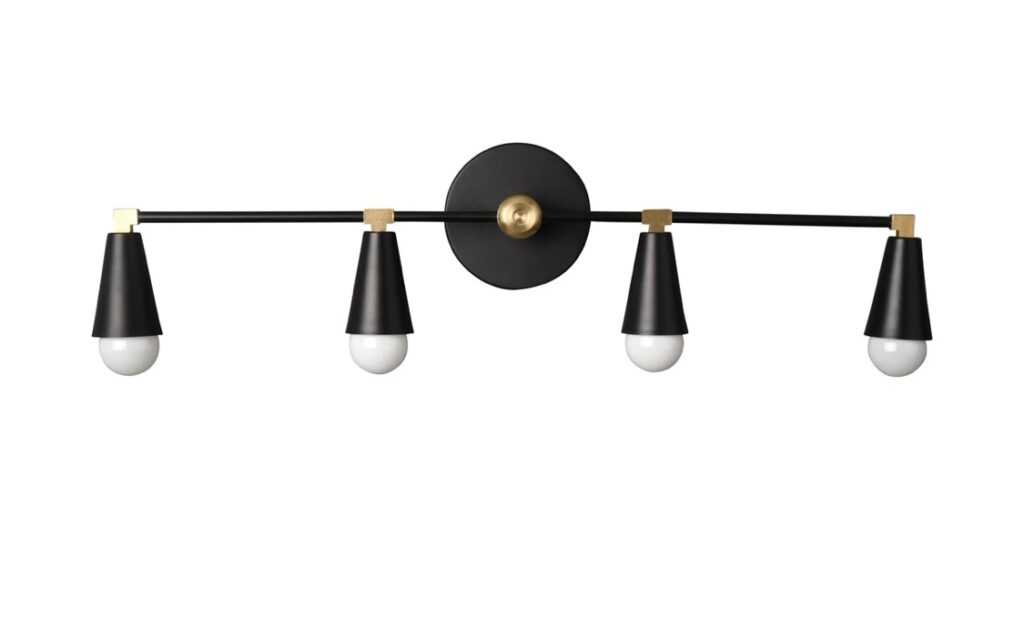
And these light fixtures from Illuminate Vintage stopped me in my tracks!

To finish it off, I used black fixtures and also painted the cupboards black (Carbon by Behr) and added some gold hardware for the pulls and handles.

I am really proud of the way it turned out without having to demo anything at all. Have you tried updating your bathroom DIY? It is hard work, but so rewarding. Plus I had the one of the highlights of my life: this bath and my home featured in Good Housekeeping Magazine! I hope you will go grab a copy!

Be sure to follow me on instagram and liketoknow.it – and SUBSCRIBE below so you never miss a thing!

LINKS:

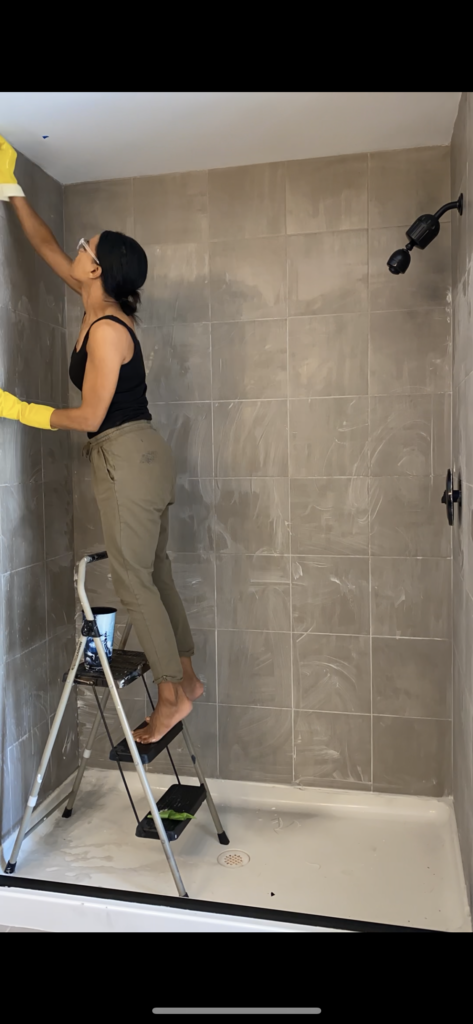
HOW TO PAINT SHOWER TILE

  1. SCRUB SCRUB SCRUB AND SCRUB AGAIN. This is one of the most important things you will do in the process. Spend as much time and effort as possible removing every bit of soap scum, products and oil from the surface of the tiles so that the paint will adhere.
  2. SAND. Sand the surface of the tile with 60, then 120 grit sandpaper.
  3. ALCOHOL. Wipe the surface with rubbing alcohol using a small sponge.
  4. TAPE. Tape off the edges. and use a drop cloth or paper/plastic floor covering.
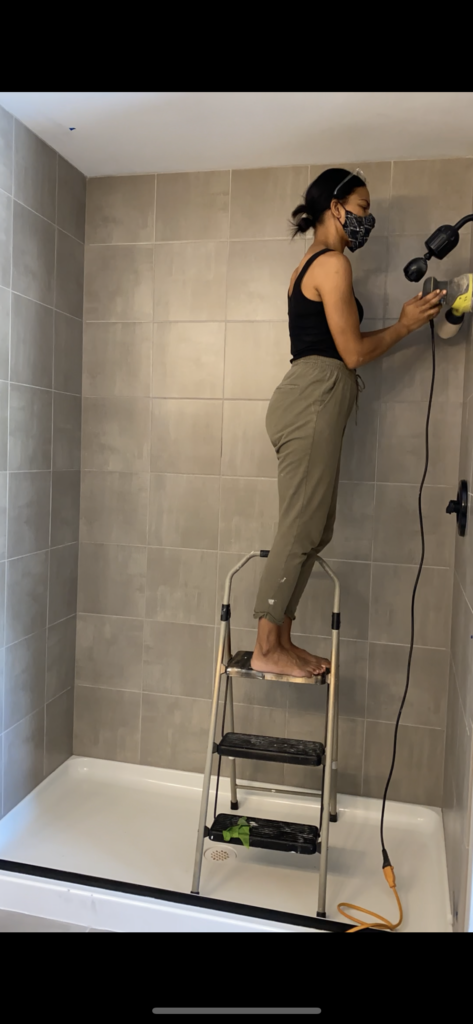
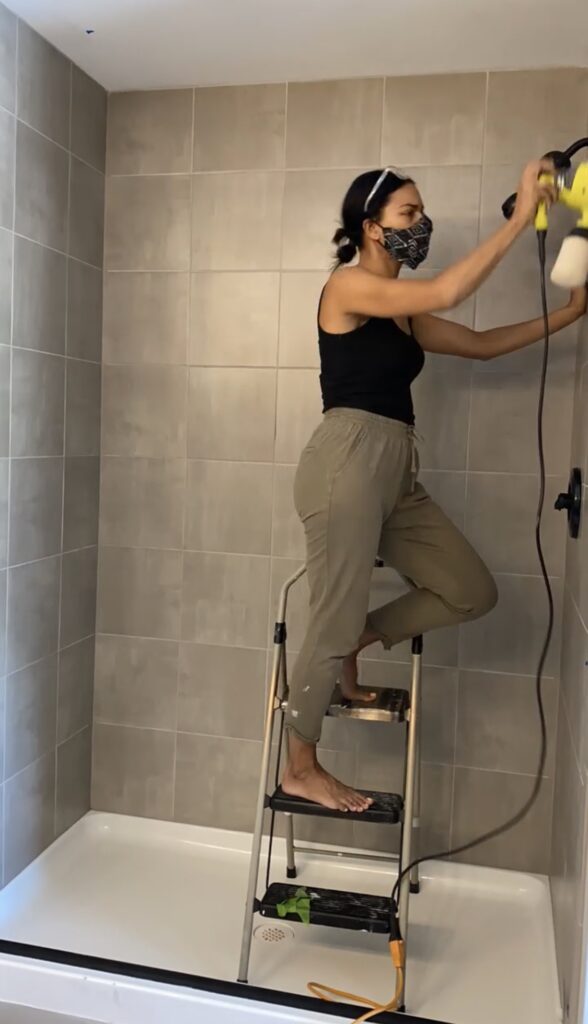
  5. VENTILATION!!! I used Tough as Tile and let me tell you. OPEN ALLLLL the windows and use a fan. Then double mask.
  6. ROLL Using a roller, VERY QUICKLY WORK your way across the surface you are covering. If you have awkward areas, you may want to have a brush ready. This stuff dries quickly so you need to work fast. Repeat the process. You will need 2-3 coats. I used 2 cans.
  7. DRY. Let it dry for a few days before use. Clean up any drops with Citristrip, a non toxic varnish stripper. This stuff is the only thing that worked to remove any spills and drops.
  • Remove caulk + frame
  • scrub thoroughly
  • sand
  • or use steel wool
  • use 2-3 coats
  • work quickly!

PRODUCTS:

HOW TO PAINT YOUR SHOWER FRAME

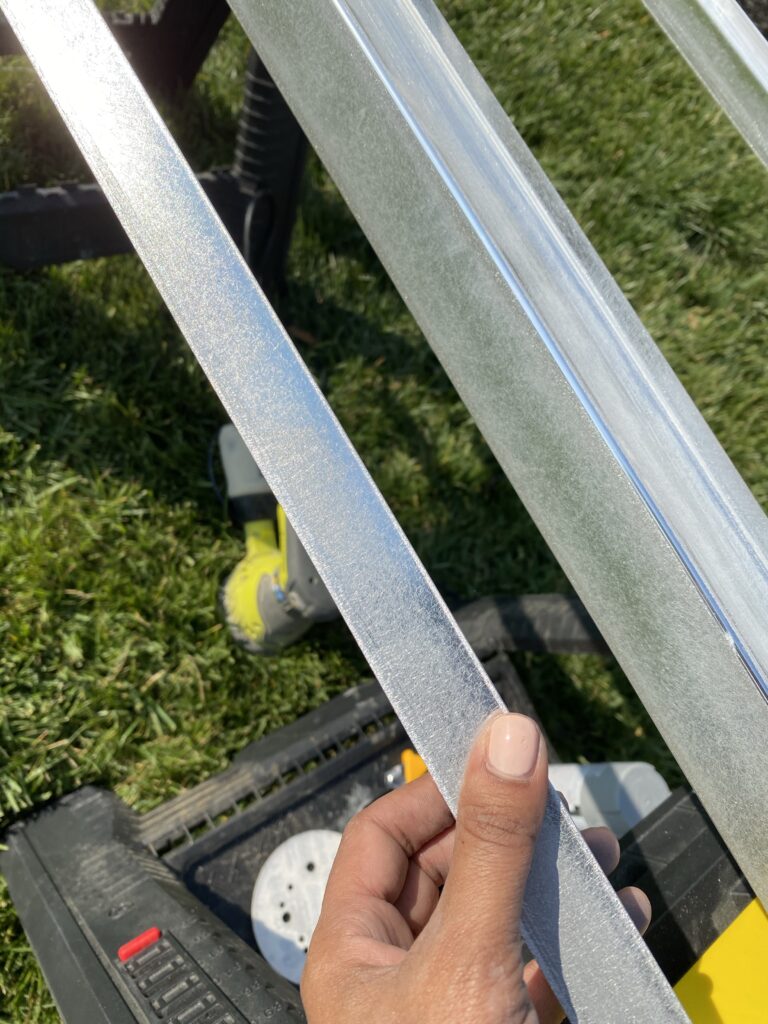
  1. TAPE up the surrounding areas (or you can completely remove the frame and doors- I did this so I could spray paint outside.)
  2. WASH the frame thoroughly with CLR (I used soft scrub with bleach)
  3. Sand with the highest grit sandpaper you can find.
  4. Use at least 91% rubbing alcohol to wipe down with a small sponge.
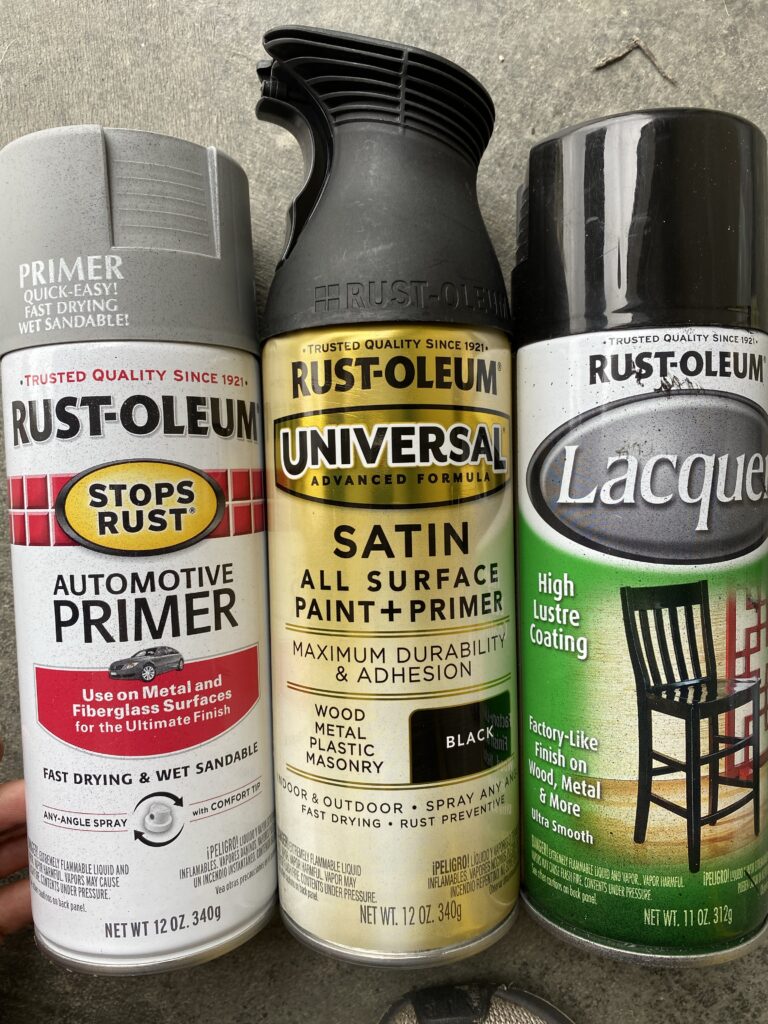
  5. COAT with one thin layer of Rustoleum Auto Primer. let dry for 4 hours.
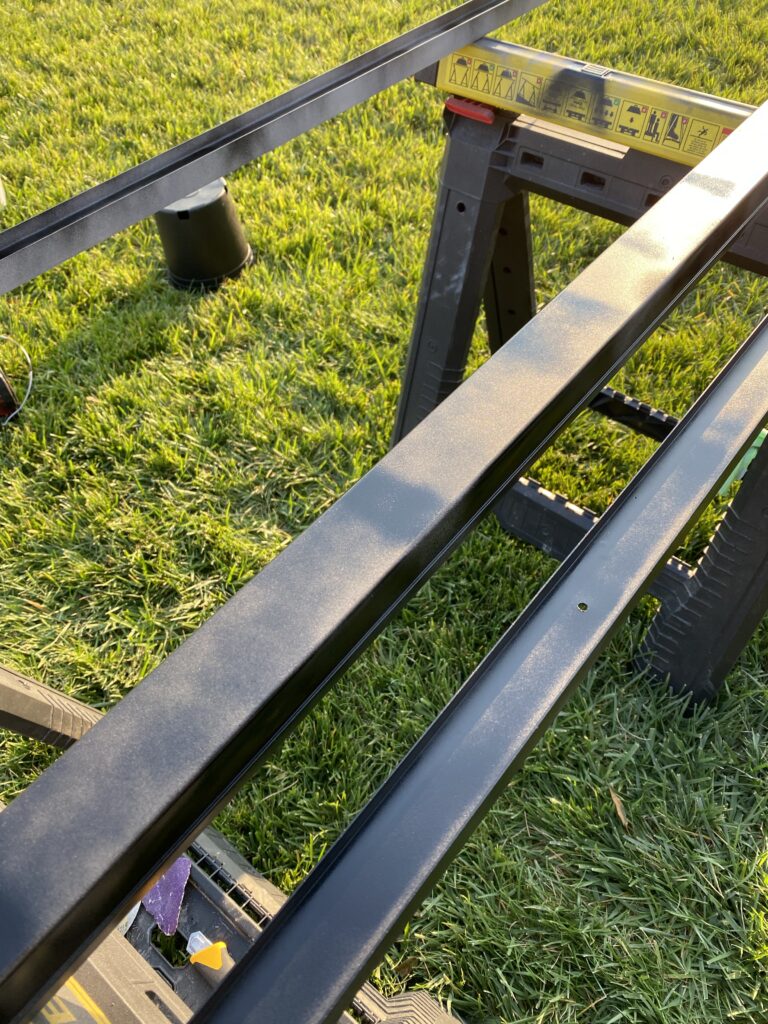
  6. SPRAY 2 thin coats of Rustoleum Spray Paint in Matte Black. Let dry 4 hours between coats.
  7. SPRAY with 1-2 thin coats of Rustoleum lacquer. Let dry 4 hours between coats
  • Products used linked below
  • Clean, Sand, Alcohol
  • 1 coat primer, 2 coats paint, 1 coat laquer

PRODUCTS:


Filed Under: Home, Lifestyle, Uncategorized Tagged With: diy bathroom, diy paint shower, diy wallpaper, large brass mirrors, livette's wallpaper, paint shower frame, paint shower tile, peel and stick wallpaper, rejuvenation

Reader Interactions

Leave a Reply Cancel reply

Your email address will not be published. Required fields are marked *

Primary Sidebar

Latest Posts

DIY CANE HEADBOARD

DIY MODERN FLOOR MIRROR

DIY BATHROOM AND SHOWER

New Nordstrom Beauty Faves

Archives

Categories

Footer Widget Header

SUBSCRIBE

Join Anna's List!

Footer

  • Email
  • Instagram

The Links

  • About
  • Home
  • Contact

Categories

  • Beauty
  • Lifestyle
  • Faith
  • Wellness
A vessel sharing positivity through beauty, wellness, and personal style.
I get a lot of questions about how I learned to do I get a lot of questions about how I learned to do things. Things like makeup. Editing. DIY.  Blogging. Pictures. Instagram. Running.  Cooking.  Reels.  
 
My friend, here’s the thing.  I didn’t learn how to do them before I did them.  
 
I repeat:  
 
I didn’t learn how to do them BEFORE I did them.  
 
I learned WHILE I did them.  
 
Every artist, interior designer, photographer, writer, mother, father, runner, athlete, chef, dancer, accountant, teacher, content creator, roofer, painter.... not a single one knew what they were doing before they did it.  
 
And do you know the difference between you and them?  
 
They started. In the unknown.  In the dark. In the fear.  They went for it.  
 
And then, do you know what they did? They saw that they weren’t amazing the first time and.....  
 
....they did it again.  
 
and again.  
 
and again.  
 
And each time they learned something new.  AS THEY WENT.  
 
For years I watched my incredible friends do things they’d never done before. And AS THEY WENT they became great.  
 
I waited SIX years to start a blog because I didn’t know what I was doing.  Because I was afraid of failure. Because I was scared of messing up in front of others. I let fear win. Until one day in May of 2019, I woke up.  
 
As far as these DIY’s? I STILL don’t know what the heck I’m doing. But I’m learning in front of your eyes. As I GO.  
 
My beautiful mother had a plethora of gifts and talents. She was an artist. A writer.  A creative.  And many of her dreams died with her because she let fear stop her.  We never got to see her full potential. It grieves me deeply.  I won’t let that be me.  Please don’t let it be you.  
 
So.... that thing you’ve been wanting to do? What are you waiting for?  
 
It’s go time. 
 
Psalm 37:23-24
Someone said something really rude in my DM’s an Someone said something really rude in my DM’s and I’m so proud of myself.    
   
Everyone is different, but I always feel the need to reply or defend or explain.  I even took a screenshot of what they said so I could share it.  I typed my response and hit send.  About 5 minutes later, I went back. It was still unread.  I pressed “unsend” and deleted the screenshot.   
   
Listen, that is growth.  Late is better than never.   
   
I was letting the mean spirited words of a stranger on the internet live rent free in my heart even though I knew it would bear no fruit for me.    
   
No more. God, give me the strength to stand by this. I won’t let someone’s unkind words hold space in this temple. It’s too precious of a house. The gatherings at this house are invite only....and I am in charge of the guest list.    
   
I hope you’ll make a beautifully exclusive guest list for your house, too. 🖤   
   
#youarethetemple
How it’s going >>> How it started 🖤🖤🖤 Y How it’s going >>> How it started 🖤🖤🖤 You, me and God make a pretty strong triple strand cord, Rob G.  Happy Valentine’s Day! #NotEasilyBroken   
‭‭   
Ecclesiastes‬ ‭4:9-12‬ ‭
You guys! 😭😭😭 The headboard is done and I You guys! 😭😭😭 The headboard is done and I’m literally tearing up as I write this.  
 
It could be that I’m just tired, but I really felt like giving up a few times, and I am so proud of myself for pushing through to the finish line.  I wish you could see the headboard and room in real life. It is so much prettier in person.  
 
Besides getting the wrong length screws and having a manual staple gun (which I do not recommend for stapling cane btw 🤦🏽‍♀️).... 
 
I got what I thought was a kreg jig, then went back and got an ACTUAL kreg jig, and when I got home I realized I really sucked at using a kreg jig. 😬 
 
After I finally got it, I then forgot to adjust the height of the guide, and drilled ALL THE WAY THROUGH THE ACTUAL KREG JIG 😩😂🤷🏽‍♀️ (see the whole saga in stories)  
 
Anyway, I think it looks awesome. Thank you for all of your encouragement. So many of you didn’t laugh AT me, but WITH me, and you encouraged me to keep going.  I appreciate you, and I hope you’ll do the same thing when life gets hard, too.  
 
Have a wonderful weekend and an amazing Valentine’s or Galentine’s or Palentine’s or MeMyselfandAgoodBookentine’s. Ok? 
#diyheadboard #caneheadboard #idcoathome #diybed
Valentine’s Day is almost here and I’m thrille Valentine’s Day is almost here and I’m thrilled to share my favorite new scent -  Scarlet Poppy by Jo Malone London – available now at @nordstrom.  I can’t stop smelling it… enveloping ambrette, rich scarlet poppy, warm creamy tonka bean, and a touch of fig make this the perfect addition to my collection! 
  
I’ll be pairing it with Myrrh & Tonka over my Wood Sage & Sea Salt body crème.  
  
@jomalonelondon 
#JoMaloneLondonAmbassador 
#CologneIntense
Y’all, Rob made us a romantic date night meal! I Y’all, Rob made us a romantic date night meal! Is he a chef yet?! SWIPE to see it and his shopping list :) I sent him into @aldiusa for ingredients to create something scrummy and he did it! Scallops, shrimp, asparagus and roasted potatoes! 🙌🏾 Head to my stories to check out his adventure.  #sponsored 
 
To recreate something like this, you can find everything at ALDI! You will get in and out quickly, plus as always- find delicious, affordable foods.  #ALDILove
I found a home for my little valentines arrangemen I found a home for my little valentines arrangement in the nook! 💐 Yesterday I took a bundle of plain store bought blush roses and gently spread apart the petals. Then I tucked in white and purple wax flowers and such.  TIP: start with like items (the roses) and then tuck in smaller pieces at different lengths to fill. Did a little time lapse in stories! I really like asymmetric arrangements. Do you prefer symmetry or are you the lopsided type, too?  What’s your favorite arranging tip? 👇🏾#floralarrangement #valentines #valentinesgift
It’s #MANIMONDAY! 💅🏽 If you have trouble w It’s #MANIMONDAY! 💅🏽 If you have trouble with your polish chipping, I’ve got some tips that work for me! Head up to stories to see it in action, but here’s the gist:  
1. Don’t wash your hands right before - if your nail bed is damp, it will expand and then contract- chipping your nails. I like at least an hour of drying time after a hand washing or shower.  
2.  Don’t touch your nails! After removing polish, I buff, then dip into the remover again. If you touch your nails, the oils from your fingers can keep the polish from adhering.  
3. LET IT DRY! I let my nails dry 5 minutes or more between 3 THIN coats -and even longer before the top coat.  
 
What are your tips?  Or if you have questions, leave em below!
Save this post for a puffy eye tip below! If you d Save this post for a puffy eye tip below! If you didn’t already know, I’m a HUGE advocate of retinol and I got some incredible results testing Shani Darden’s Retinol Reform - such good results that I am actually trying eye cream!  
 
I haven’t used an eye cream in years but I said yes to trying Shani’s new Intensive Eye Renewal Cream.  Why? Because I trust her after my amazing experience.  
 
It’s a couple weeks in and so far I love the texture, the way it smooths, lifts and de puffs instantly- with 9 powerful actives like peptides, Squalane, ceramides and silk tree extract- Shani addressed everything! 
 
HERE’S A TIP: On the days that I wake up extra puffy, I make a “mask” out of the eye cream. I put on a thick layer, let it sit for five minutes, then roll it into the eye with a cool jade roller until it absorbs. It’s a game changer!  
 
You can shop Shani’s new eye cream at Sephora- swipe up in my stories.  Can’t wait to check back in with you guys soon! 
 
#SkinByShani  
@ShaniDarden 
#sponsored  
@sephora
A tale of one headboard. SWIPE to see its life so A tale of one headboard. SWIPE to see its life so far, and save this post for reference!  
 
I made this headboard from a single piece of maple plywood, sanded it with 220 grit sandpaper, kept it raw, and leaned it against a dark wall for contrast. Looks just like the headboard from a $1000 CB2 bed (last slide)! 
 
Anyway, we’ve always had a queen size bed and now it’s a king, just so Rob’s feet could have a separate home from mine (best believe my feet will be staying over at his feet’s new place 😂😂).  
 
I’m pretty positive I’ll need a bigger headboard (can barely see it now!) either by repurposing this one or building something new.  Lots of suggestions in DM’s to build a frame around this one- what do you think?  
 
1st pic is the current king size bed. 2nd is the queen, 3rd is the queen in our old house, 4th is the inspiration headboard. 
 
Head to stories to help me narrow down the lamp choices!
Follow on Instagram

Copyright © 2021 · Anna Mae Groves · Blog Design by Little Blue Deer
Privacy Policy