• Email
  • Instagram
  • Skip to primary navigation
  • Skip to main content
  • Skip to primary sidebar
  • Skip to footer
  • Home
  • About
  • Contact
  • Beauty
  • Lifestyle
  • Faith
  • Wellness
  • HOLIDAY GIFT GUIDES

Anna Mae Groves

A vessel sharing positivity through beauty, wellness, and personal style.

  • About
  • Contact
  • Beauty
  • Lifestyle
  • Faith
  • Wellness
  • HOLIDAY GIFT GUIDES
    • Email
    • Instagram
You are here: Home / Home / DIY BASEMENT UPDATE

DIY BASEMENT UPDATE

August 17, 2021 By Anna Groves No Comments

I turned our kids’ basement hang out into a mom cave! When we bought our house, it was a new home without much character and the bare minimum in finishes.  We made our offer and negotiated to have them finish out the basement and add a small bath.  Knowing we would be doing a DIY basement update, we chose the least expensive options.  
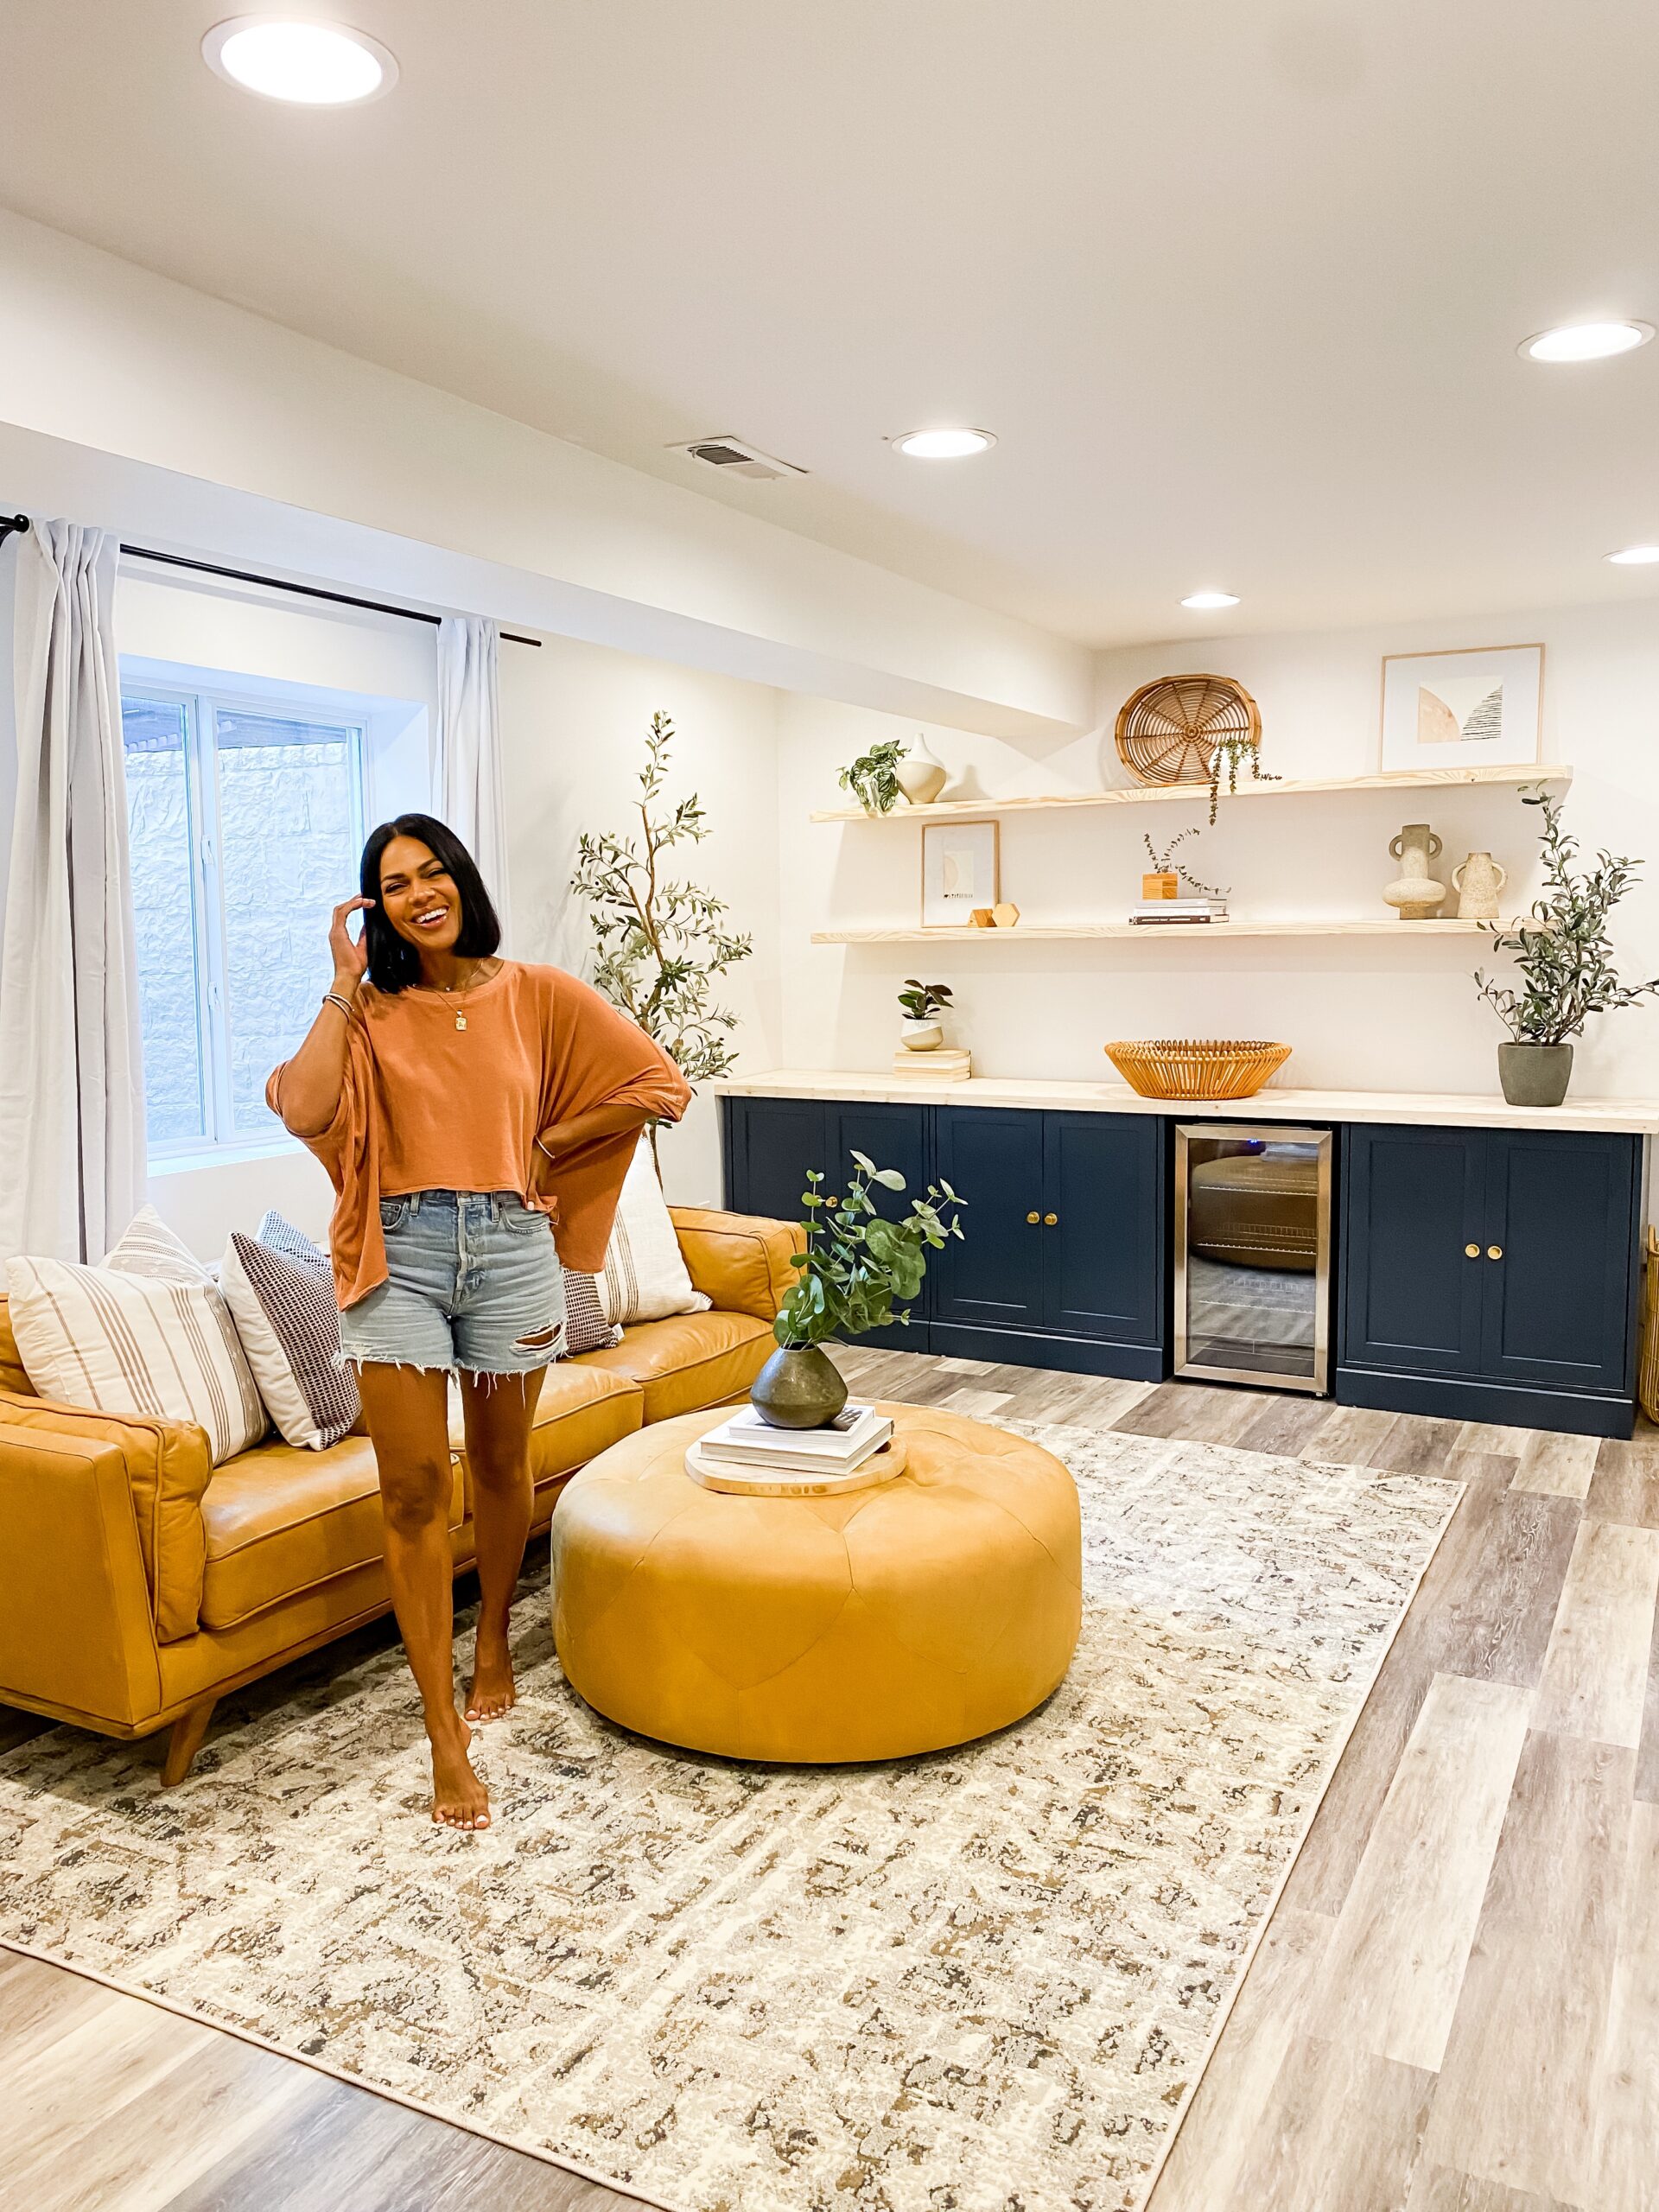
Ew.

Mom Cave

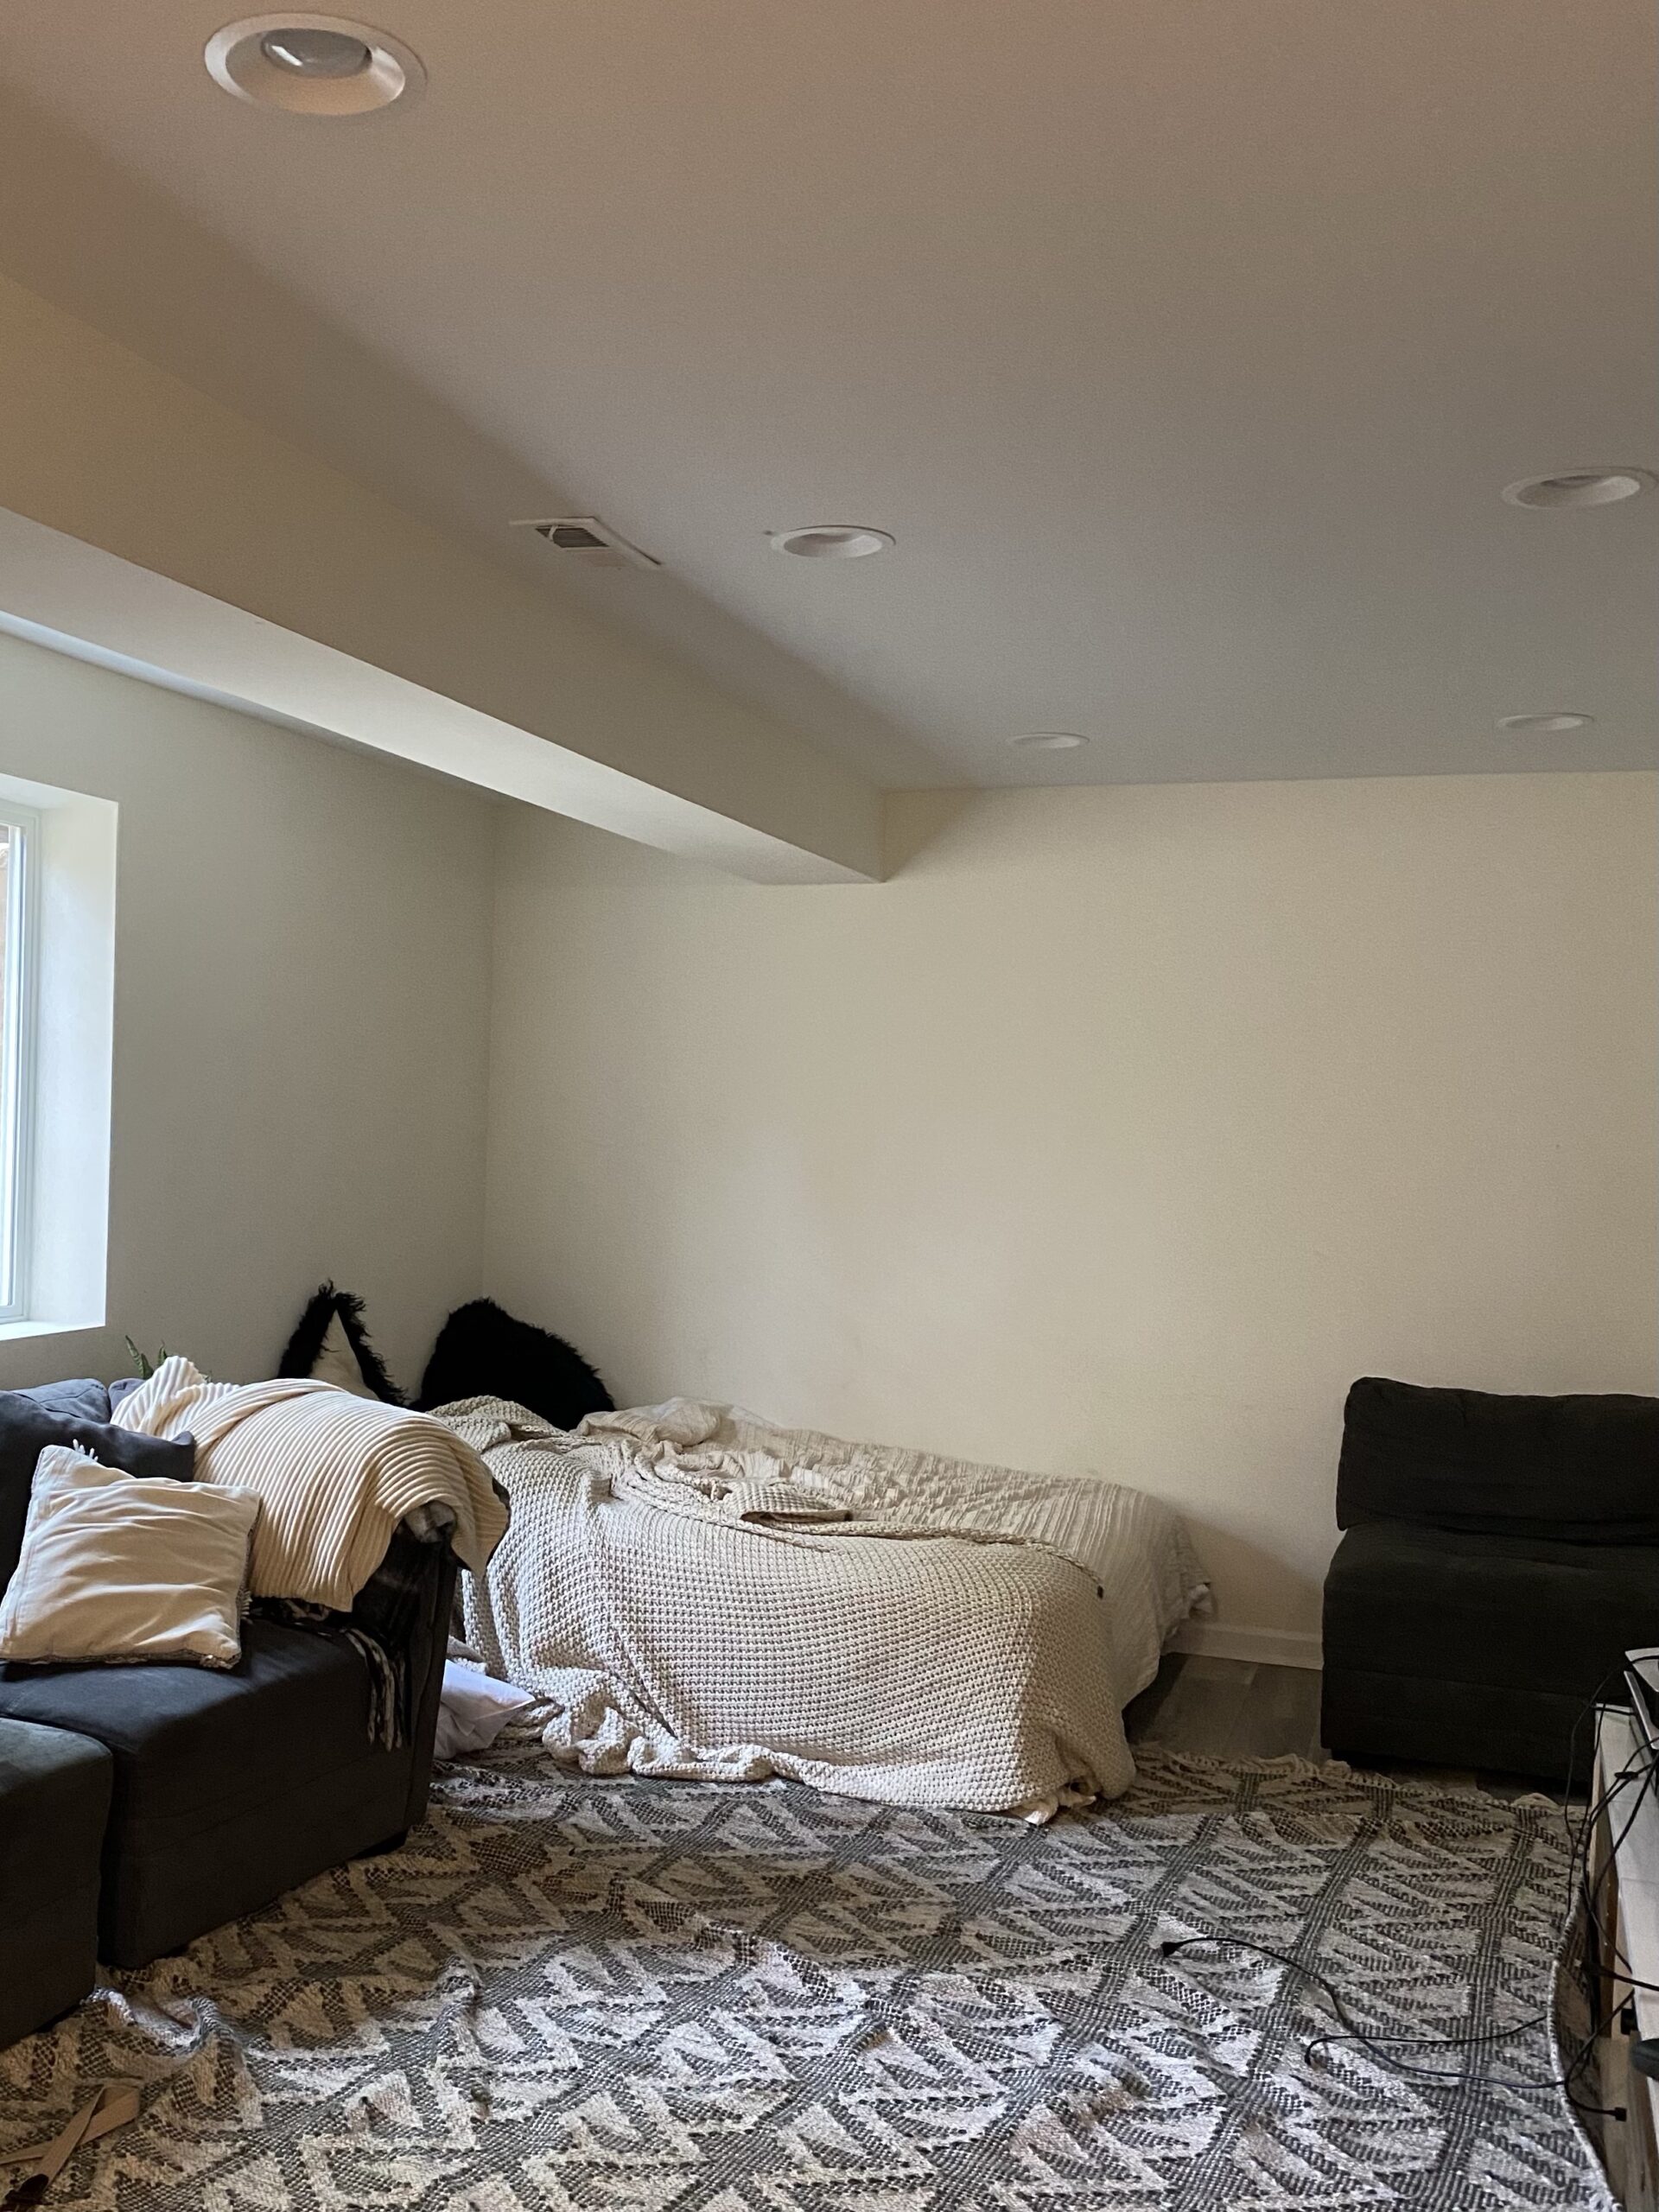
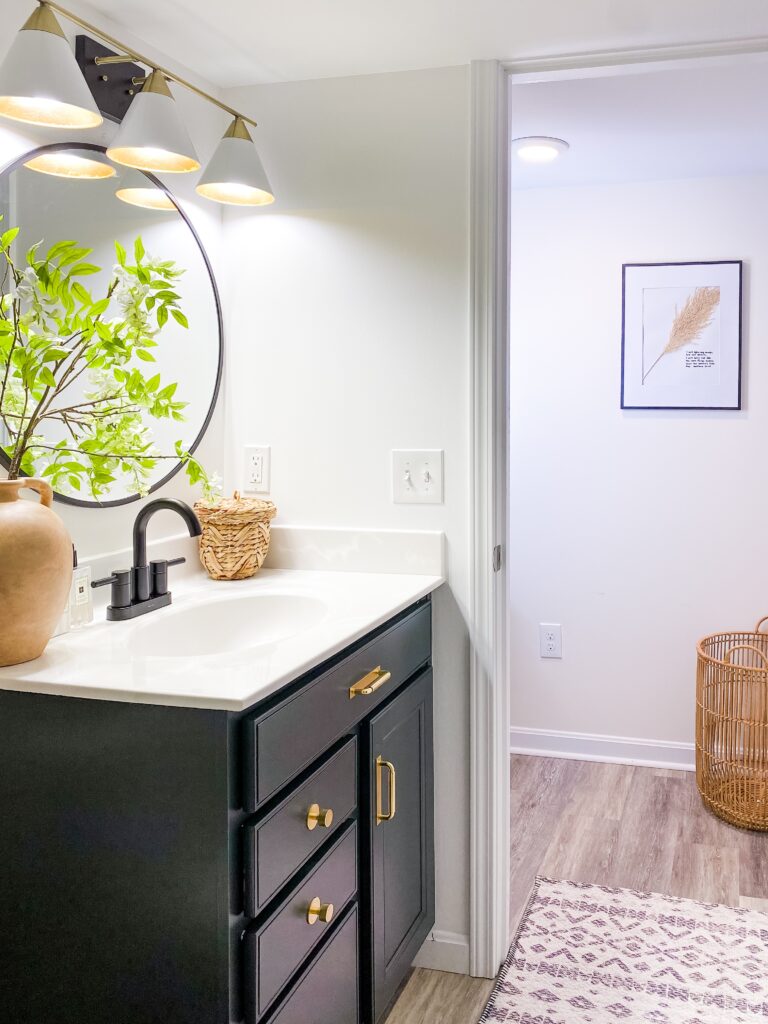
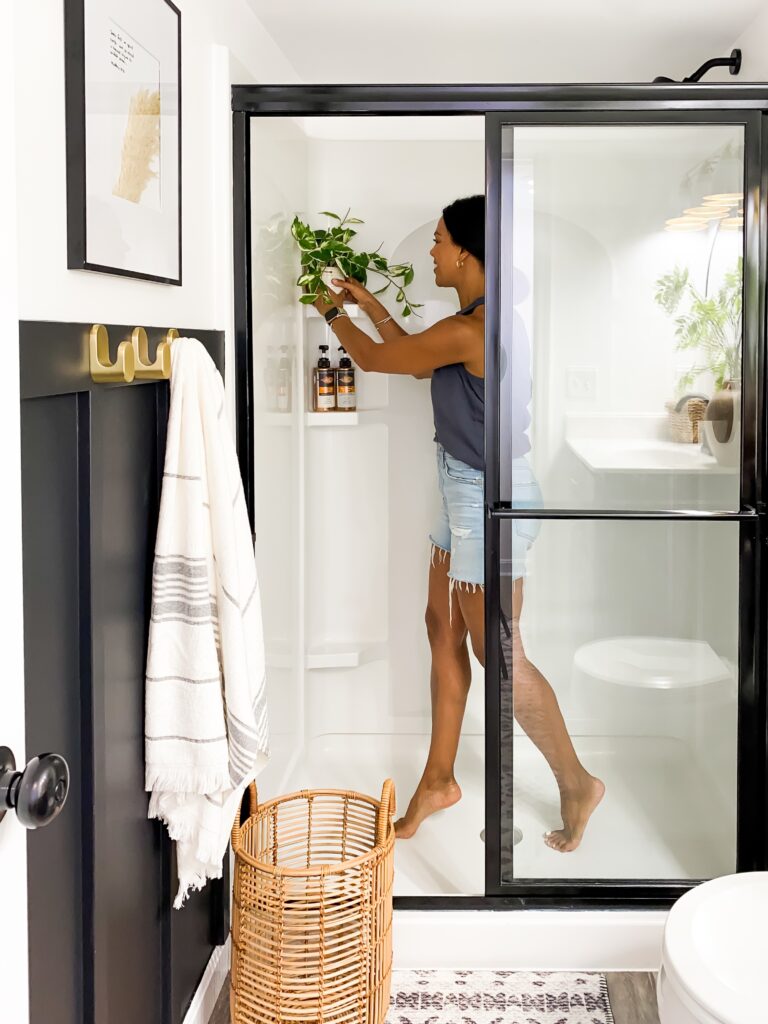
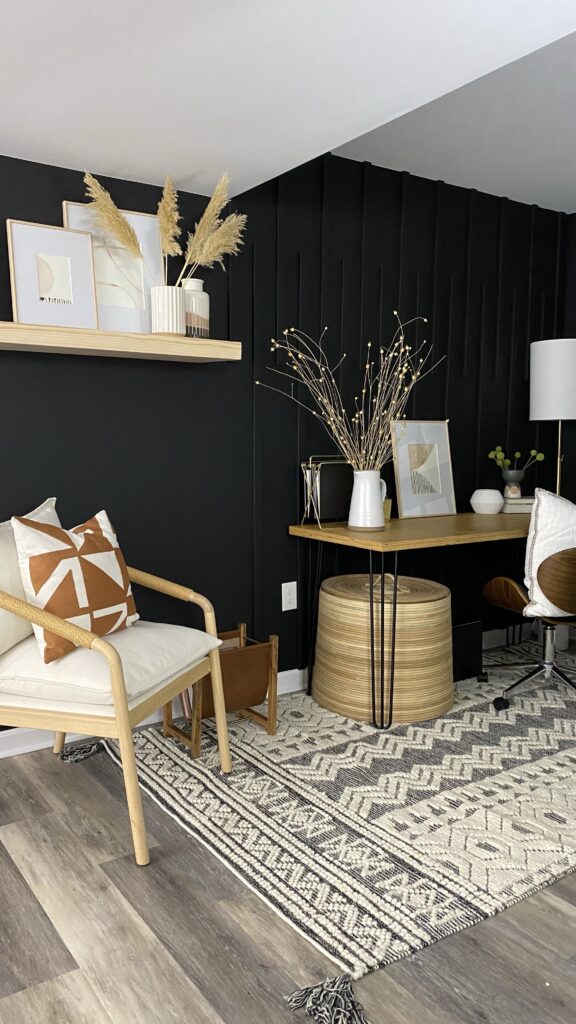
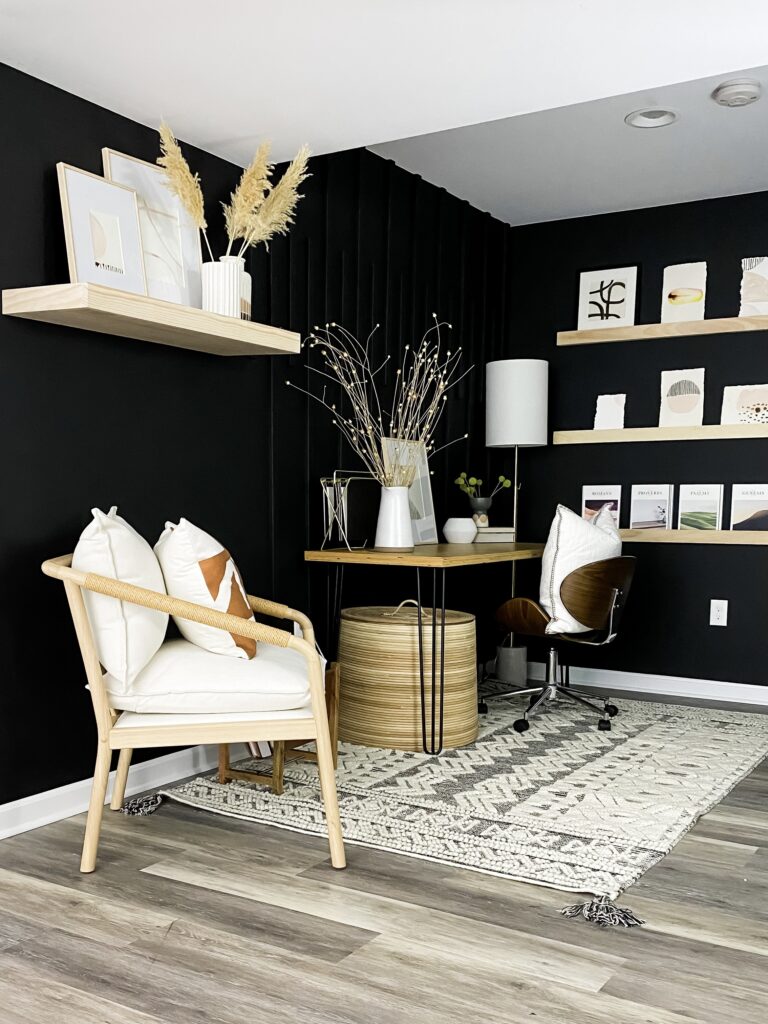
This basement is an awkward shape. When you come down the stairs you turn right to the small bathroom (see the bath update on instagram and below), or go straight and see a blank wall (which I turned into an office) below. 

  • bath to the right
  • office as you come downstairs

To the left, you will find a verrrrry long room.  We had it set up on both sides like two living rooms for the boys to play video games.  I knew I wanted to redo them but what I thought was going to be a teen hangout turned into a mom cave!

Inspiration

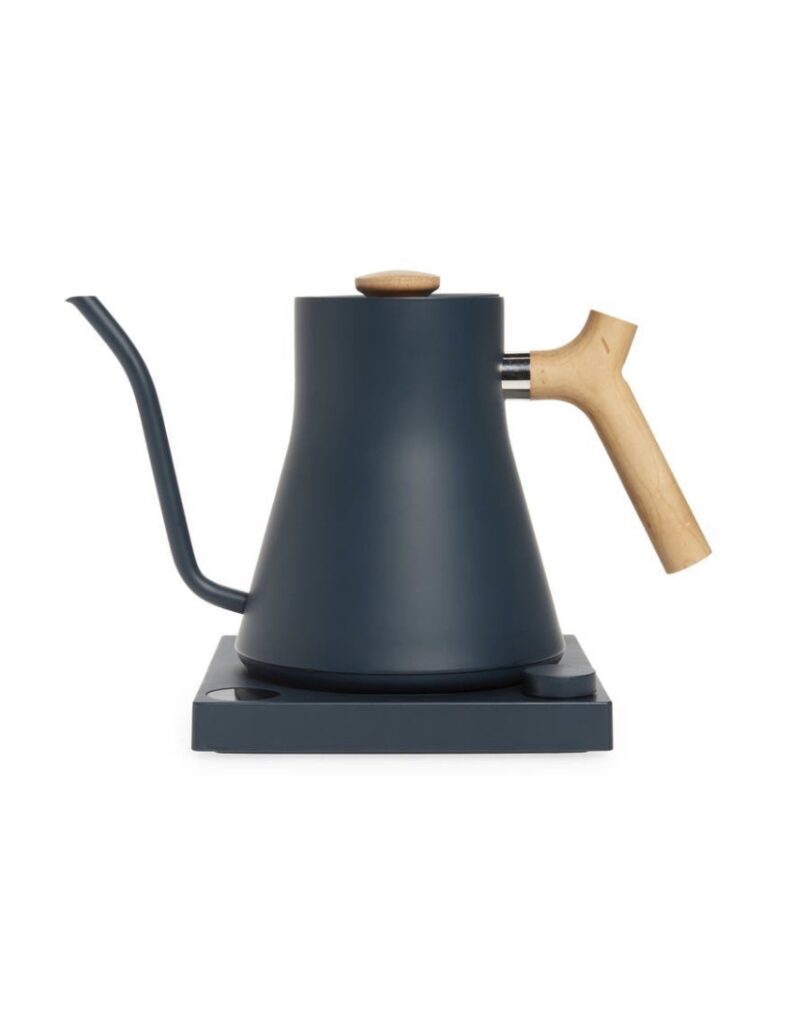
I was inspired by my tea kettle’s gorgeous blue hue.   It was a sign that this room would be for me!  

my inspiration color for the cabinets

First I took a pic of the dungeon and marked it up. (Do you like my professional rendering??)

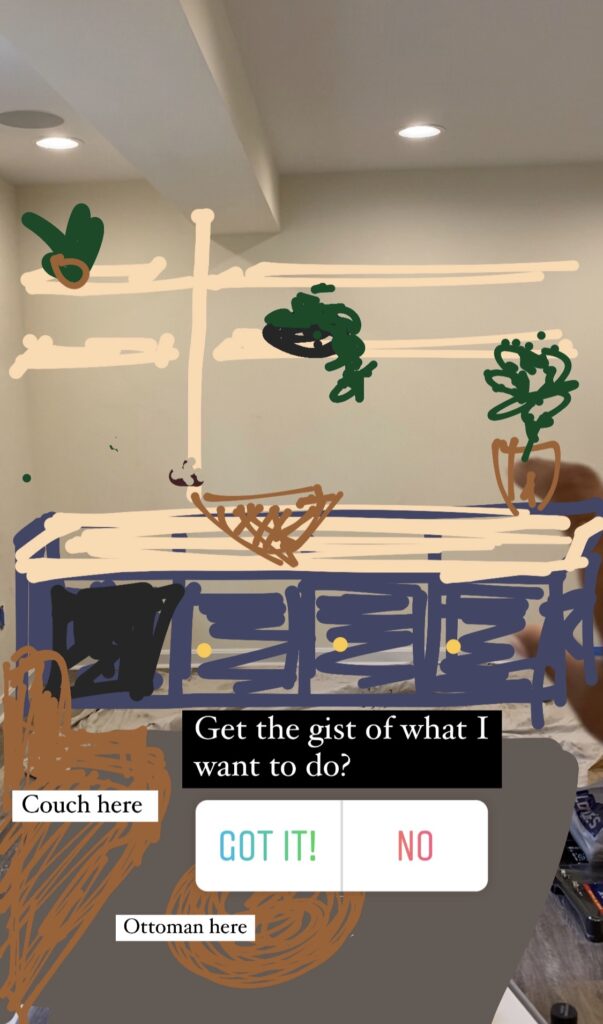
I wanted some storage and shelving, and thought floating shelves and a drink cooler would be great.  I almost built everything from scratch using plywood but quickly changed my mind.  Why reinvent the wheel when I can do an IKEA hack? More on that later.

Brighten Things Up

The first step was paining the room white.  That made a huge difference.  I used Snowcap White in the eggshell finish by Valspar Reserve- a good contrast to the black wall in the office.  Sometimes you go with the lack of natural light and opt not to fight it, like I did in the office.  And other times you do your best to enhance the light!  There is one small window, so I kept it light and airy.   I also knew I was painting the cabinets dark blue, which was a factor.
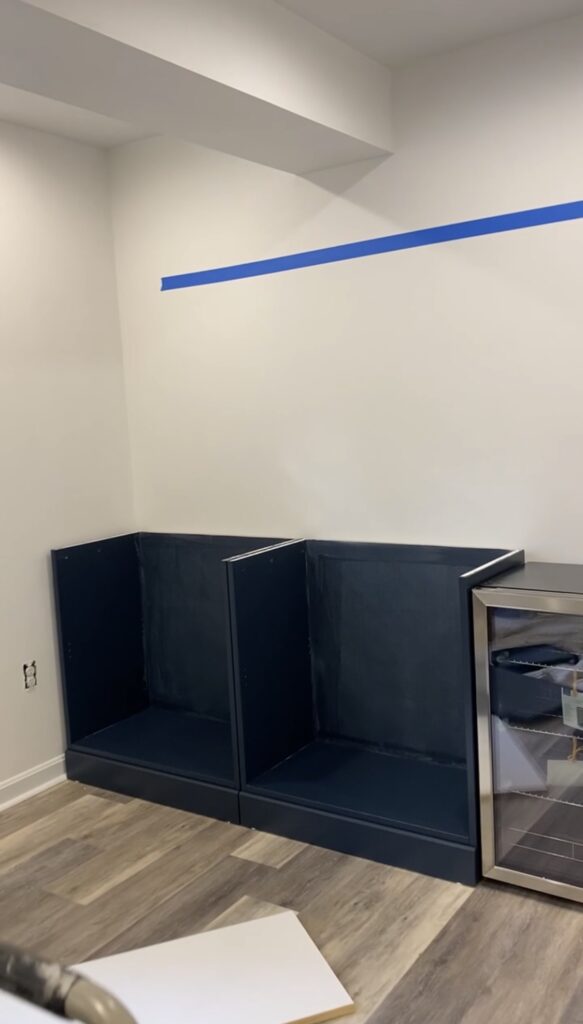
Cabinets

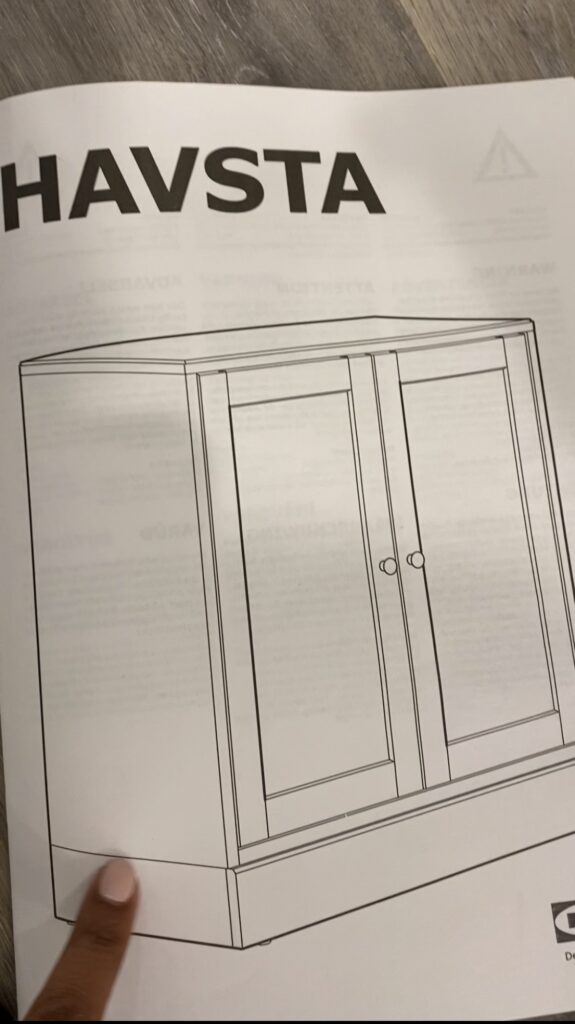
Next, I moved onto cabinets. I purchased some Havsta IKEA cabinets with the intention of painting them and adding a butcher block countertop. I assembled the base of the cabinets and left the doors off to paint separately. The tops would go unused due to the butcher block countertop. The Valspar furniture and cabinet paint says you don’t need to sand or prime, but I HIGHLY recommend that you do on these particular cabinets.

I started to paint directly onto the IKEA cabinet doors, thinking the existing paint was like a primer. It wasn’t, plus the grain on the wood was really pronounced.

  • Ikea Havsta Cabinets
  • Should have sanded first lol
  • You should sand and prime these particular cabinets!
  • This paint is amazing – it settles beautifully
  • painted the base separately

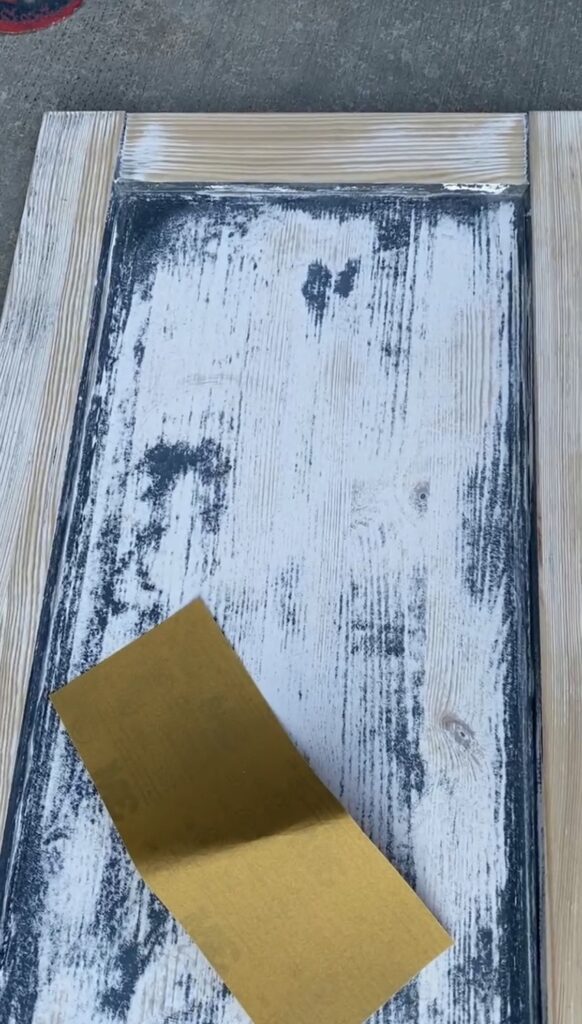
That said, I sanded for forever, used a tack cloth to remove the dust, and the paint turned out perfect. I love this paint. It takes a loooooong time to dry since it is an oil blend, but it settles so beautifully that it looks like you used a sprayer.

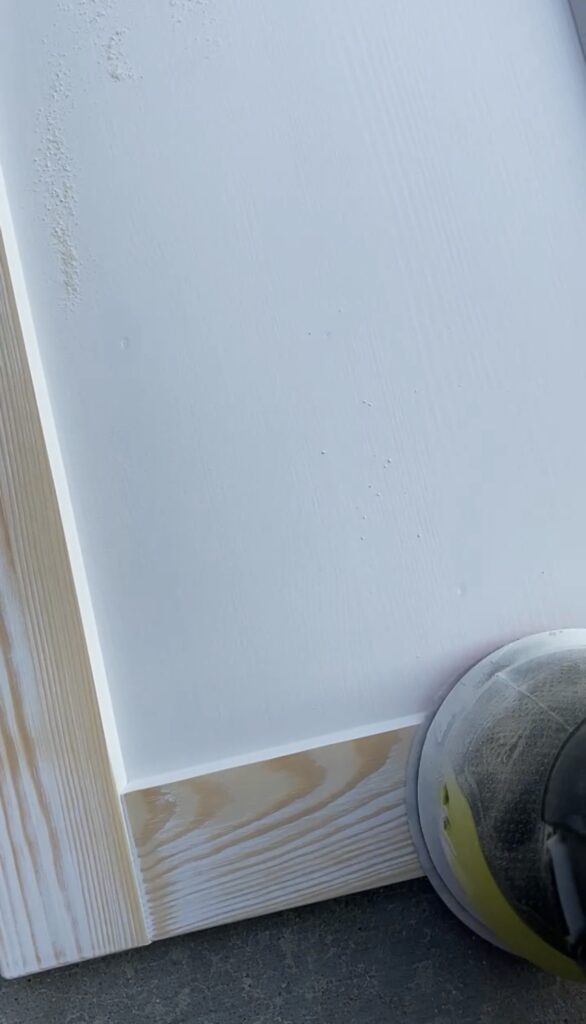
I used a roller and brush to apply a thin coat, then brushed the corners, and rolled once more to smooth it out. I waited 24 hours before applying the second coat, and another 24 hours before handling. While the doors were drying, I painted the base and then started on the countertops. The color is Valspar Pitch Cobalt and the finish is satin in the Cabinet and Furniture paint.

Countertops

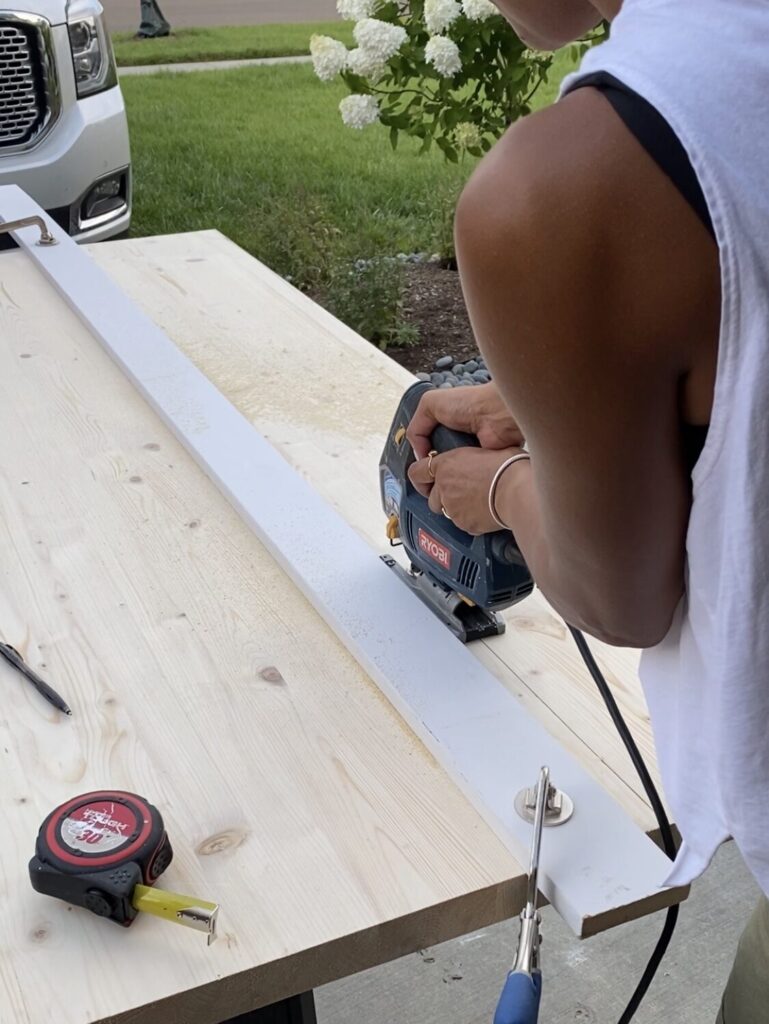
The cabinets were about 18 inches deep and the butcher block countertop was about 30 inches wide. I cut it down to 24 inches using a jig saw. Big mistake! After bending the blade and the saw going rogue, (see my highlights) it dawned on me that I had a circular saw sitting in the garage! Don’t ask me how one forgets they have a whole circular saw, lol!

So, I tried again with the circular saw. This time it turned out perfectly. I was using two countertops for length, so I repeated the process. (If you don’t have a table saw, use a piece of trim as a straight edge).

right before the blade bent!

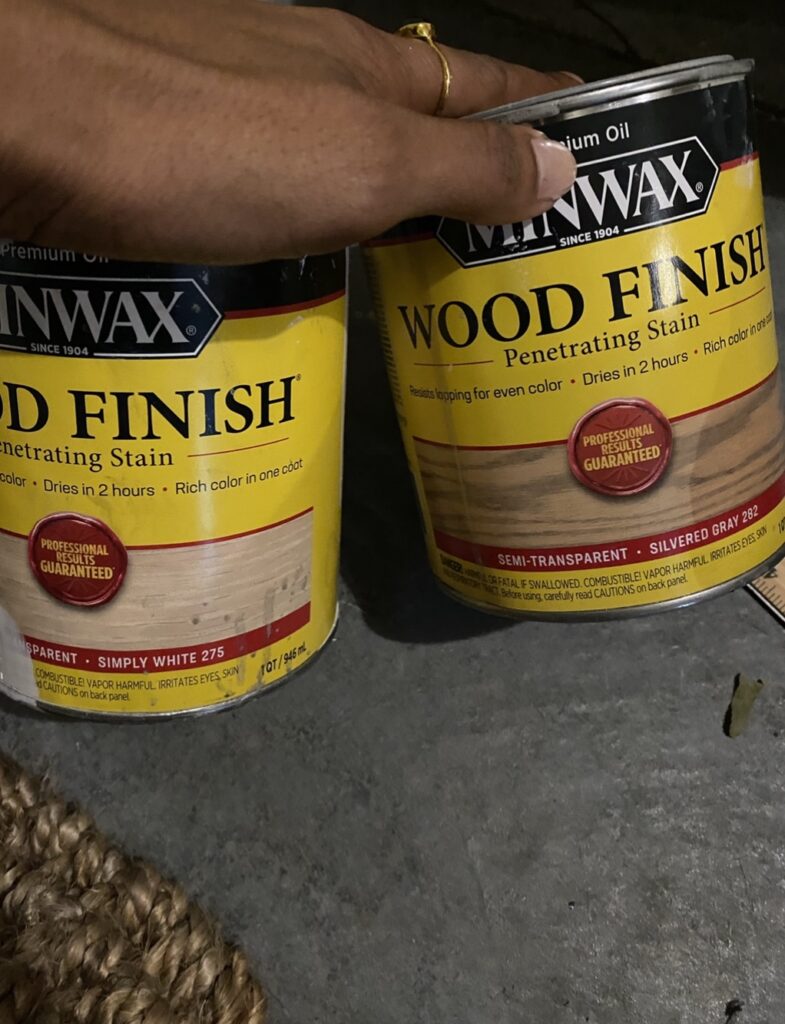
Staining Wood to Remove Yellow

I like to work with raw wood, but for this project I decided to stain to remove some of the yellow. I sanded with 220 grit sandpaper and used tack cloth to remove all dust. Then I mixed Minwax Silvered Oak with a splash of Simply White to get the perfect color, taking out the yellow. This is all about trial and error so you will need to have a piece of wood to practice on. I probably tried about 6 times to get the perfect color, then stained and let dry. We used these inexpensive countertops.

left is unstained, right is stained.
I used silvered oak mixed with a splash of simply white.

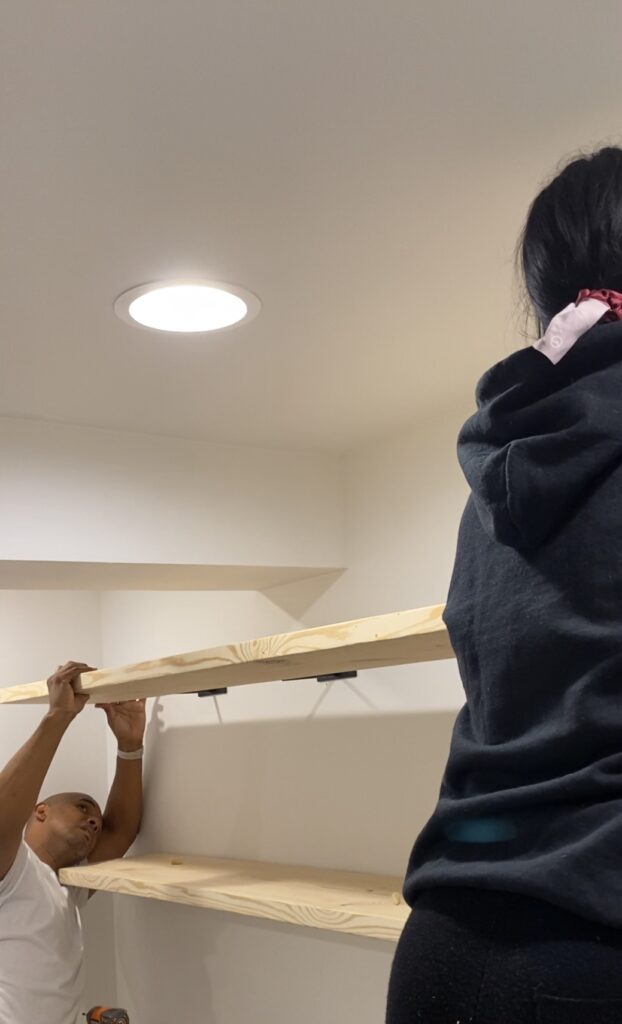
While the countertop was drying I applied the same stain mixture to the wood for the floating shelves.  For these I chose 2 x 12 pine.   In hindsight, I would have chosen something lighter.  These were 8 foot long solid pine boards- the weight was no joke!  

Hardware

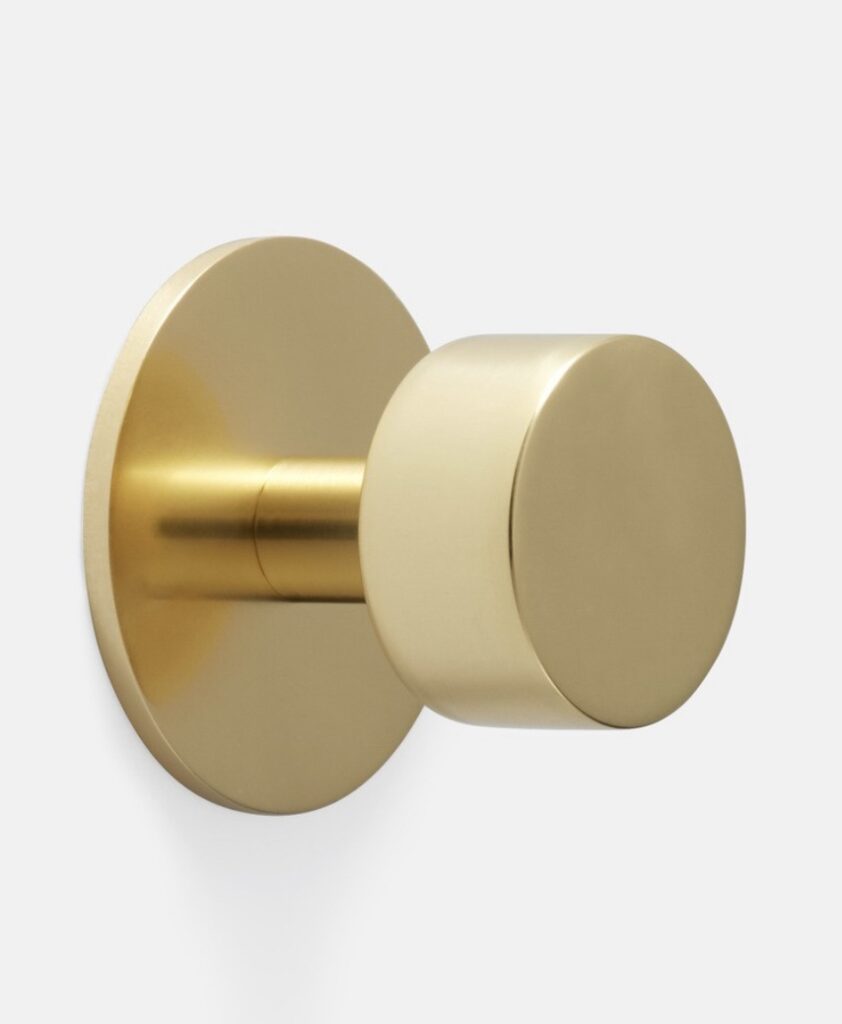
When they were dry, I assembled the cabinets. I added beautiful gold Rejuvenation hardware. It is spendy, but justifiable if it’s only a few doors. It really elevates the look of the cabinets and makes them look higher-end. Mine were leftover from a previous project.

rejuvenation cabinet pull

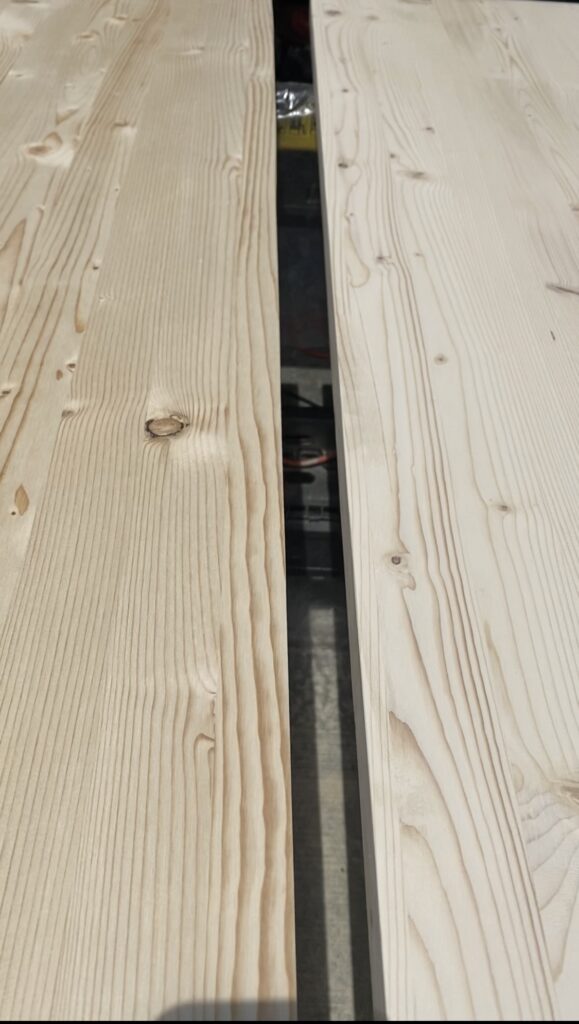
Joining the Countertop

For joining the countertop, I had no idea what I was doing. I’m not a woodworker, but I decided I would use dowels left over from the IKEA cabinets to join the them together. If it were for a kitchen or bathroom I would have added pocket holes for a tighter fit.  (Here’s a video from a real pro on how to properly join the countertops.)

  • drill hole for the dowel
  • make sure it fits
  • dry fitting
  • wood glue on dowel
  • wood glue on one of the boards
  • fit together
  • fill gap with wood filler
  • stain over the seam

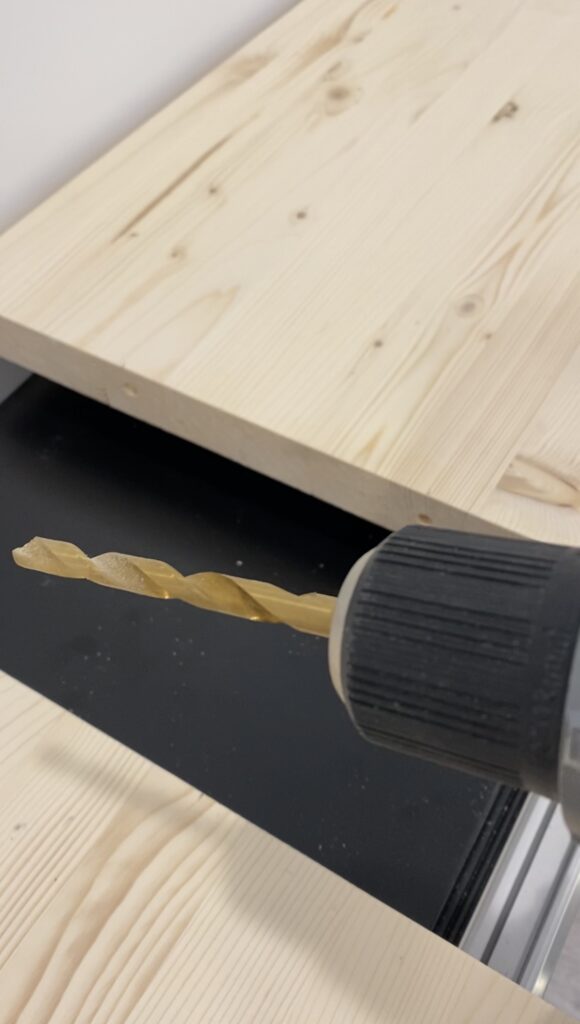
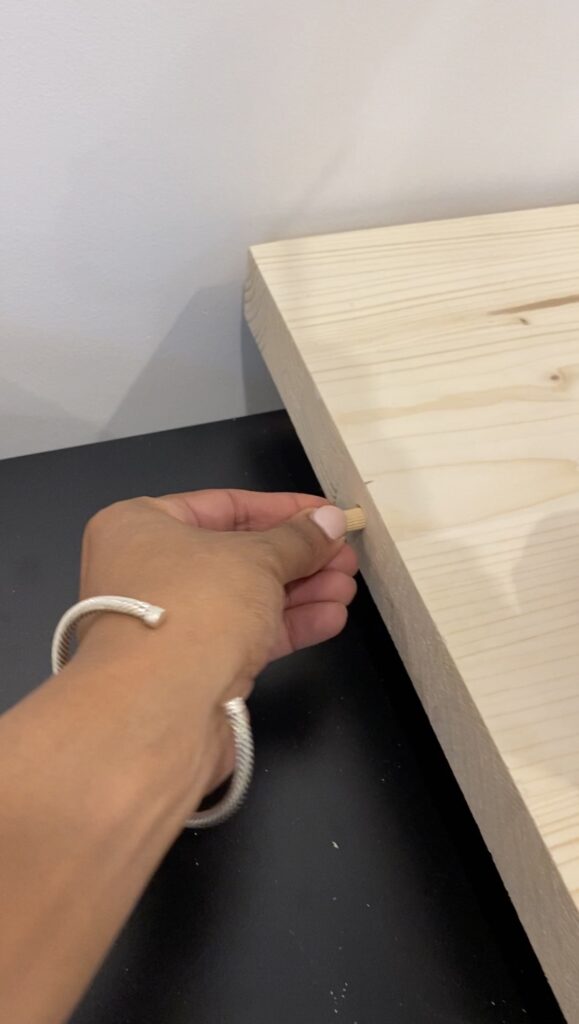
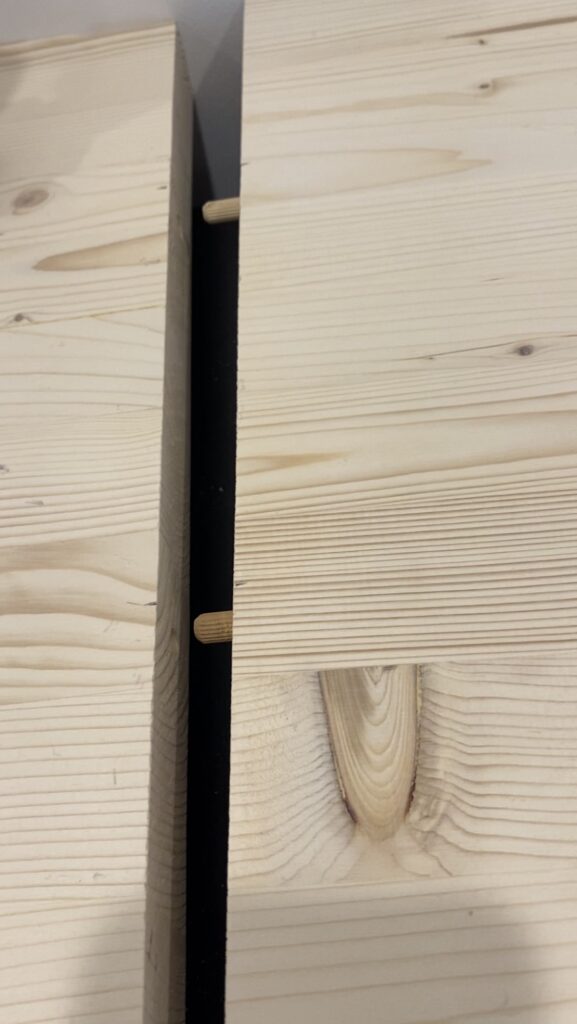
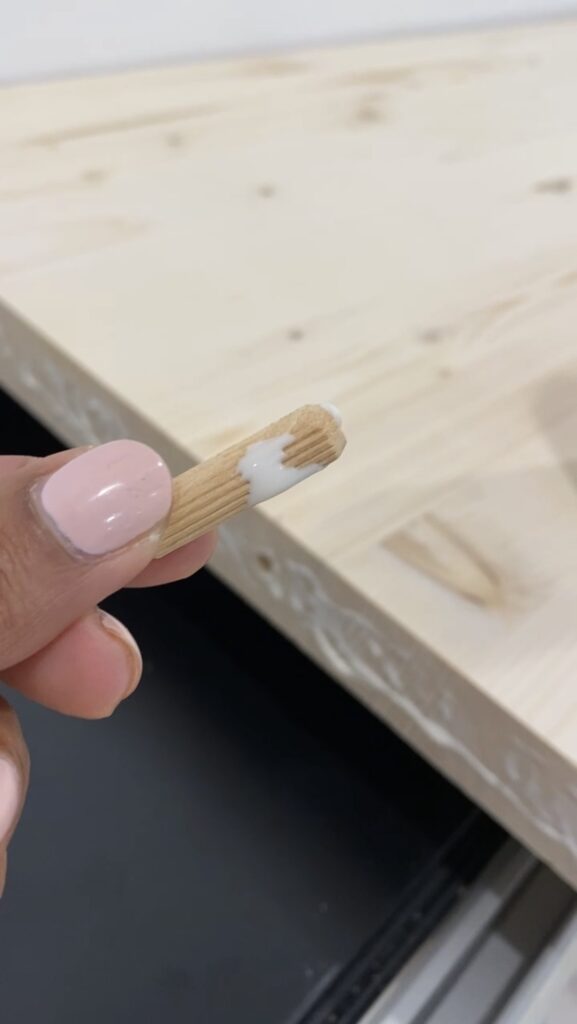
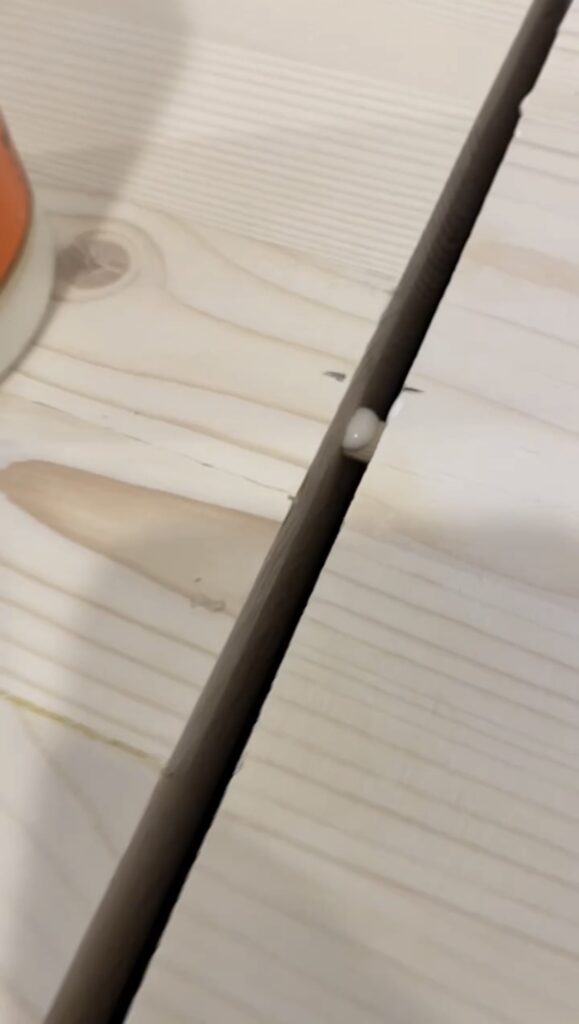
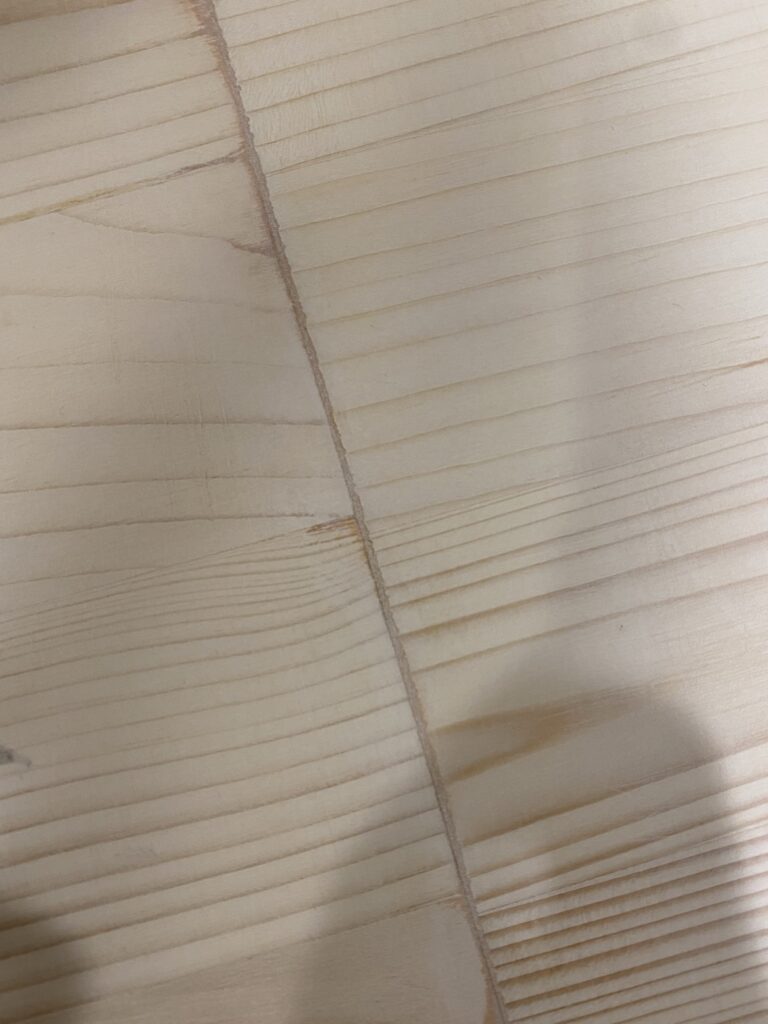
I marked and drilled holes into the counter top for the dowels and dry fit them.  It fit!  Then I added wood glue to connect it. There was a small gap so I filled it with wood filler, sanded, and added a quick wash of stain over the seam. I used the wrong color wood filler so I will go back and fix that soon. I opted to leave the countertop without sealing,  since there will be no water source anywhere near it.  Finally, you’ll want to attach the countertop from the inside top of the cabinet using L brackets.  Now onto the shelves.
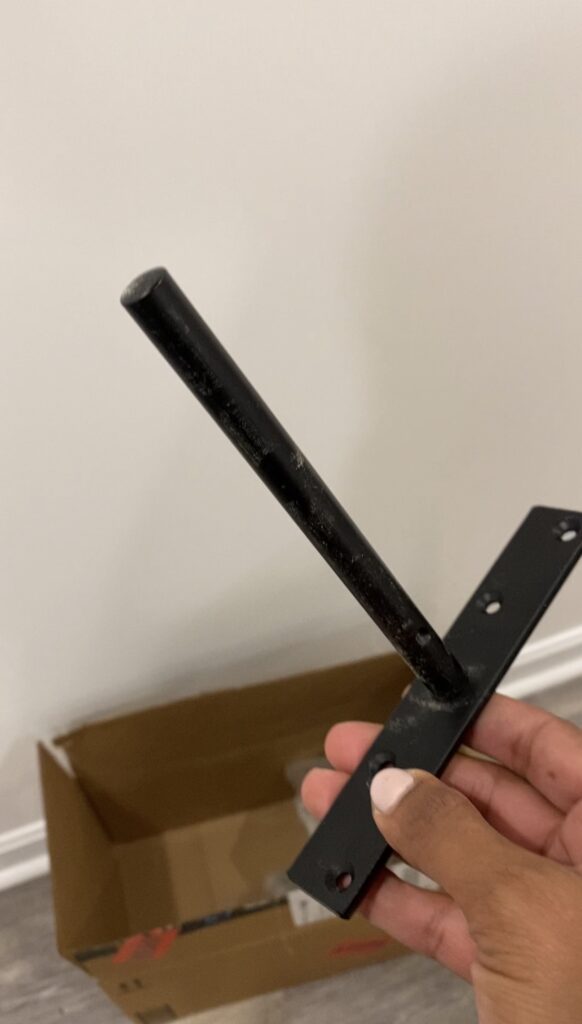
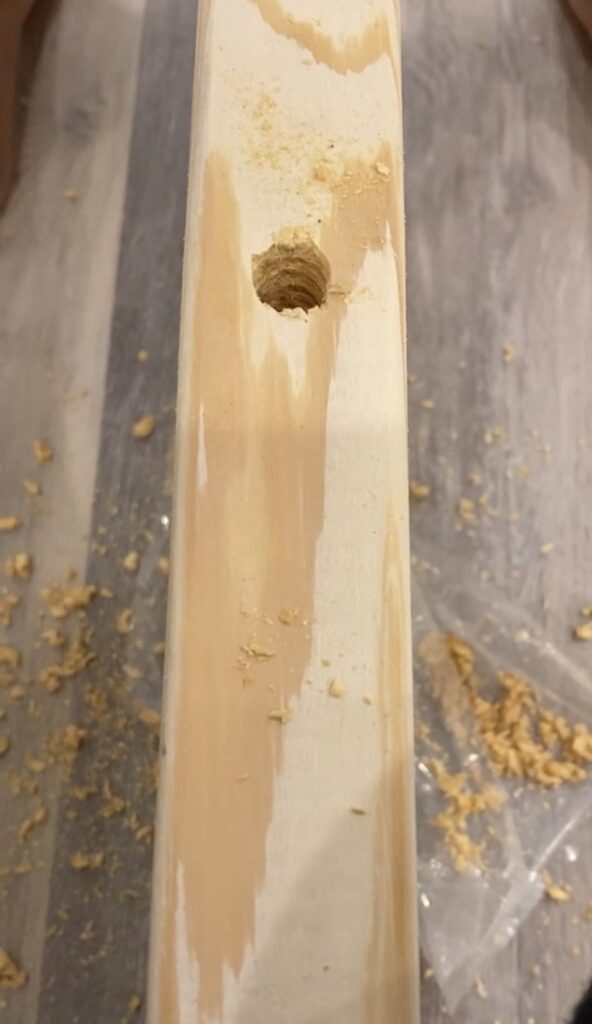
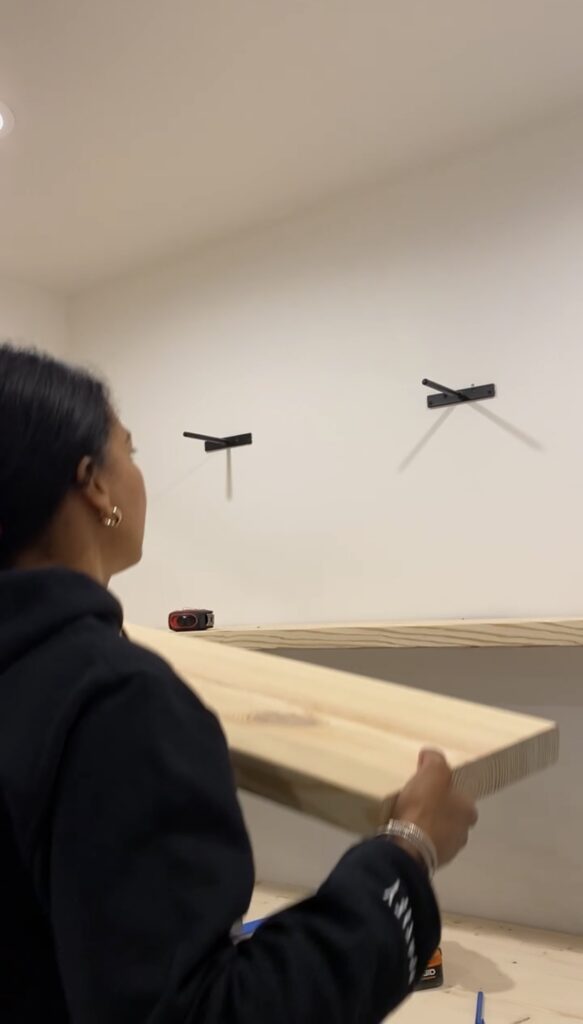
Floating Shelves

We used these brackets from Amazon. I found and marked the studs on the wall. Using the studs as a guide, I measured where the holes would be on the wood and we used a drill bit to carve them out.  Finally, we attached the brackets to the wall and pushed the wood onto the brackets.  We had to pull it off and try again, as one hole was slightly off.  We drilled a larger hole and it worked out great!

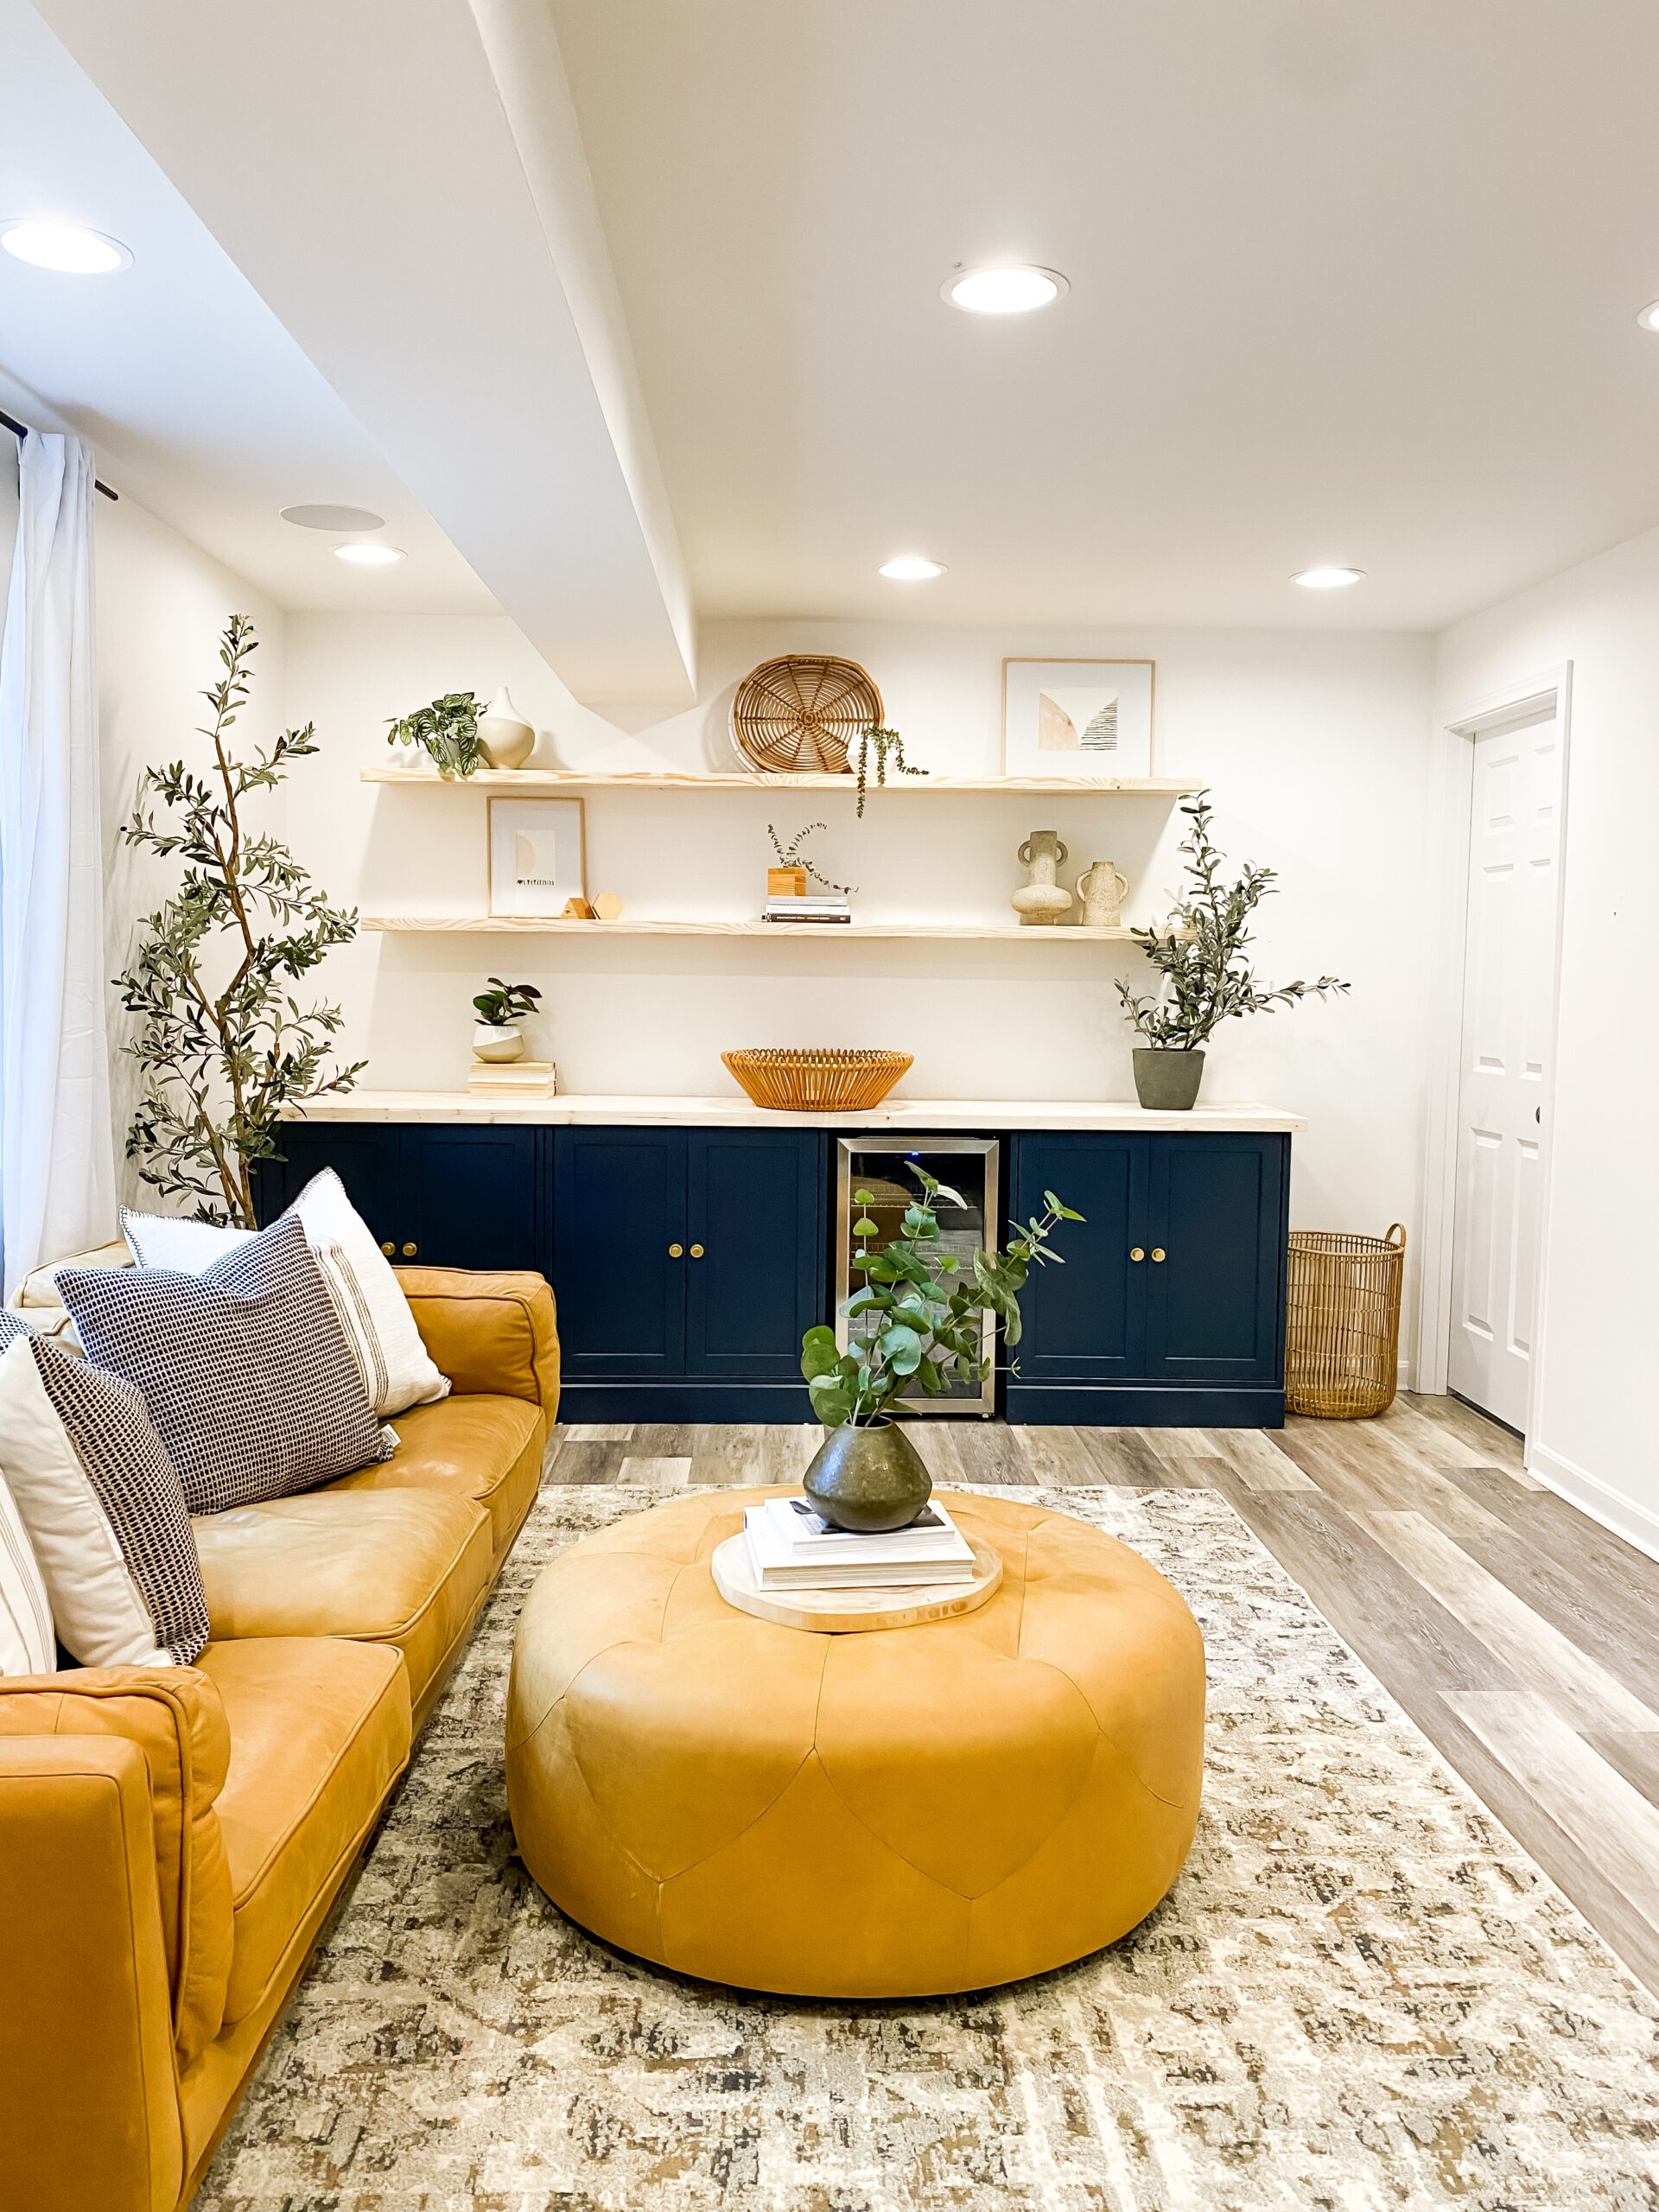
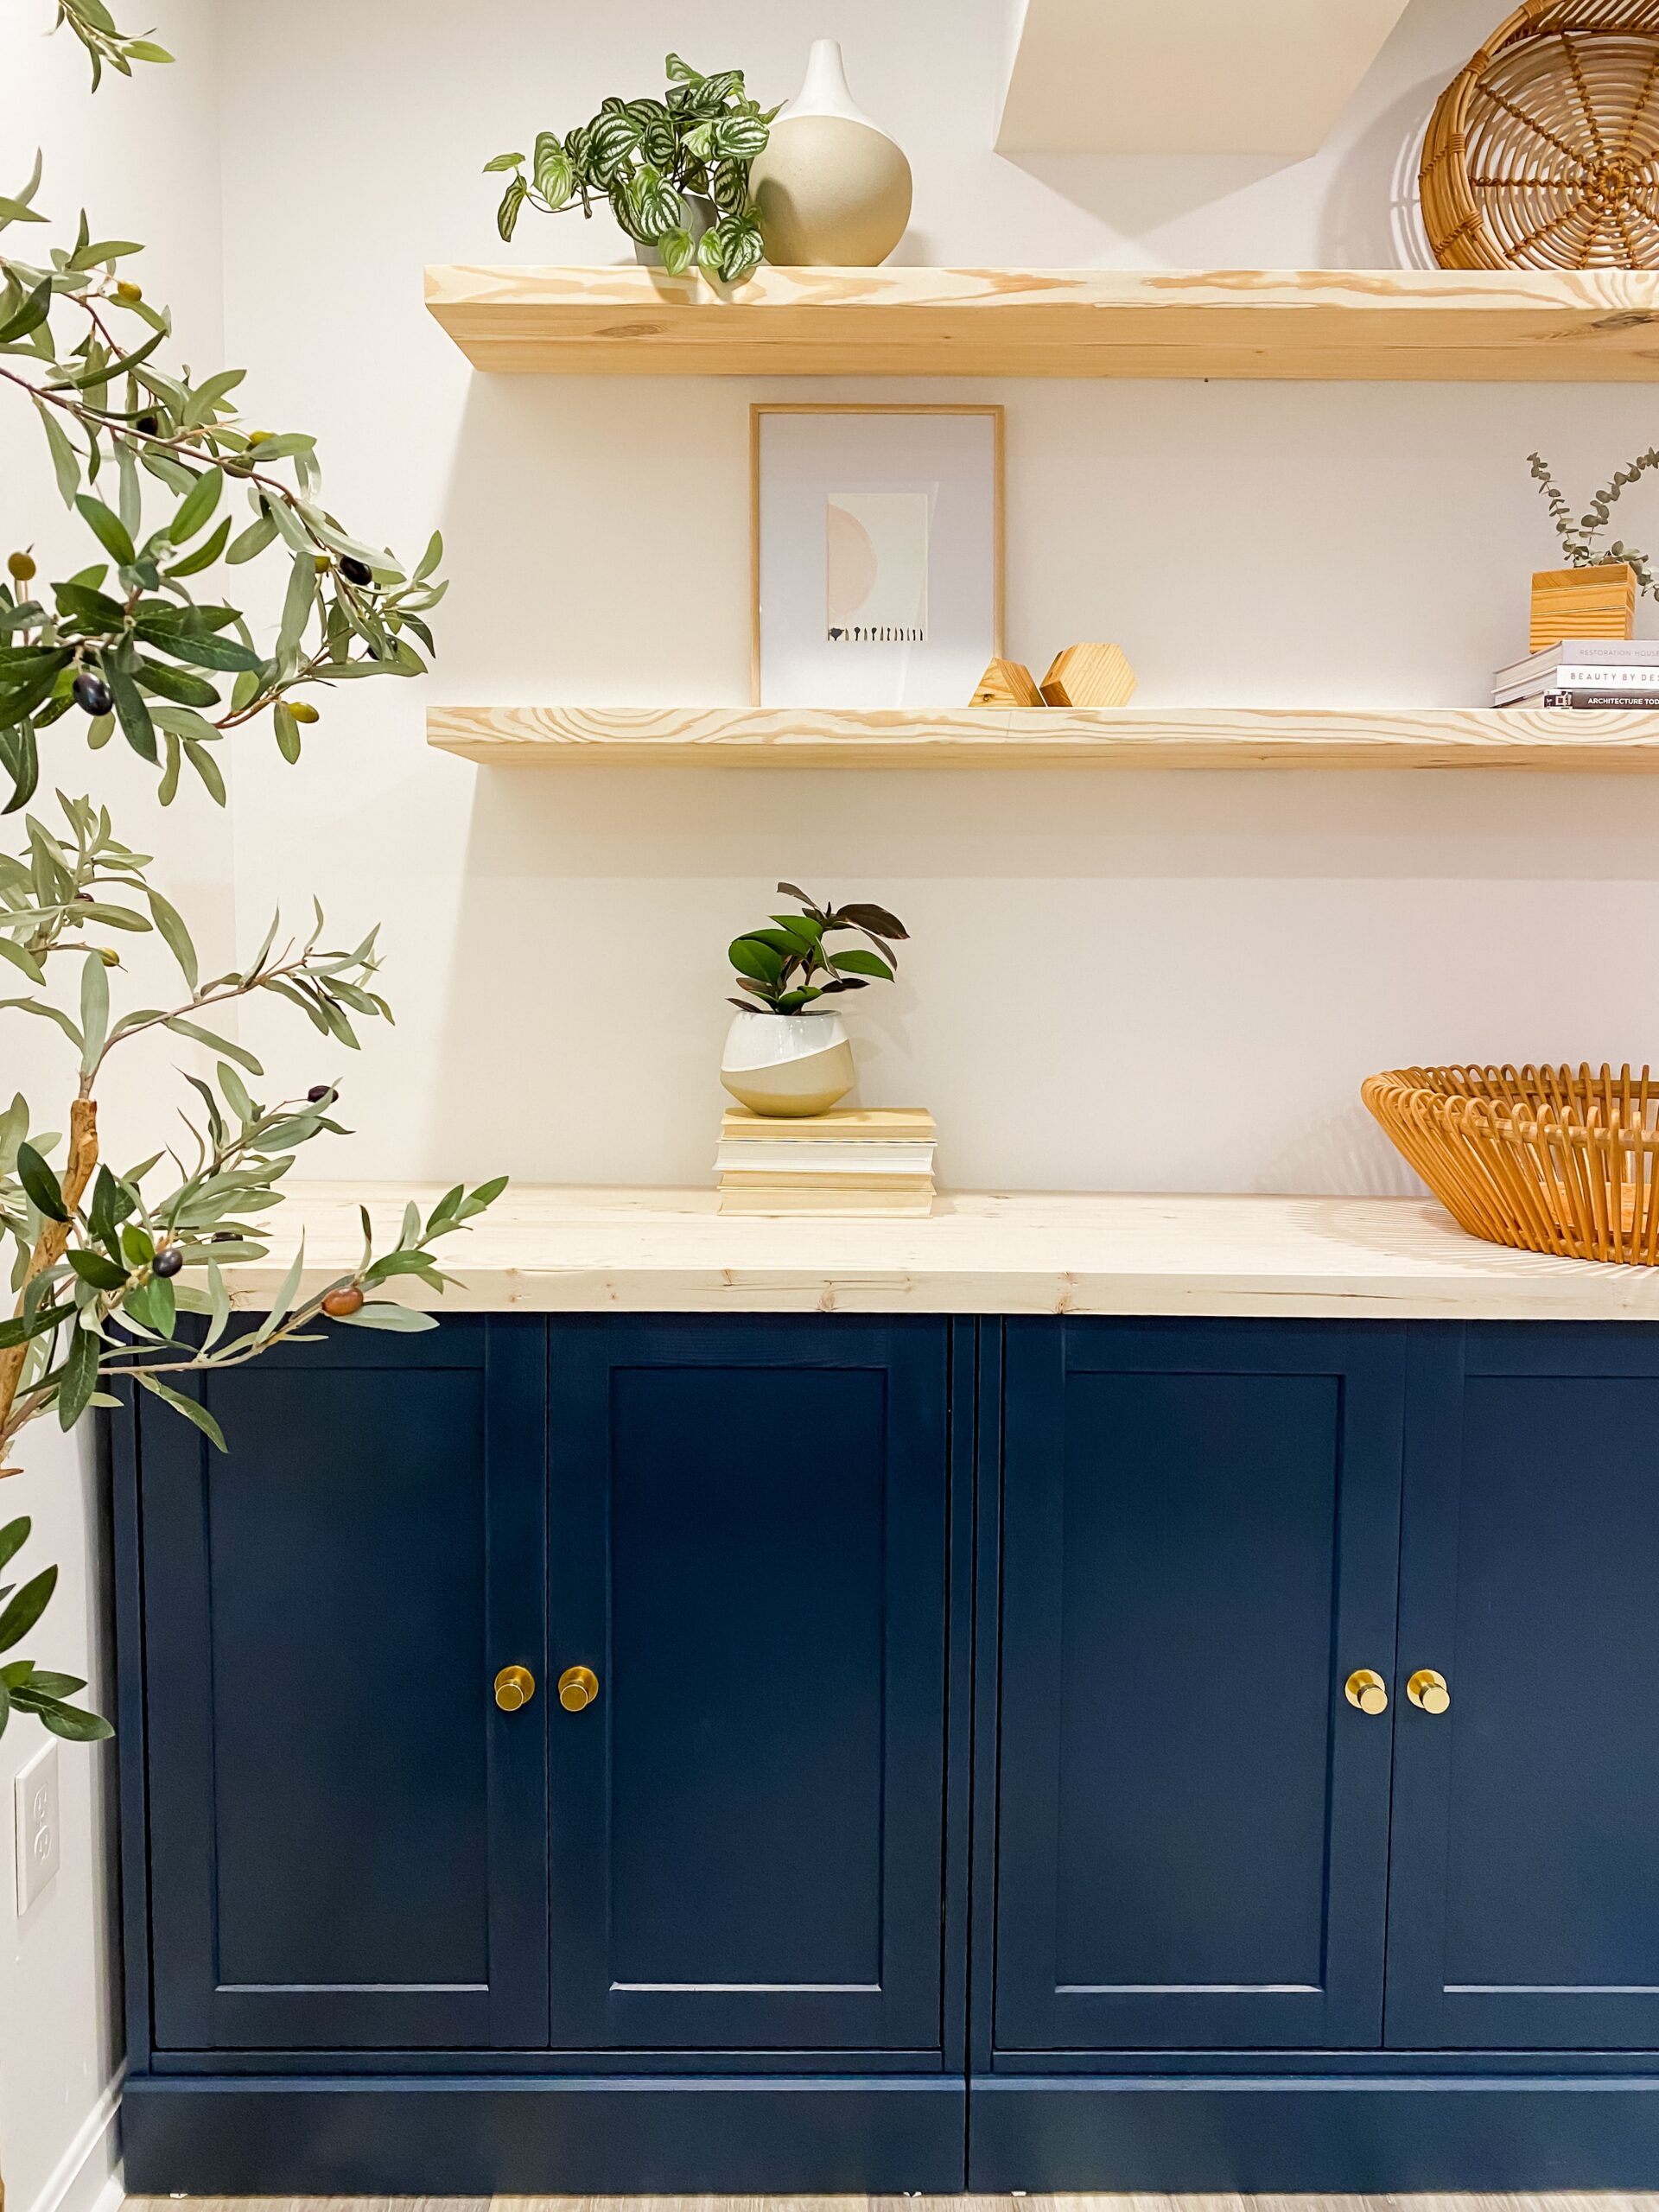
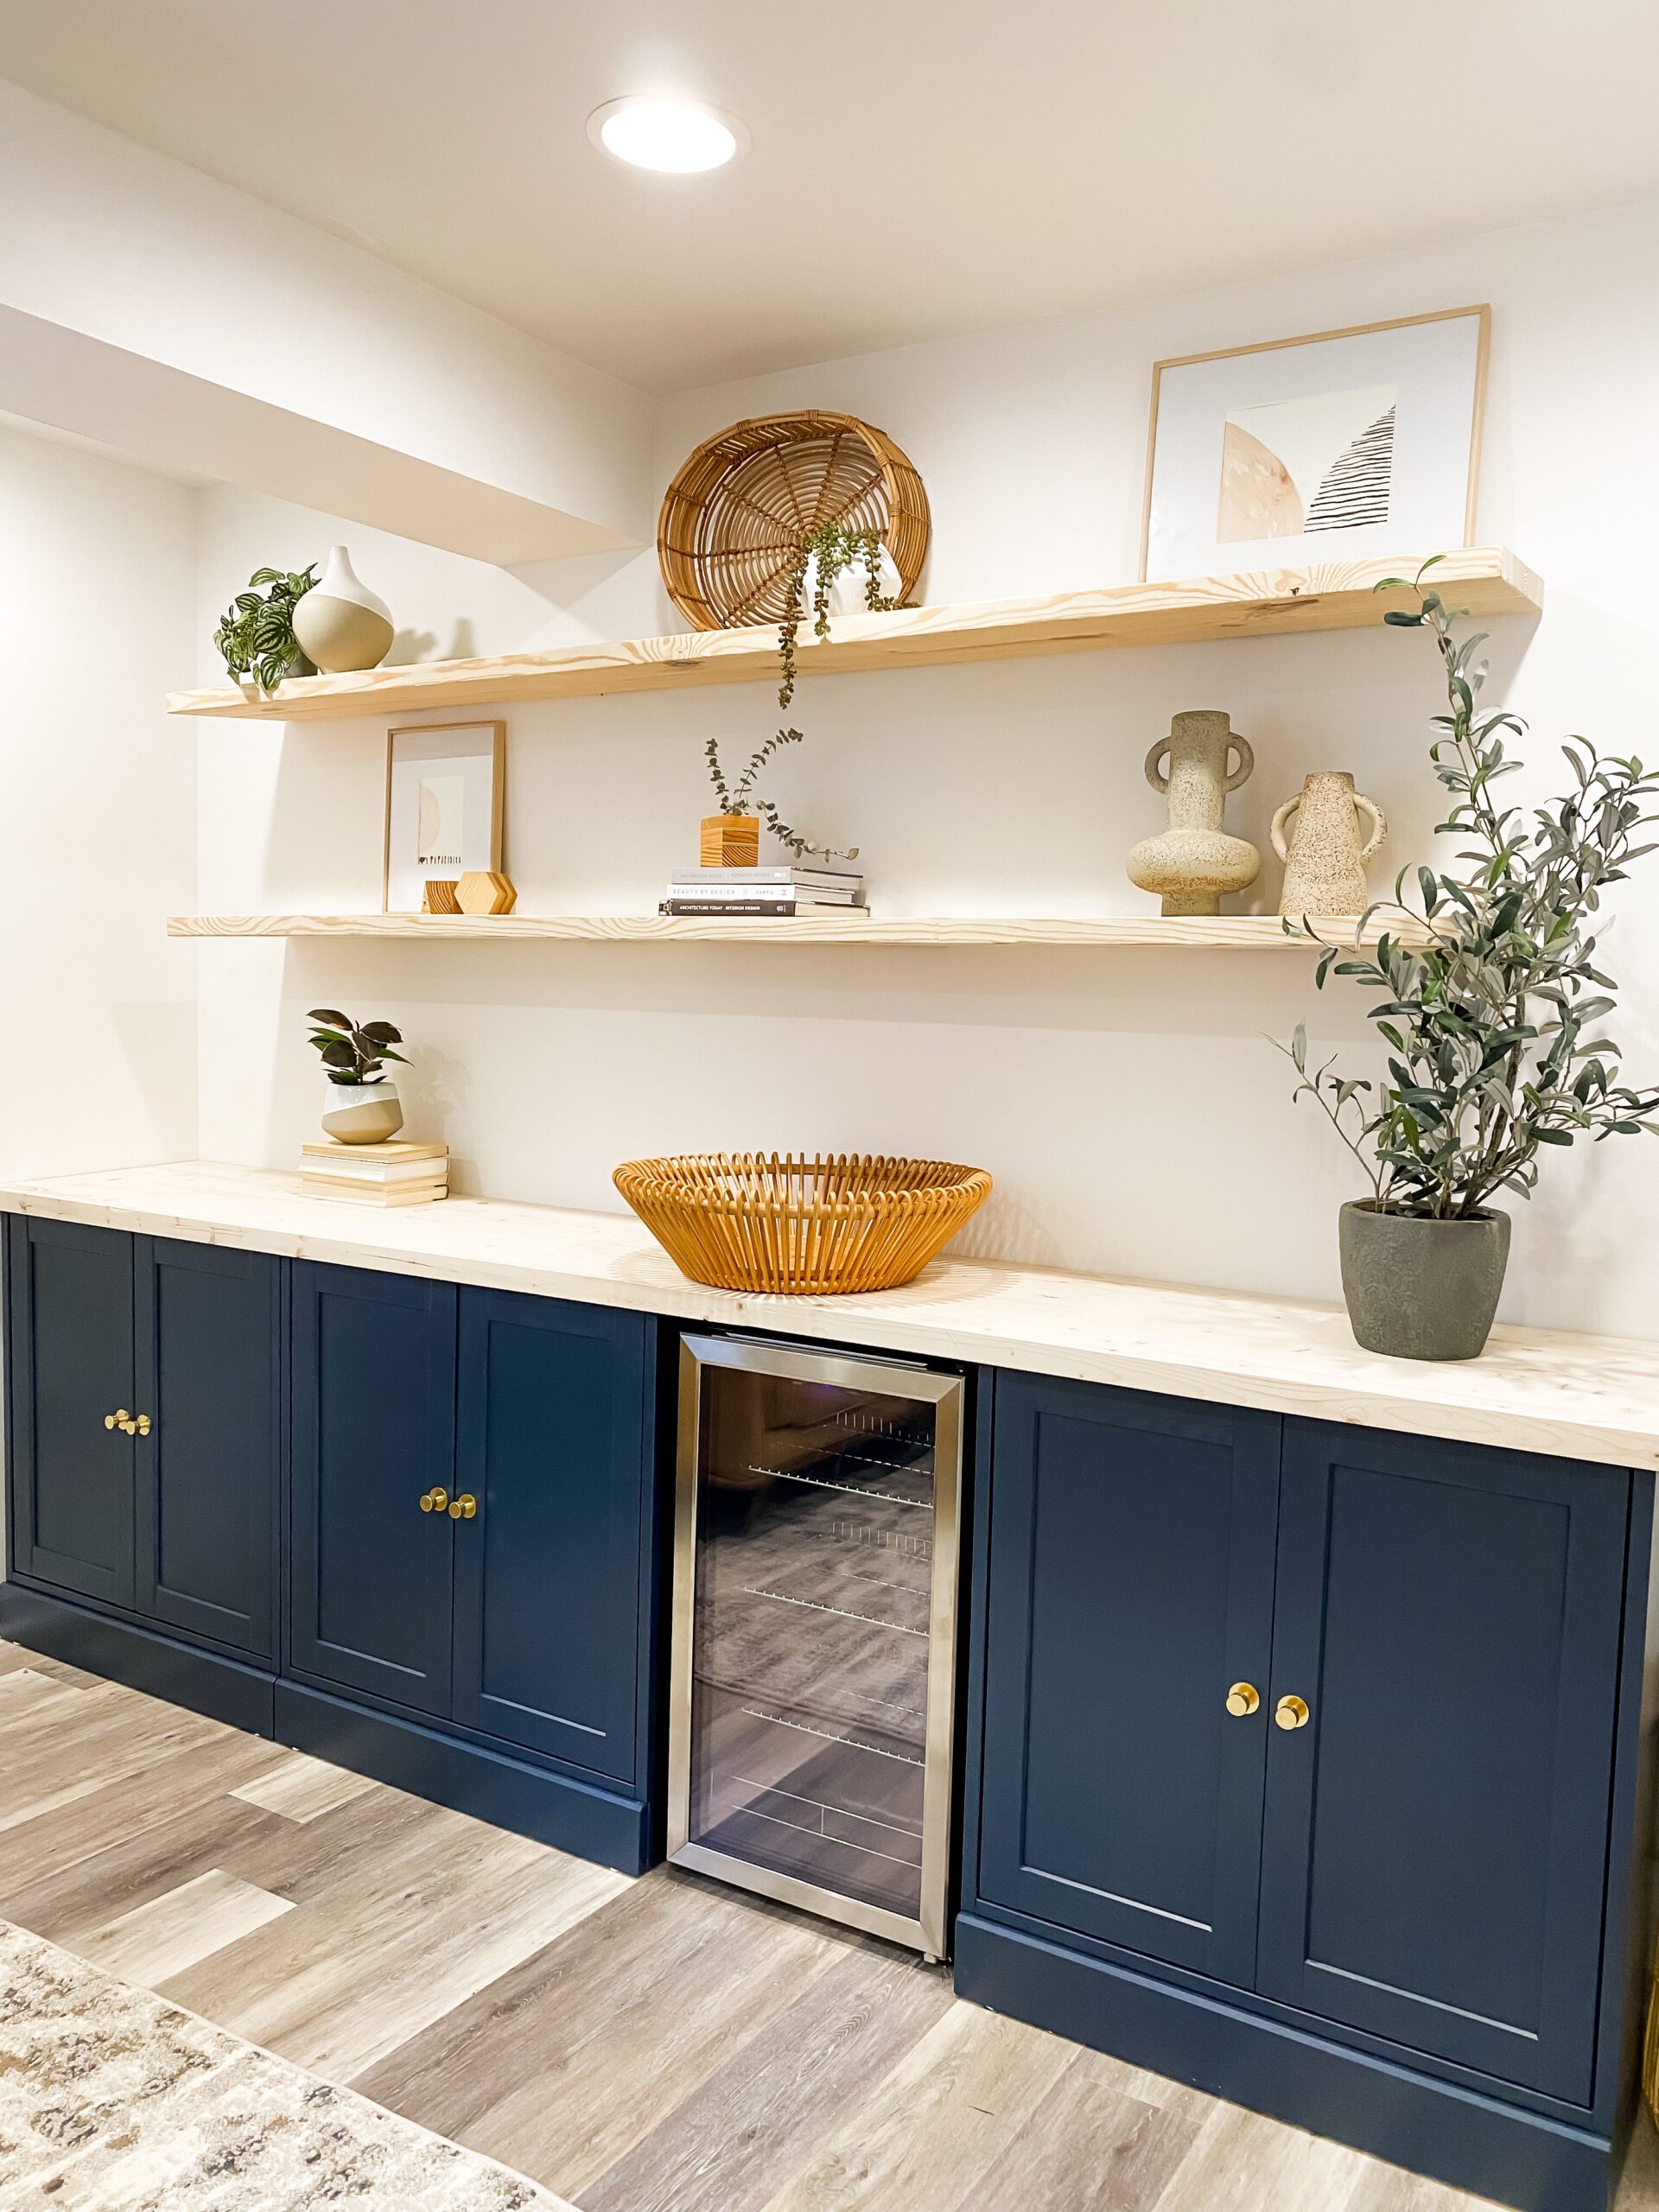
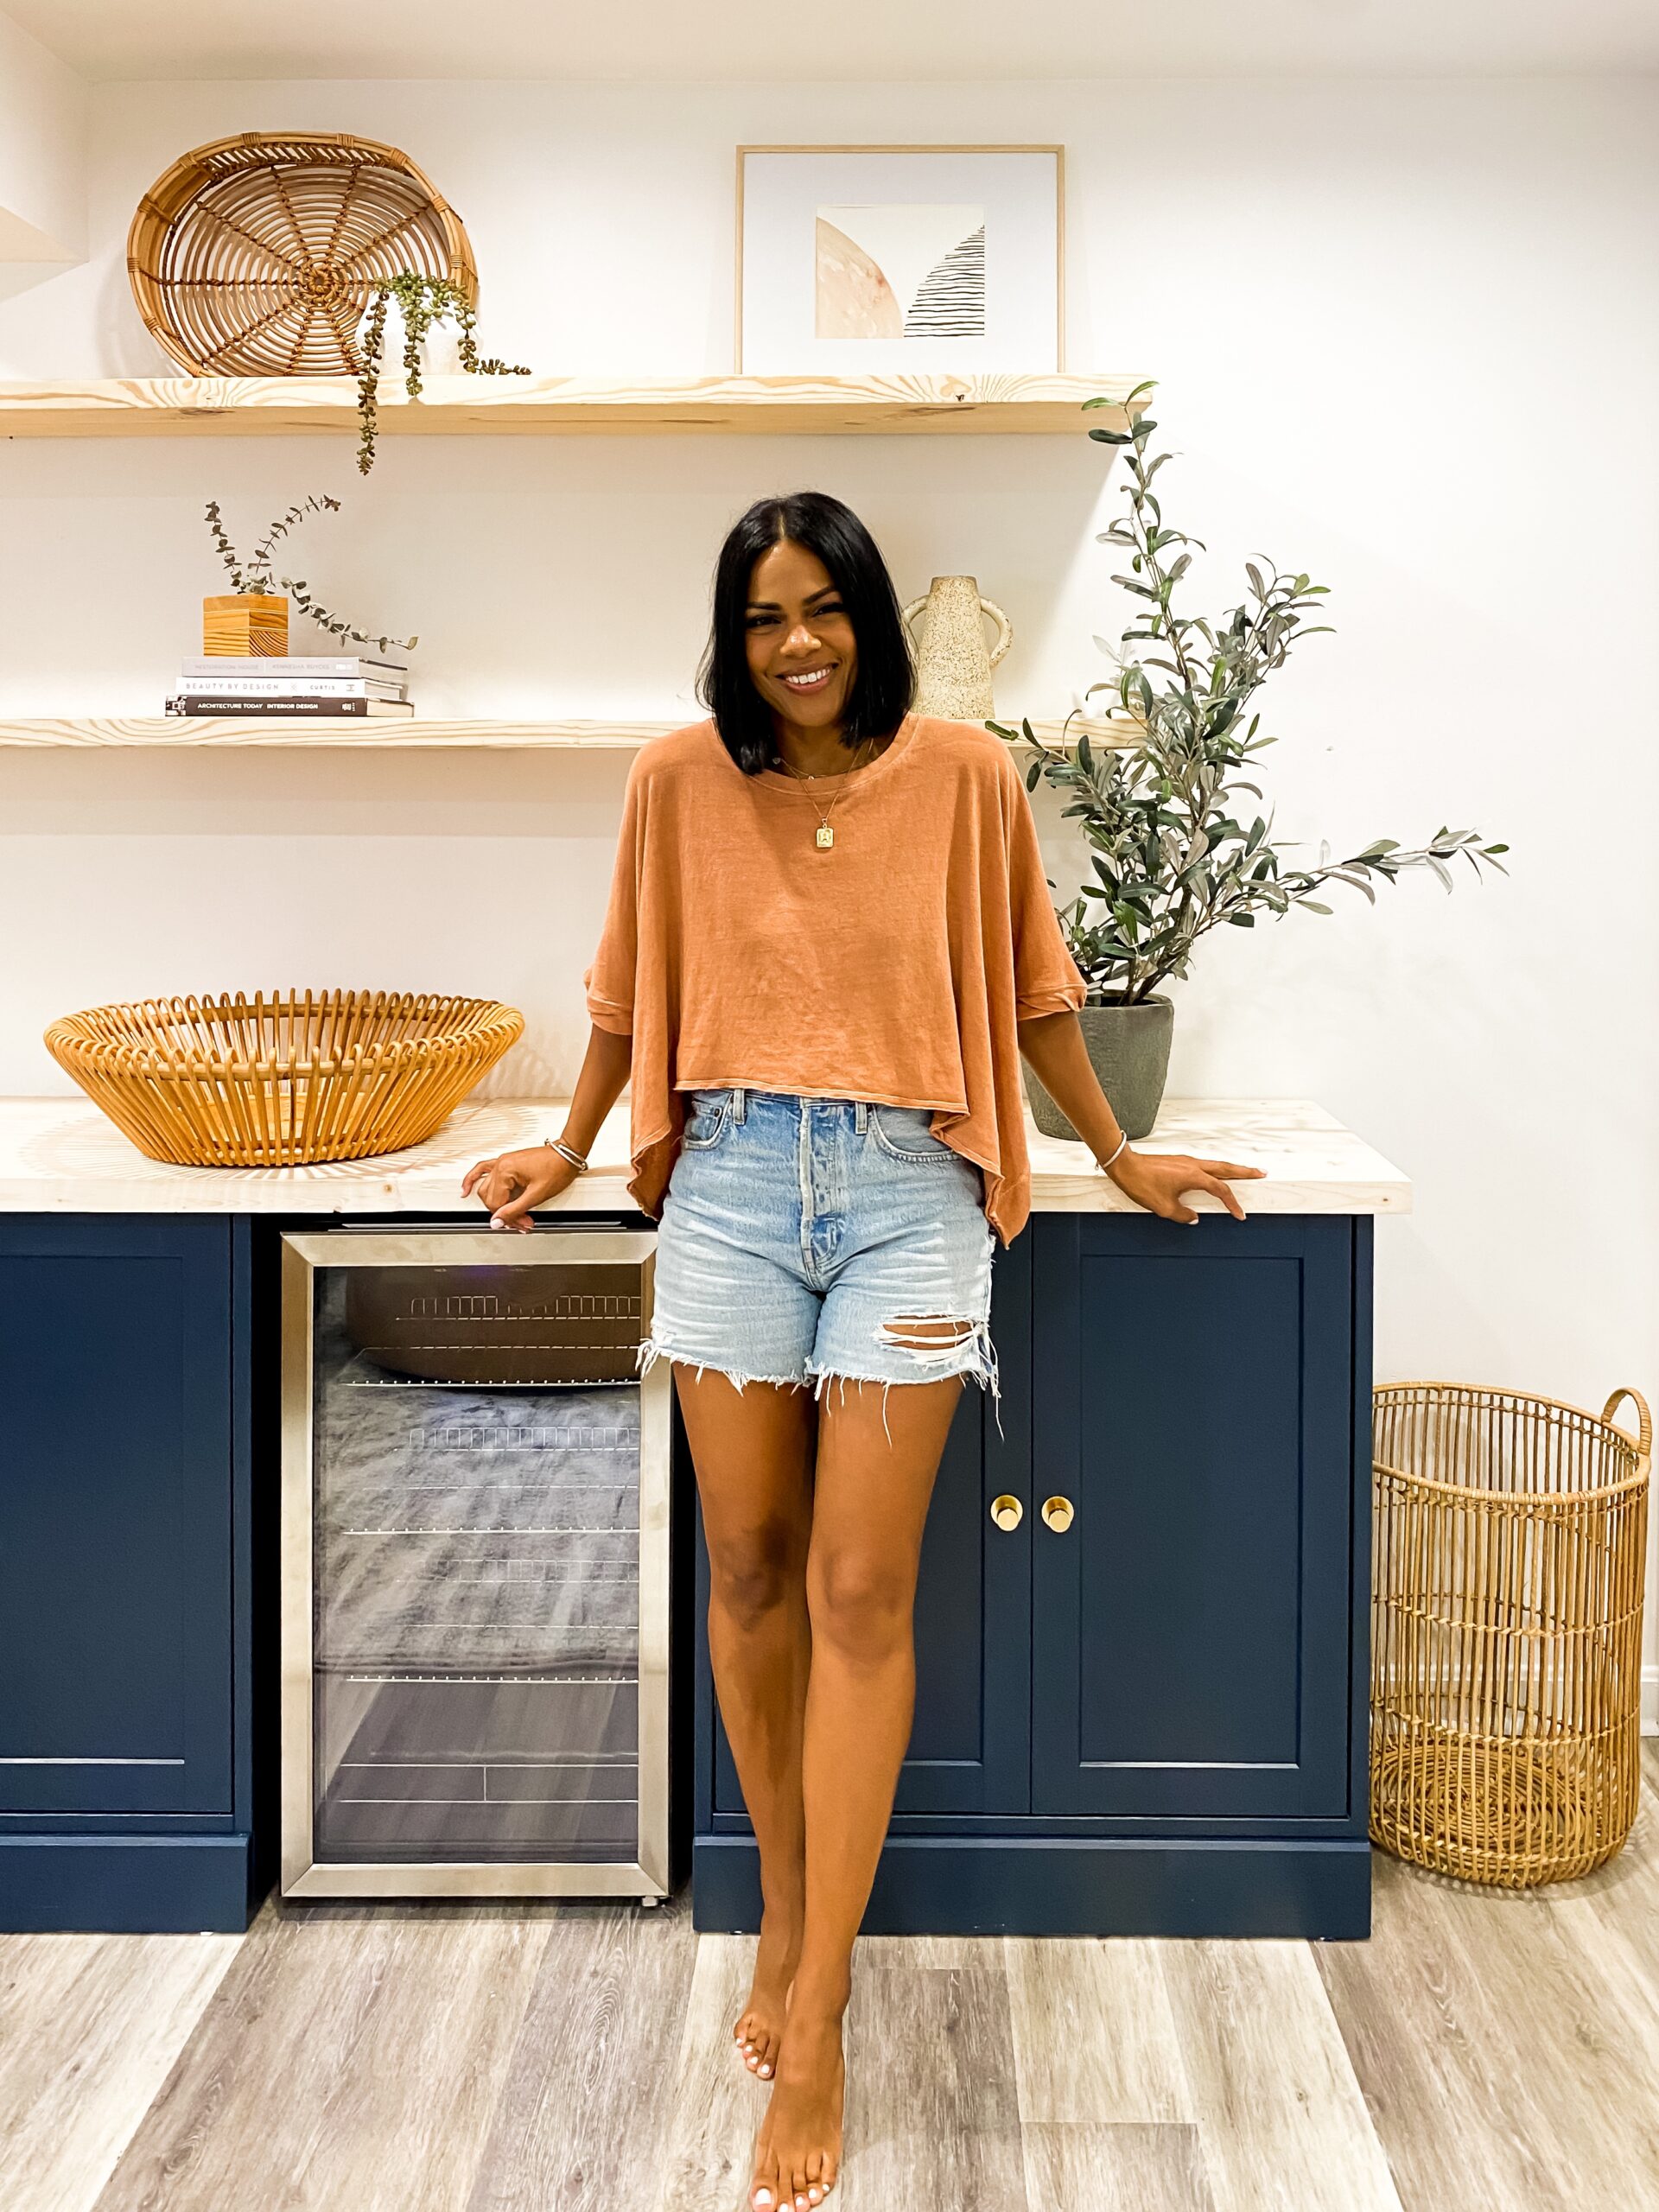
To finish the look, I added a few decorative items to the shelf, moved our sofa and ottoman from the other side of the basement and popped in a rug from Target.  I love the way it turned out!  It might be my favorite project to date!

What do you think??

Thanks for being here, and be sure to follow me on instagram and subscribe below so you never miss a thing!

PRODUCTS:


Filed Under: Home, Lifestyle, Style, Uncategorized Tagged With: basement update, diy bar, diy basement

Primary Sidebar

Latest Posts

What to Wear for Valentine’s Day… kind of!

How to Layer for Skiing or Snowboarding – from a Novice!

HONEY LAVENDER SIMPLE SYRUP

Last Minute Gifts in Time for Christmas!

Archives

Categories

Footer Widget Header

SUBSCRIBE

Join Anna's List!

Footer

  • Email
  • Instagram

The Links

  • About
  • Home
  • Contact

Categories

  • Beauty
  • Lifestyle
  • Faith
  • Wellness
A vessel sharing positivity through beauty, wellness, and personal style.
I don’t know about you, but something about fres I don’t know about you, but something about fresh fruit in a bowl, simple florals and football as white noise on a Sunday brings me joy. What’s bringing you joy today? Also, can you find what’s missing in this video? 😆 Buying a Starbucks for the first 5 to get it right😂. Happy Friday!
Y’all finalllyyy!!! There’s no way some of us Y’all finalllyyy!!! There’s no way some of us can get to @shanidarden’s spa in Beverly Hills for her Signature Facial once a month (let’s be real- I live in Ohio 🫠) but she brought home the next best thing for us!!!   
  
This is the at-home version of the peel I had in her spa, and I absolutely had to pause for a moment of real gratitude that we get to do this whenever we want that glow 🙌🏾 Let’s gooo!!!! It’s two parts and comes with 8 treatments that you can do 1-2 times a month.  Let me tell you- it’s a 10/10! 🙌🏾 See more in my stories! #ShaniDardenPartner @sephora
BRECKENRIDGE! Our first mountain trip as a family BRECKENRIDGE! Our first mountain trip as a family and it did not disappoint!! This was a bucket list item for us and we had the time of our lives.  Have you taken a trip to the mountains as a family? I think it’s one to put on your list, if you haven’t! I really dislike being cold but if you dress right, you’ll be toasty and dry the whole time :) If you need some tips for dressing while skiing or snowboarding, I have a bunch on the blog. I sourced most of the items I wore while snowboarding for warmth and comfort 🙌🏾🏂⛷️❄️🎿🚡  


Travel tips, Snowboarding, family travel, skiing, what to wear in the snow, traveling while Black, safe places for Black travel, Black friendly travel spots, Christmas travel, destination Christmas, snowboarding for beginners, where to go snowboarding
HOW I TAKE CARE OF MY SKIN: It’s not just skinc HOW I TAKE CARE OF MY SKIN: 
It’s not just skincare- I also make my mental well being a priority, get plenty of sleep, drink lots of water and take care of my gut- it all affects our skin. Every single night, I properly cleanse my skin and sleep on my back. And every single morning I take @seed, my DS-01® Daily Synbiotic, on an empty stomach. Keeping it next to my bed is super helpful! #seedpartner #accountable See stories for more, and use my code ANNAMAE15 for 15% off your first order of Seed.
If you’re a lyric listener…. 40 oz of water, d If you’re a lyric listener…. 40 oz of water, duh😂 Loving every single one of these pieces from the Good American capsule at @evereveofficial ! Can’t wait to style them with my other things for a ton of variations and outfit possibilities! Which one is your favorite item? Everything’s in my stories and LTK for you :)
#EverevePartner
Did you know that brown eyes pop with a little gre Did you know that brown eyes pop with a little green, blue or purple? All you need a is a liner in any of those hues- subtle or bright!
Two completely different styles of dresses from @a Two completely different styles of dresses from @anthropologie: A classic full length shirt dress and a feminine floral - I love finding a variety of ways to style them- sweater, chambray, denim, belted… it’s fun to play:) Head to stories or my LTK for deets! Are you more into minimalist classics, or flowy florals… or both? @Anthropologie #ad #myanthropologie 
 
#liketkit  
@shop.ltk 
https://liketk.it/3ZCQb
What to wear for Valentine’s Day! Valentine’s What to wear for Valentine’s Day! Valentine’s Day outfits! Or for any date night, really :) Still deciding on the short dress! Which outfit spoke to you the most? Or do I need to do a streaming and sweats one for some of you?! Everything’s from @nordstrom - love them! #nordstrom #NordstromPartner  
 
#liketkit #LTKstyletip #LTKSeasonal 
@shop.ltk 
https://liketk.it/3Zser
Literally filmed the most epic… video of my ligh Literally filmed the most epic… video of my light😂😂 here’s to do overs! It’s a smoky eye tutorial that’s actually easy to do- use an eyeshadow primer before starting!
Oh, how I love this man. Rob Groves, you are my be Oh, how I love this man. Rob Groves, you are my bestie, my cheerleader, my challenger, my partner in this life.   
  
Gahhhh we have raised four men, lived in four states, made mistakes, fallen down, dusted ourselves off and kept on going.  We have sought the Lord together, and we have done what He said - even when it was hard.   
  
Thank you for championing for me when I had no champion in sight. For seeing more in me than what I saw in myself.  For making me laugh even when I was mad. For seeking to connect even when I was being a pain in the ass.  For seeing how to change and then actually doing it. For being a person of character and integrity when no one is watching.   
  
Well, actually… I am watching. I see you. And I love what I see.   
  
Happy 24 years to you and me, Rob G! Let’s see what other adventures we can get into. And for me, that does not include crocs. It DOES, however, include whistling by yours truly, terrible dancing because the gene missed me, and lots of awkward encounters between me and other humans, just for your entertainment. 😂 I love and like you so much!
Follow on Instagram

Copyright © 2023 · Anna Mae Groves · Blog Design by Little Blue Deer
Privacy Policy