Hello!
My Name is Anna
Thank you for being here
explore the blog
Join me on ltk
Follow along on instagram
Deck Update!
June 28, 2022
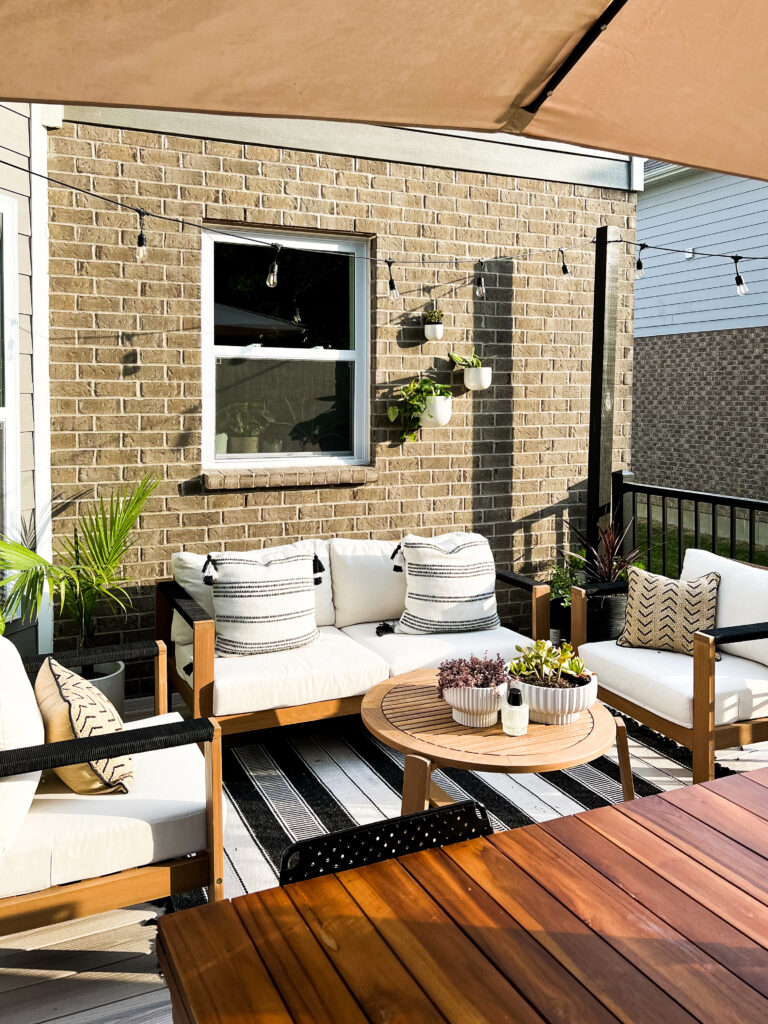
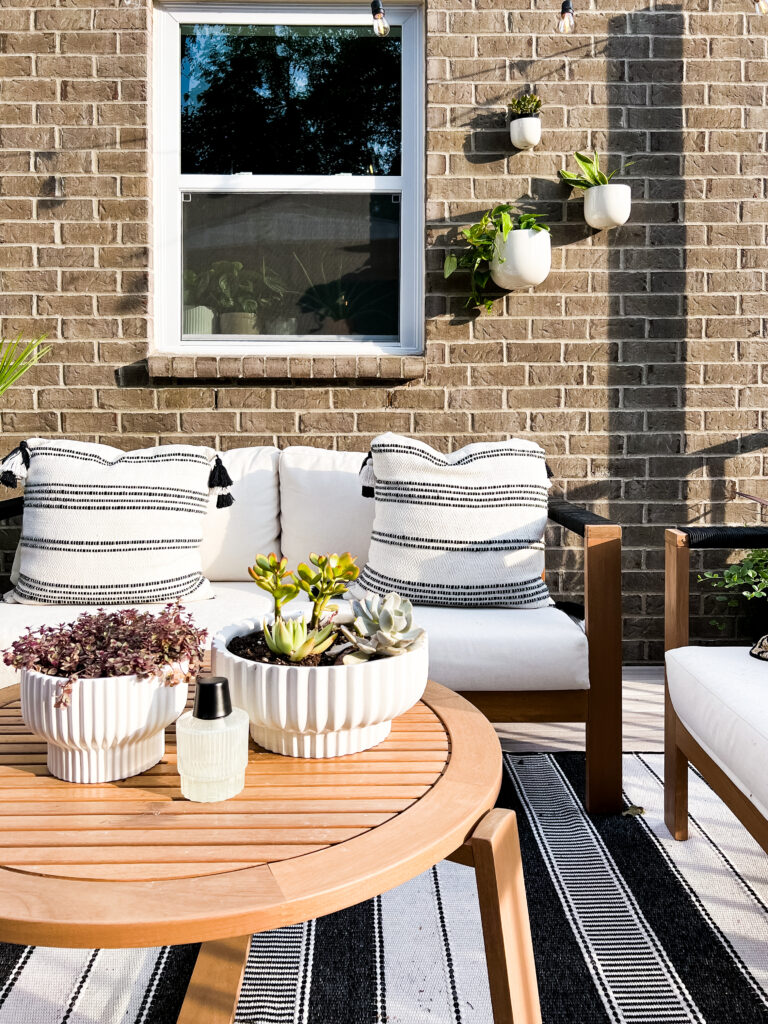

Last week on Instagram I shared the behind-the-scenes and full reveal of our back deck and decor, including a cool DIY planter/string light pole combo. Gah! I love it so much. You can see the DIY planter process in action here.
When we moved in, we had a teeny deck. In fact, it was really just a small unstained wooden platform with stairs leading down to the grass. As a result, I made our front porch a little outdoor oasis. It came in handy during the pandemic stay-at-home orders. A little “outdoor living room,” if you will! See my most recent refresh here.
But my real dream was to have a nice deck out back. There’s a pretty tree line and the sounds of birds chirping! I wanted a nice place to spend my morning quiet time in the spring and summer. I also longed for a place to entertain!
While I really enjoy doing DIY, a deck was something that I didn’t feel equipped to tackle. I wanted this to be done right, and I wanted it to be safe! So, we found a contractor that our neighbor used, and I started shopping for the materials I wanted.
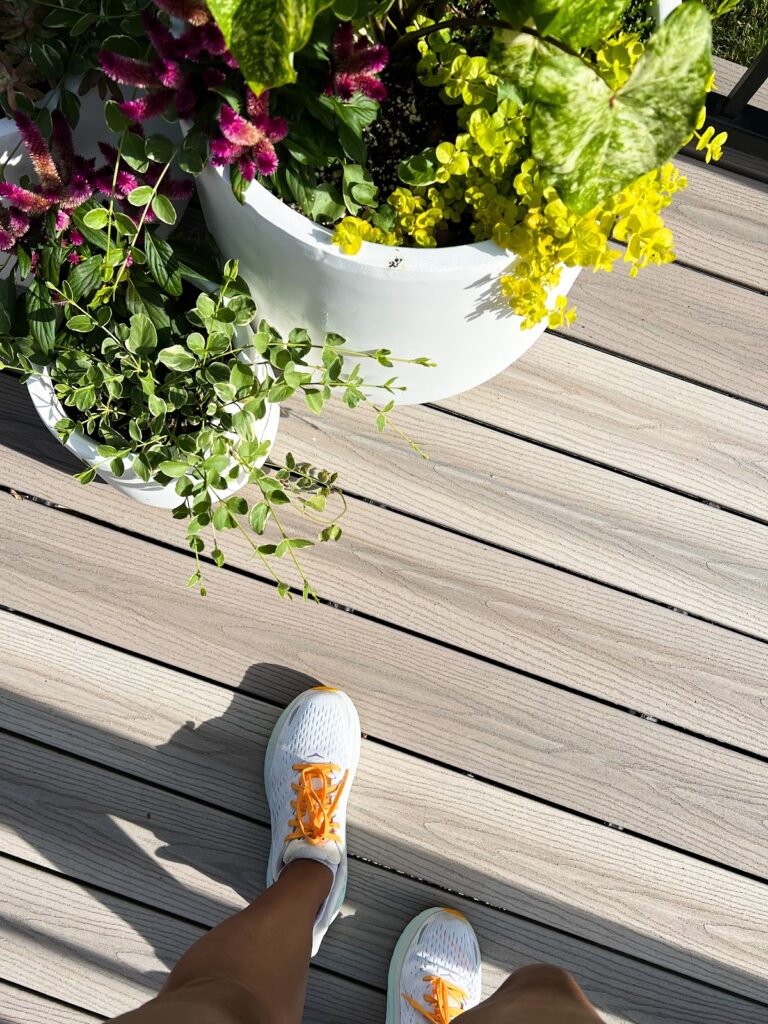
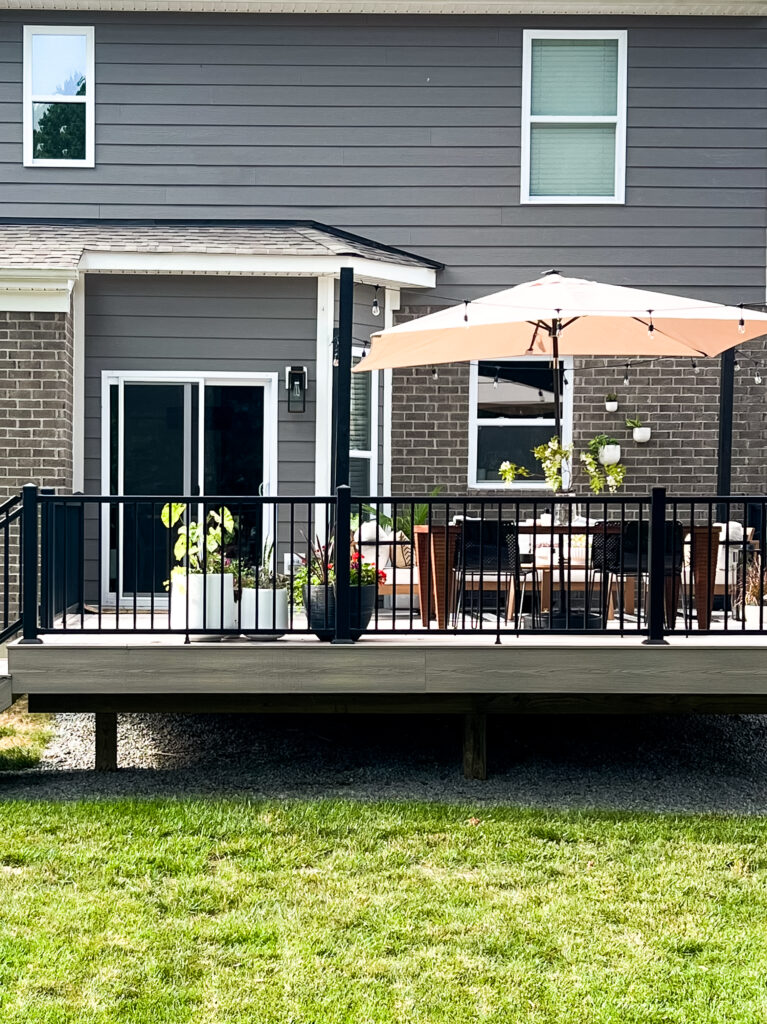
Ultimately I went with Fiberon in the color “Cabana.” It is a nice medium-toned gray color that pairs nicely with our cool-toned brick, gray siding, and white trim. I purchased mine from McCabe Lumber here in Ohio but I believe the brand can be found at many local and national chains.
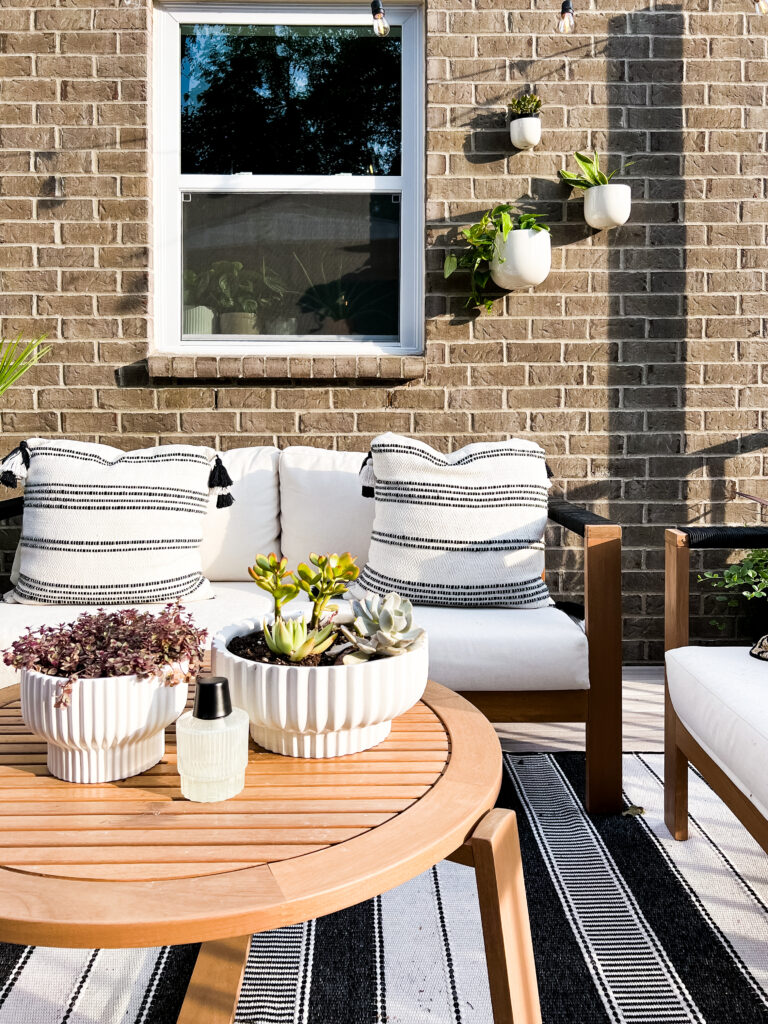
After completing the deck, the first thing I did was order seating to create the living room portion. This seating set is from Walmart, believe it or not! The covers are treated, and removable for washing. After the first couple of washes, I use Scotchguard for continued protection. All the details and the planters on that side are here in this blog post.
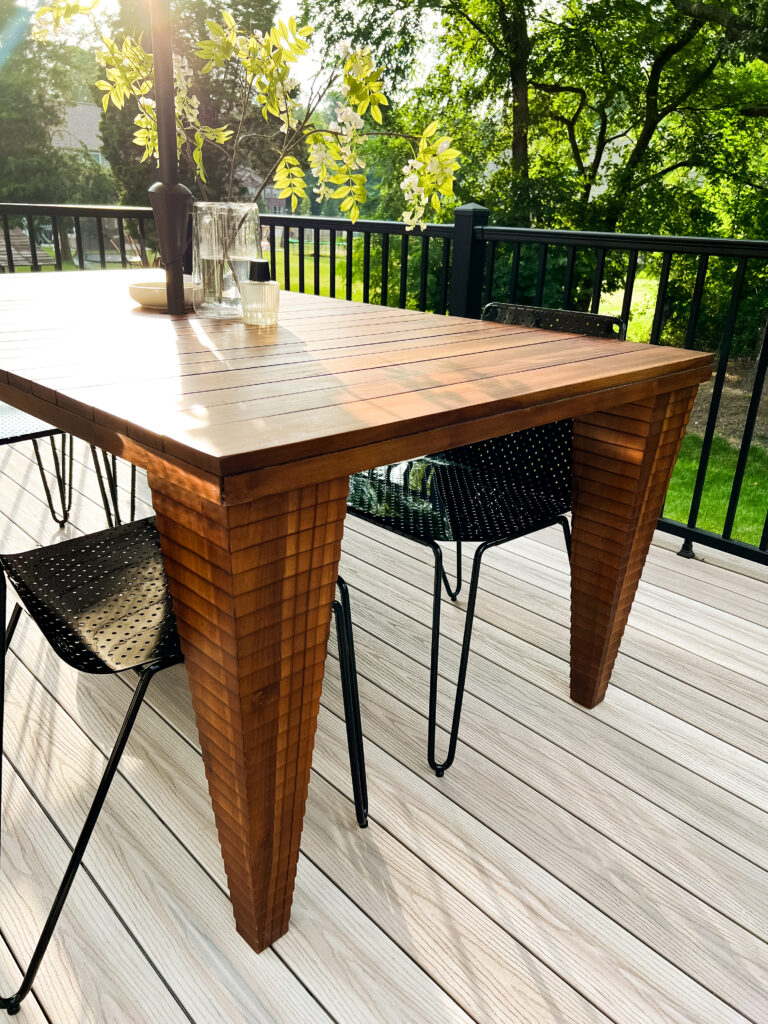
The next thing I did was purchase an outdoor dining table. I got mine from cb2. I love the color, and the contrast of the black metal chairs is so nice against the gray deck.
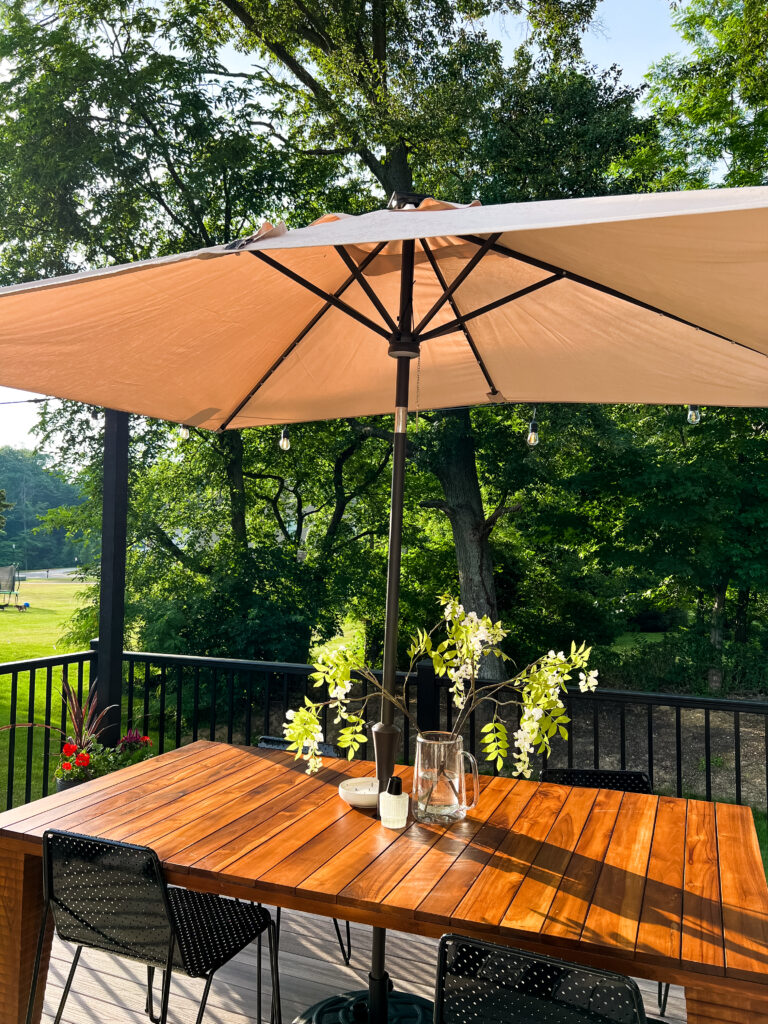

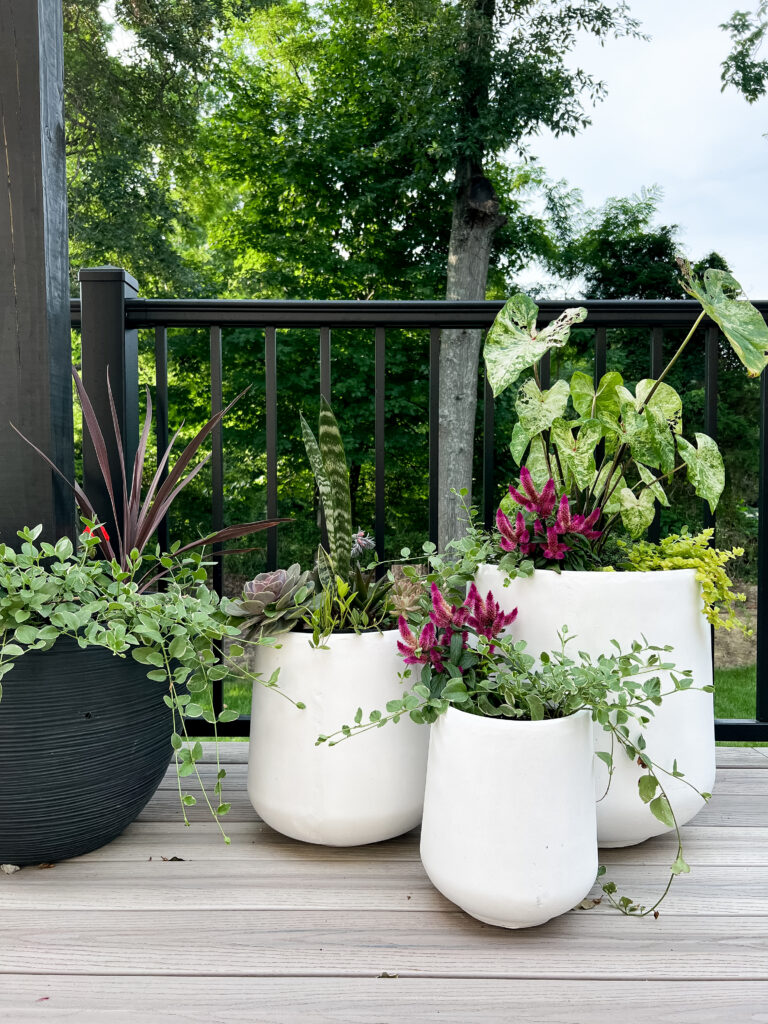
For the umbrella, new light fixture and set of three white planters, I ordered from Wayfair. The umbrella is solar powered for lighting, although I honestly thought the lights would be brighter and I don’t use them. The thing I like the most is the shape and size of the umbrella. It is a large rectangle which is perfect for the table. I also found another identical one on Amazon, and they also had identical planters on Amazon, too!
We also did our own DIY planter/light pole project, and you can see details below.
Here are some FAQs from the question box I posted in stories last week!
How large is your deck?
Our deck is pretty big! 16 x 21 feet. Room for the big table, seating area, bbq, and there’s still that blank area where you may have seen me do a workout on in stories!
What was the material you used?
We used Fiberon in the color “Cabana.” Online it reads more brown but in real life it is more gray to me. Order a few samples so you know for sure. For the railing I chose one from the lumber place, but the contractor was able to find a less expensive version from Preferred Aluminum Railing. We used 3.5’ x 3.’ posts and 6’ length rails.
How much did your deck cost?
With labor and materials, our deck total was approximately $12,000. It is an investment but it’s one I know we will get a lot of use out of, plus helps with the value of the home.
Does the decking material get hot?
This was funny because it was not something I considered and I had just experienced the answer moments before seeing this question. It was 90 degrees and the deck was HOT! It’s not a deal-breaker for me, but yes. The rug under the seating and the umbrella really help!
Where’d you get your table?
The table is an 80” x 42” teak table from CB2 as well as the chairs.
Where are your small planters on the coffee table from?
Those and the ones on the wall are from Walmart, sourced in this post: https://annamaegroves.com/how-to-create-an-outdoor-oasis/
What plants did you use in the planters?
I used:
- Celosia
- Geranium
- Creeping Jenny
- Caladium
- Red Sensation Cordyline Shrub
Let’s see it at night!

Can I see a pic from the back yard?
How do you take care of things when it rains?
The furniture is all treated so I usually just flip the cushions before the rain and then brush everything off when the rain stops. I also scotchguard fabrics after a couple of washes. I plan to get covers for everything! For the Planters, we will more than likely move them into the garage during the winter.
Give me steps for the DIY planter/string light posts!
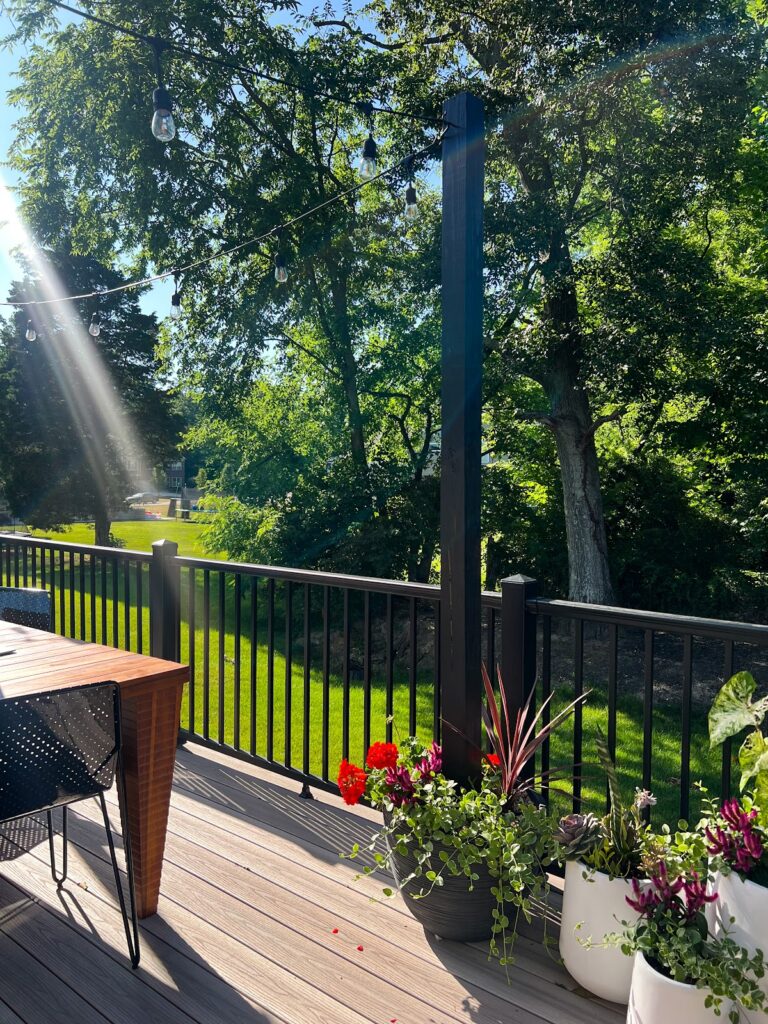
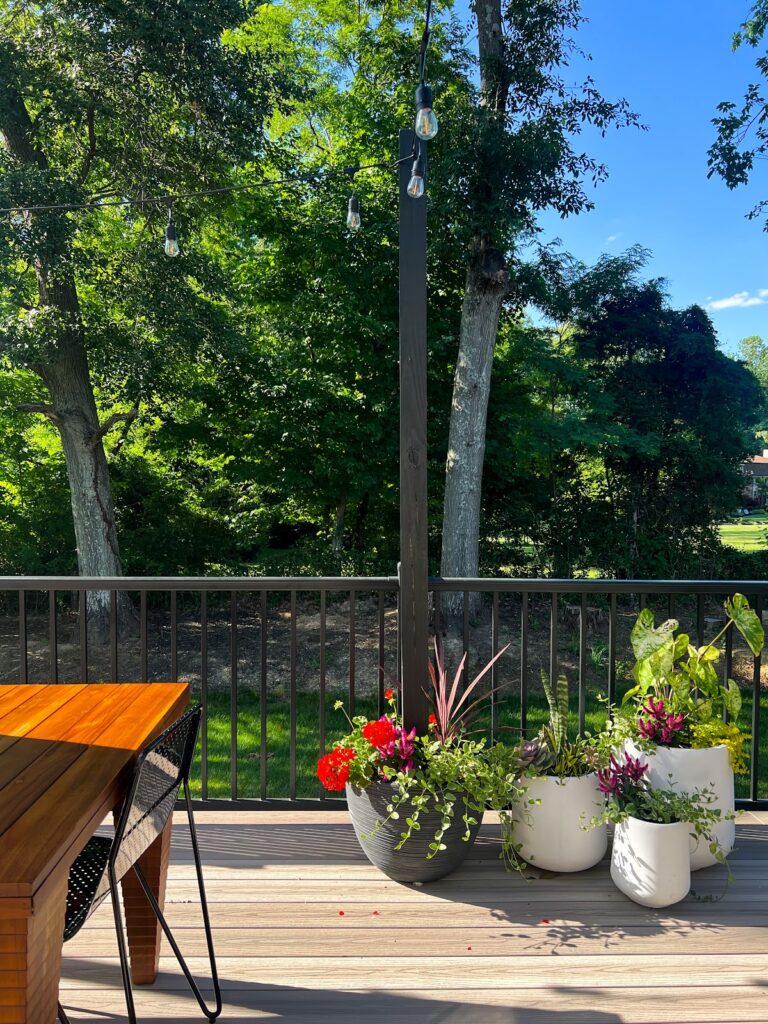
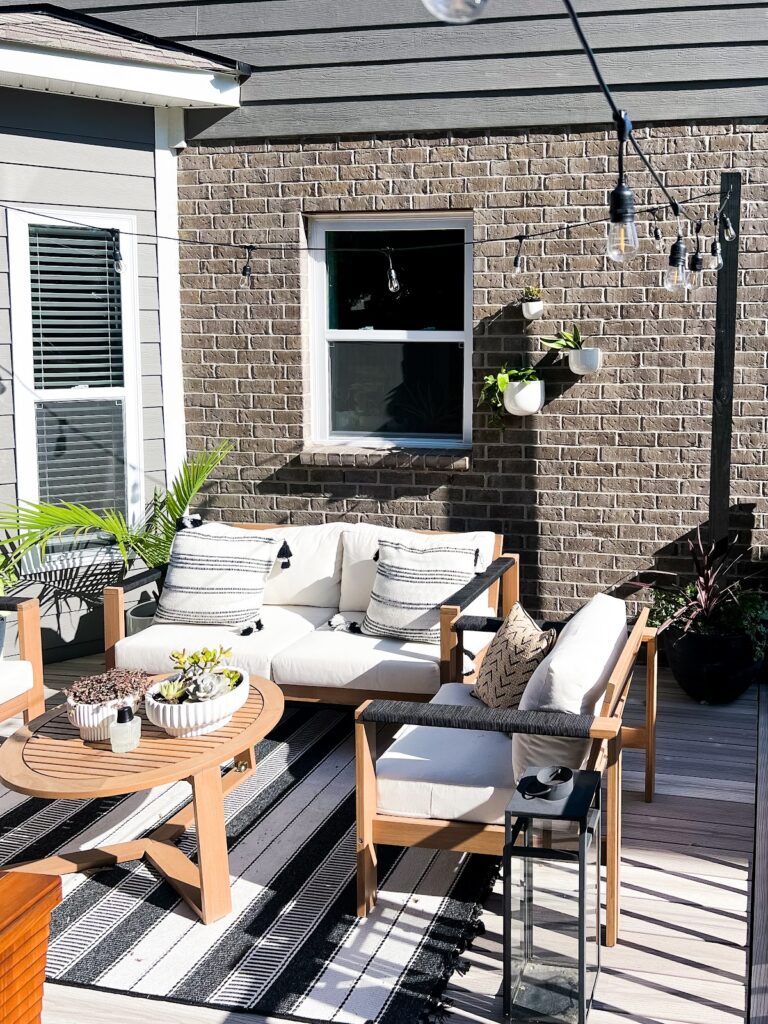
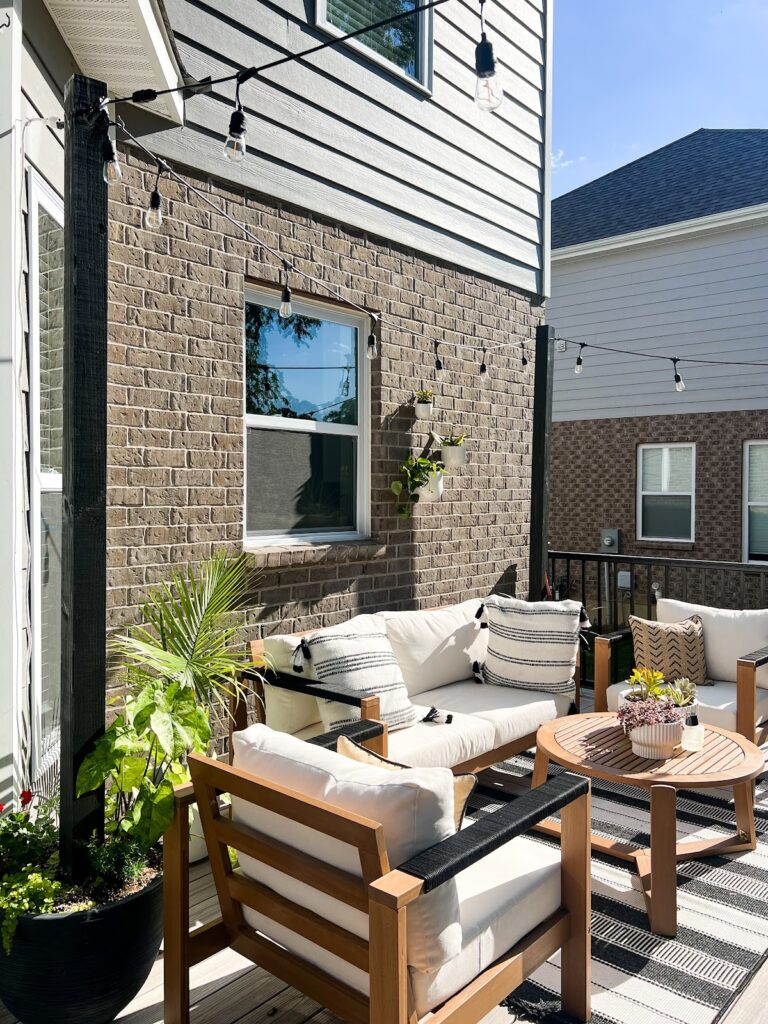

For the DIY planters, I found a couple of great tutorials on Pinterest (Here and Here) where I got all of my tips from. For mine, I wanted a sleek look, so I got my 19” black planters from Lowes. In retrospect, I would have gone for planters with a wider base because they can get a little tipsy. I put small rocks under the sides to keep them in place and it works great. But if you can, definitely look for containers with a wider base.
I got all of my ideas from these two Pinterest (Here and Here), but these are my steps:
MATERIALS:
- Planters (get a wide base planter! Mine are skinnier than I’d like!)
- 4×4 pressure treated 8 foot posts
- Quikrete (two 50 lb. bags per planter)
- Stain and sealer of your choice
- L brackets (2 per pole)
- Hooks (2 per pole)
- String Lights
- Wire cutter
- Liquid tape
- Outdoor extension cord
- Rocks for drainage
- Potting Soil
- Thriller, Filler and Spiller plants
- Level
- Drill and Drill bit (¼ inch or around there should do)
INSTRUCTIONS:
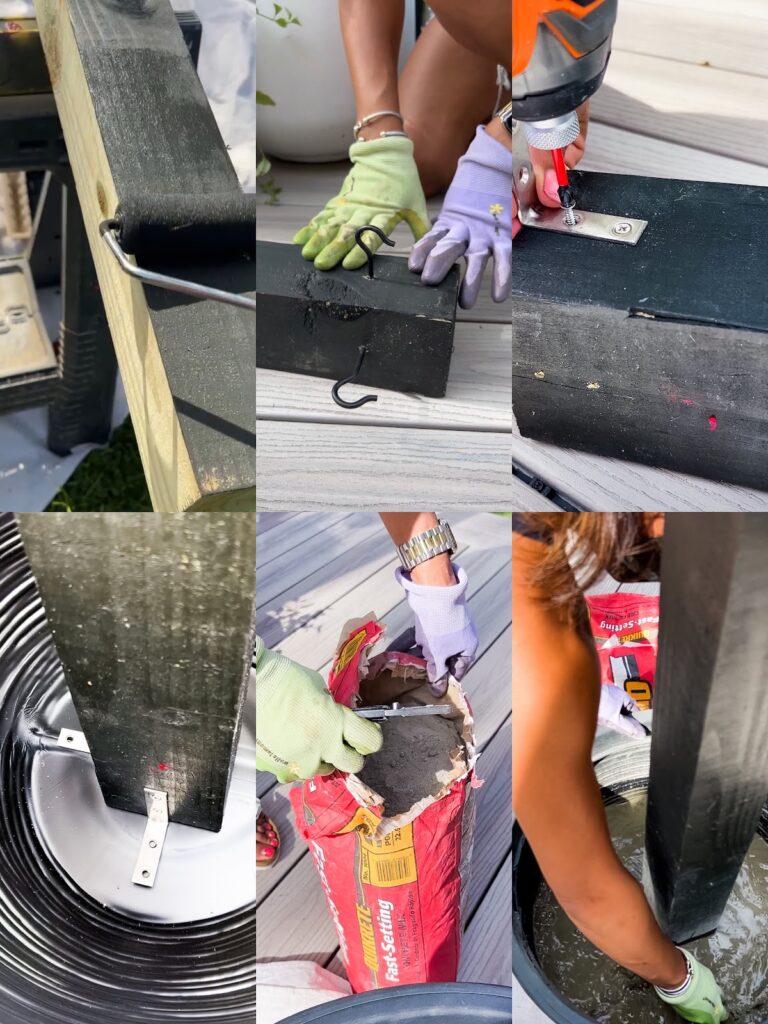
- Stain/seal your posts (do better than I did and get an outdoor stain lol)
- Drill a small pilot in the center of the post 4 inches from the top and add your hook. Repeat on the adjacent side.
- Screw in your L brackets on the bottom of the posts on two sides. This will allow some stability as you pour your Quikrete, yet you’ll still be able to move the posts to level them as you go. If you are doing this on your deck, use something underneath the planter to protect your deck in case the screws go through the bottom!
- Using a 50/50 mix of water and Quikrete, add about half your water into the container. Add one bag of Quikrete. You don’t have to mix it, but we did a little.
- As you mix, use your level on all sides of the post to make sure it is level. Add more water and the second bag of Quikete.
- Once the Quikrete is dry (ours only took about 30-40 minutes!) Drill your drainage holes just above the concrete line using a large drill bit. I added 4 holes.
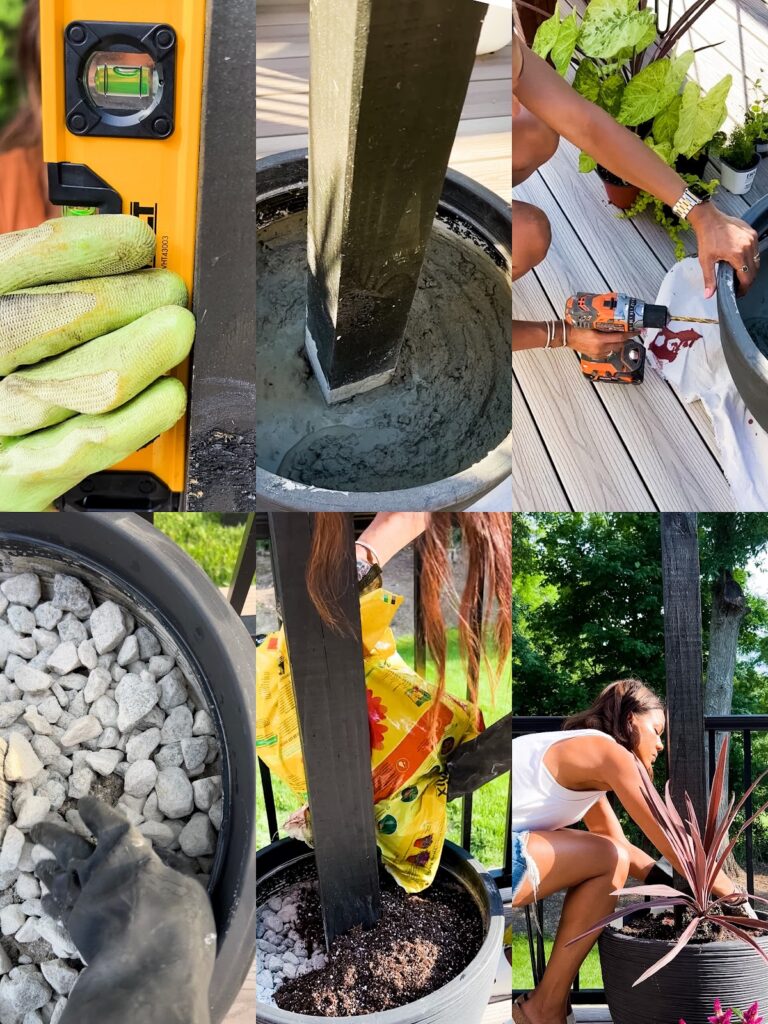
- Add a thin layer of rocks for extra drainage, and add your potting soil and plants!
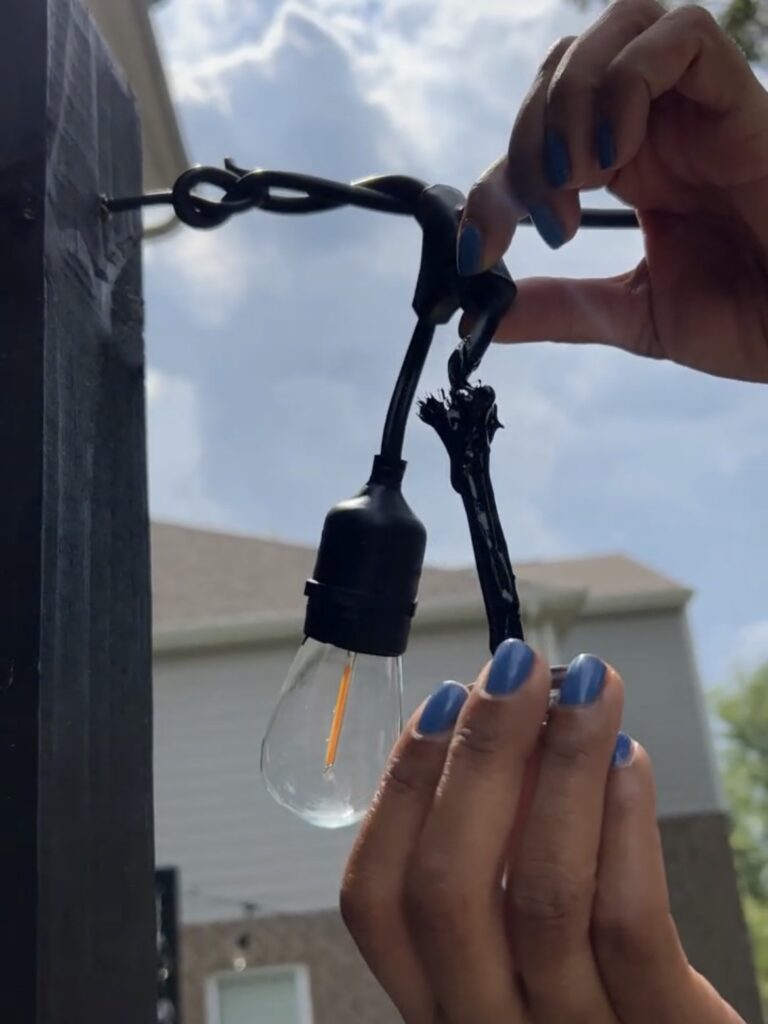
- Run your outdoor extension from the power source so that the female end lands near the top of your first post. If it reaches, you can loop it around the nearest hook, if not, attach your light string to the extension and loop it around the nearest hook. From there, string your lights, attaching more lights as needed!
- When you get to the end, if there are excess bulbs, unplug the lights and cut your cord at the appropriate spot, making sure there is enough room to string it through the final hook. Then use liquid tape to seal the cut end of the wire.

Final Tip:
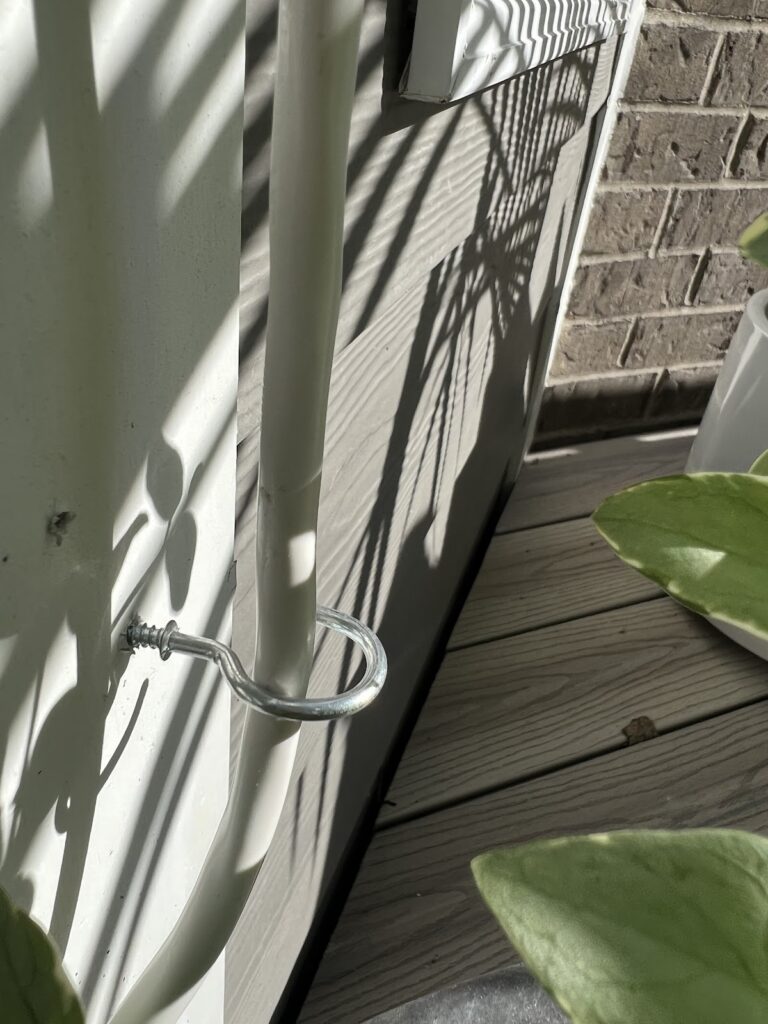
For the extension, I added hooks to the side of my house to pull them in and make them look a little neater.
I hope you enjoyed following along on our deck journey. Be sure to follow on Instagram, TikTok and LTK so you never miss a thing!
Share:
Categories:
A vessel sharing positivity through beauty, wellness, and personal style.
Website Design & Development by Garland Studios
Copyright © 2023 Anna Mae Groves