Hello!
My Name is Anna
Thank you for being here
explore the blog
Join me on ltk
Follow along on instagram
My Makeup Routine Lately
December 7, 2023

I am so excited to share this full makeup tutorial with you. Before we move on, I do have some affiliate links in this post, which means I can earn a small commission when you use them to make your purchases. Thanks for being here!
“Wait. You’re a makeup artist?”
I just found out that a lot of people don’t know that my background is in makeup artistry! If you are one of them, I can understand why. I don’t always talk about my professional history, mostly because all of the things I used to do vocationally are kind of second nature at this point, and have become a big part of who I am today!
How it started
When I was just a kid, I was always trying to “fix” family members’ eyeshadow or eyebrows. I was always doing makeup, just for fun. As I got older, I started to do some freelance work, as well as bridal makeup. Since one of my good friends was a model and singer, I did her makeup for many of her shoots, and she introduced me to others in her industry, where my creativity really started to bloom.
The Beginning of My Career in Cosmetics
Once I started working retail, I knew I wanted to work in cosmetics. After working at Banana Republic, I moved over to Nordstrom at Paula Dorf Cosmetics. That brand was so special because the philosophy was that anyone could become her own makeup artist, and it was up to me to give women lessons! I was promoted to regional makeup artist for the brand. When they left Nordstrom, I slid on over to Lancome as an account coordinator, then moved over to La Mer and Jo Malone London, where I was promoted to account executive.
Although I still worked in the cosmetic industry, I never lost my love for makeup. I continued to work with my friend Tash Haynes, who is a photographer and content creator.
I Will Always Love Teaching
I’ve always felt a huge boost whenever I could help a person feel more beautiful, and even better, teach her how to do it herself. That’s why to this day, I still love teaching and providing easy tips and tricks.
Teaching an old dog new tricks
I have to admit I had become a little stuck in my ways as far as technique, until I reminded myself that I can continue to learn and grow in this area. So for the last couple of months I have been watching lots of YouTube and TikTok tutorials and I have discovered some new tips that have worked really well for me!
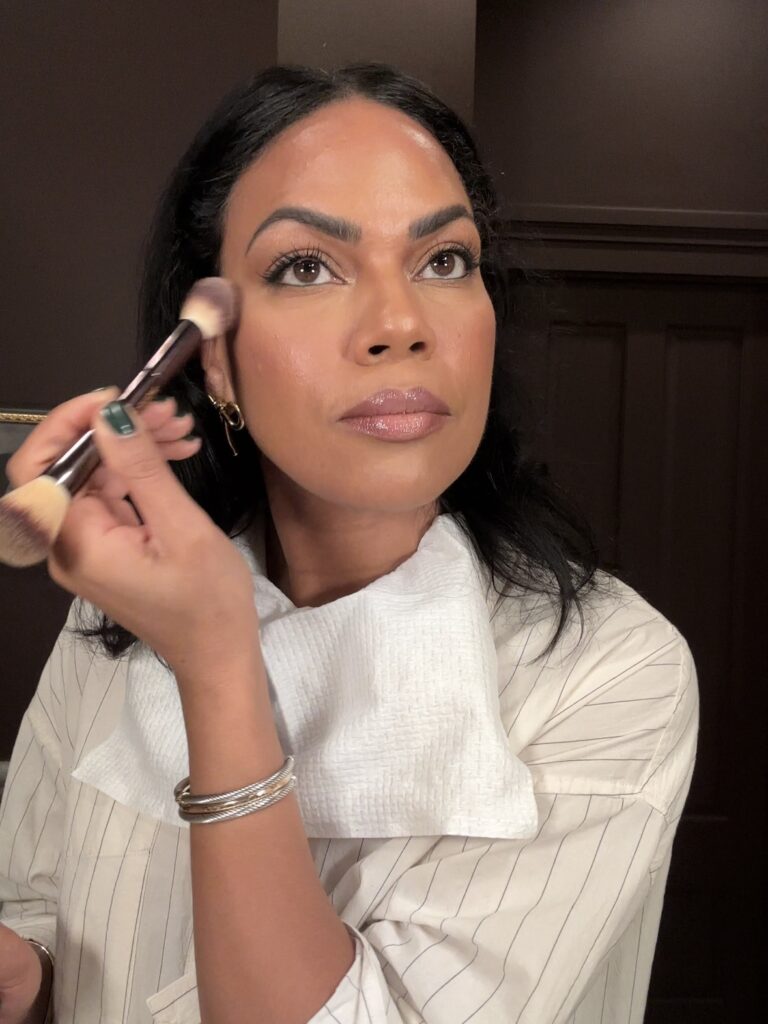
Here’s a video of the entire process that I have been doing lately. It leaves the makeup looking flawless (in real life, not just on camera!) and it stays looking that way all day long. AND it doesn’t look cakey on mature skin and eyes.
@annamaegroves Heres a full face of long wearing makeup that looks good in person, up close. This makeup never looks cakey, looks good on camera and compliments mature skin. Everything is saved on the bIog and Itk 🙂 #makeuptutorial #over40makeup #over40makeuptips
♬ original sound – annamaegroves
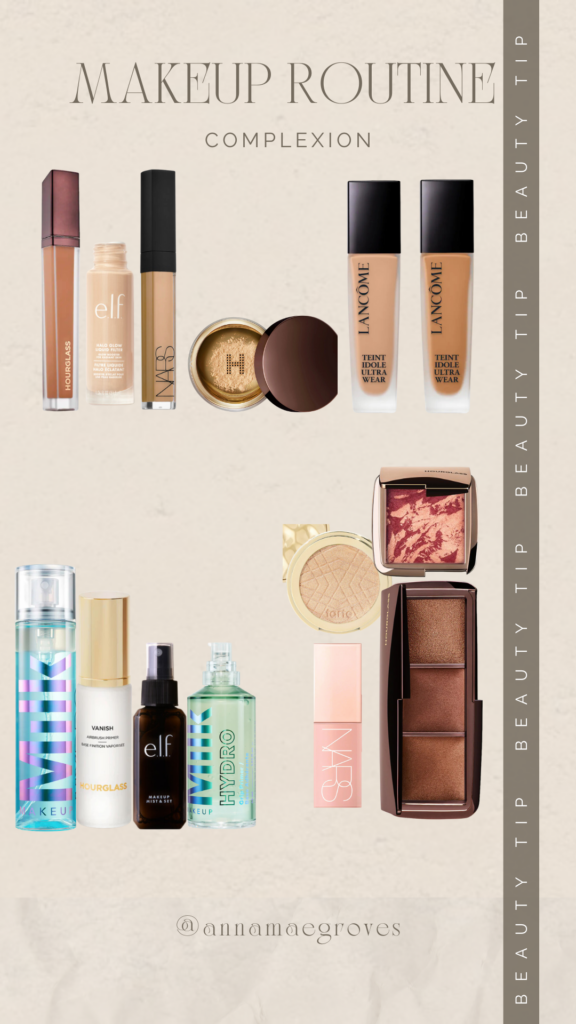
Complexion
To make everything last AND look good up close, you must hydrate your skin. I used my regular morning routine which is very moisturizing and protects my skin.
Then you must prime and set!
Setting my concealer with powder and a beauty blender has been a game changer. Make sure you bounce your concealer one last time right before setting, and really mill the powder into the beauty blender so it applies evenly. Using a good setting spray melts it all together while adding a long lasting effect! Make sure you let it dry fully.


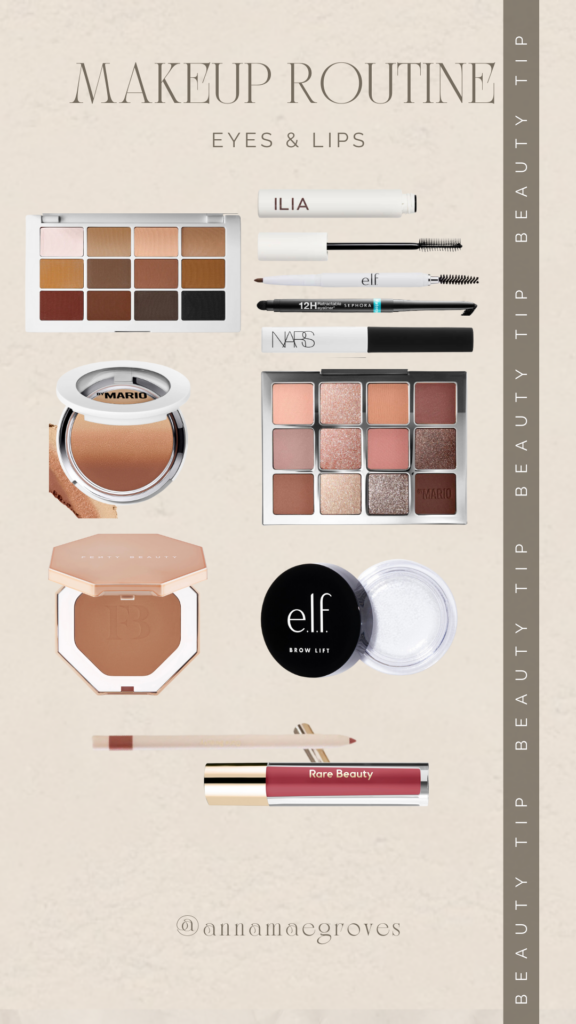
Eyes & Lips
For the eyes, if you really want your eyeliner and mascara to last without running, and your eyeshadow to stay crease free, use a primer. I love the NARS eyeshadow primer. I use the clear one and a big tip is to bring it down along the bottom lash line. That way your eyeshadow has something to stick to and it keeps oils that melt your liner at bay.
Lately I like using a bronzer as my eyeshadow, but you can use any soft brown to achieve this look. I like to create a natural shadow at the lash line using the bronzer there as well. And I take it from the crease down the sides of the nose using the crease brush for a soft contour.
Take the time to highlight under the brow with a matte, light neutral color for a crisp look, and highlight in the corner with a shimmer. It’s so pretty! I also used black on the outer upper lash for definition.
For eyeliner, if you really want your eyes to pop, use a liner in the upper lash line. I also rimmed my waterline, but that is a personal preference. If you have smallish eyes, it can make them appear smaller, so feel free to just stick with the bronze on the bottom lash line.
I finished the look with lips and a way to make the lips appear fuller without overlining the entire lip. I only overline the bottom of the lip, then line right on the lipline on the top. I made a little circle (you can see in the video) on the top and bottom lip, and shaded in the sides. then I took a little concealer as a highlight in the center of the lip, blended, and added gloss to the top.


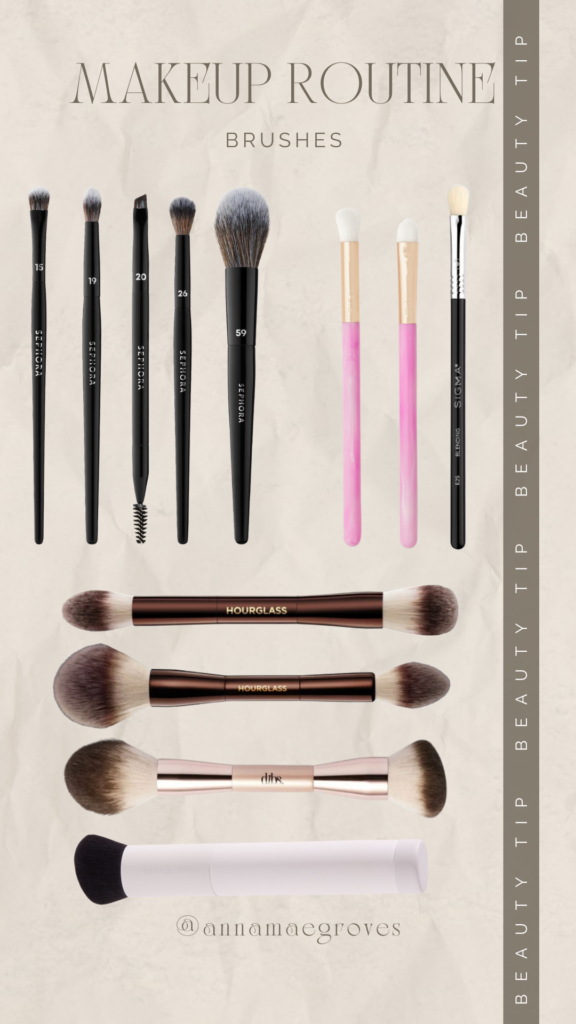
Brushes
Good brushes make all the difference and I have collected many over the years. E.l.f., Sephora Pro and Hourglass are all fantastic. I also have a few great brushes from tarte and sigma. Remember, I have been doing makeup for a long long time and as a content creator, I have a lot of brushes… you don’t need that many. Just a good foundation brush, beauty blender, a couple of fluffy brushes for bronzer and blush, and a few eye shadow brushes such as a crease, a small shadow brush, and a medium shadow brush.
You can get everything you need in a set most of the time! As time goes on and you gain more skills, you may want to add more specific brushes to your collection!


Thanks for being here and be sure to follow me on Instagram, TikTok and LTK so you never miss a thing!
Share:
Categories:
A vessel sharing positivity through beauty, wellness, and personal style.
Website Design & Development by Garland Studios
Copyright © 2023 Anna Mae Groves